Microwavin Manoa
Table of contents
Overview
Many college students have limited kitchen resources, limited cooking skills, limited time, limited access to grocery stores, and no access to creative recipes that respect these constraints. As a result, college students spend money to eat out, or eat non-healthy foods at fast food places or through vending machines.
Microwavin Manoa creates a way for students (on-campus or off) to learn and share recipes that:
- Can be made using minimal kitchen facilities (at a minimum, a toaster oven, or a microwave!).
- Can be made out of ingredients that are available within walking distance of UH.
- Suit local taste sensibilities.
- Can be filtered via dietary restrictions (gluten-free, vegan, etc).
- Have an estimated cost per serving.
- Has an estimated number of servings per recipe.
- Has an estimate of how long it takes to make.
Technologies we plan on using for “Microwavin Manoa”:
- Meteor for Javascript-based implementation of client and server code.
- React for component-based UI implementation and routing.
- Semantic UI React CSS Framework for UI design.
- Uniforms for React and Semantic UI-based form design and display.
Deployment
Microwavin’ Manoa website, deployed from Digital Ocean.
User Guide
A walkthrough for the Microwavin Manoa user interface.
Landing Page
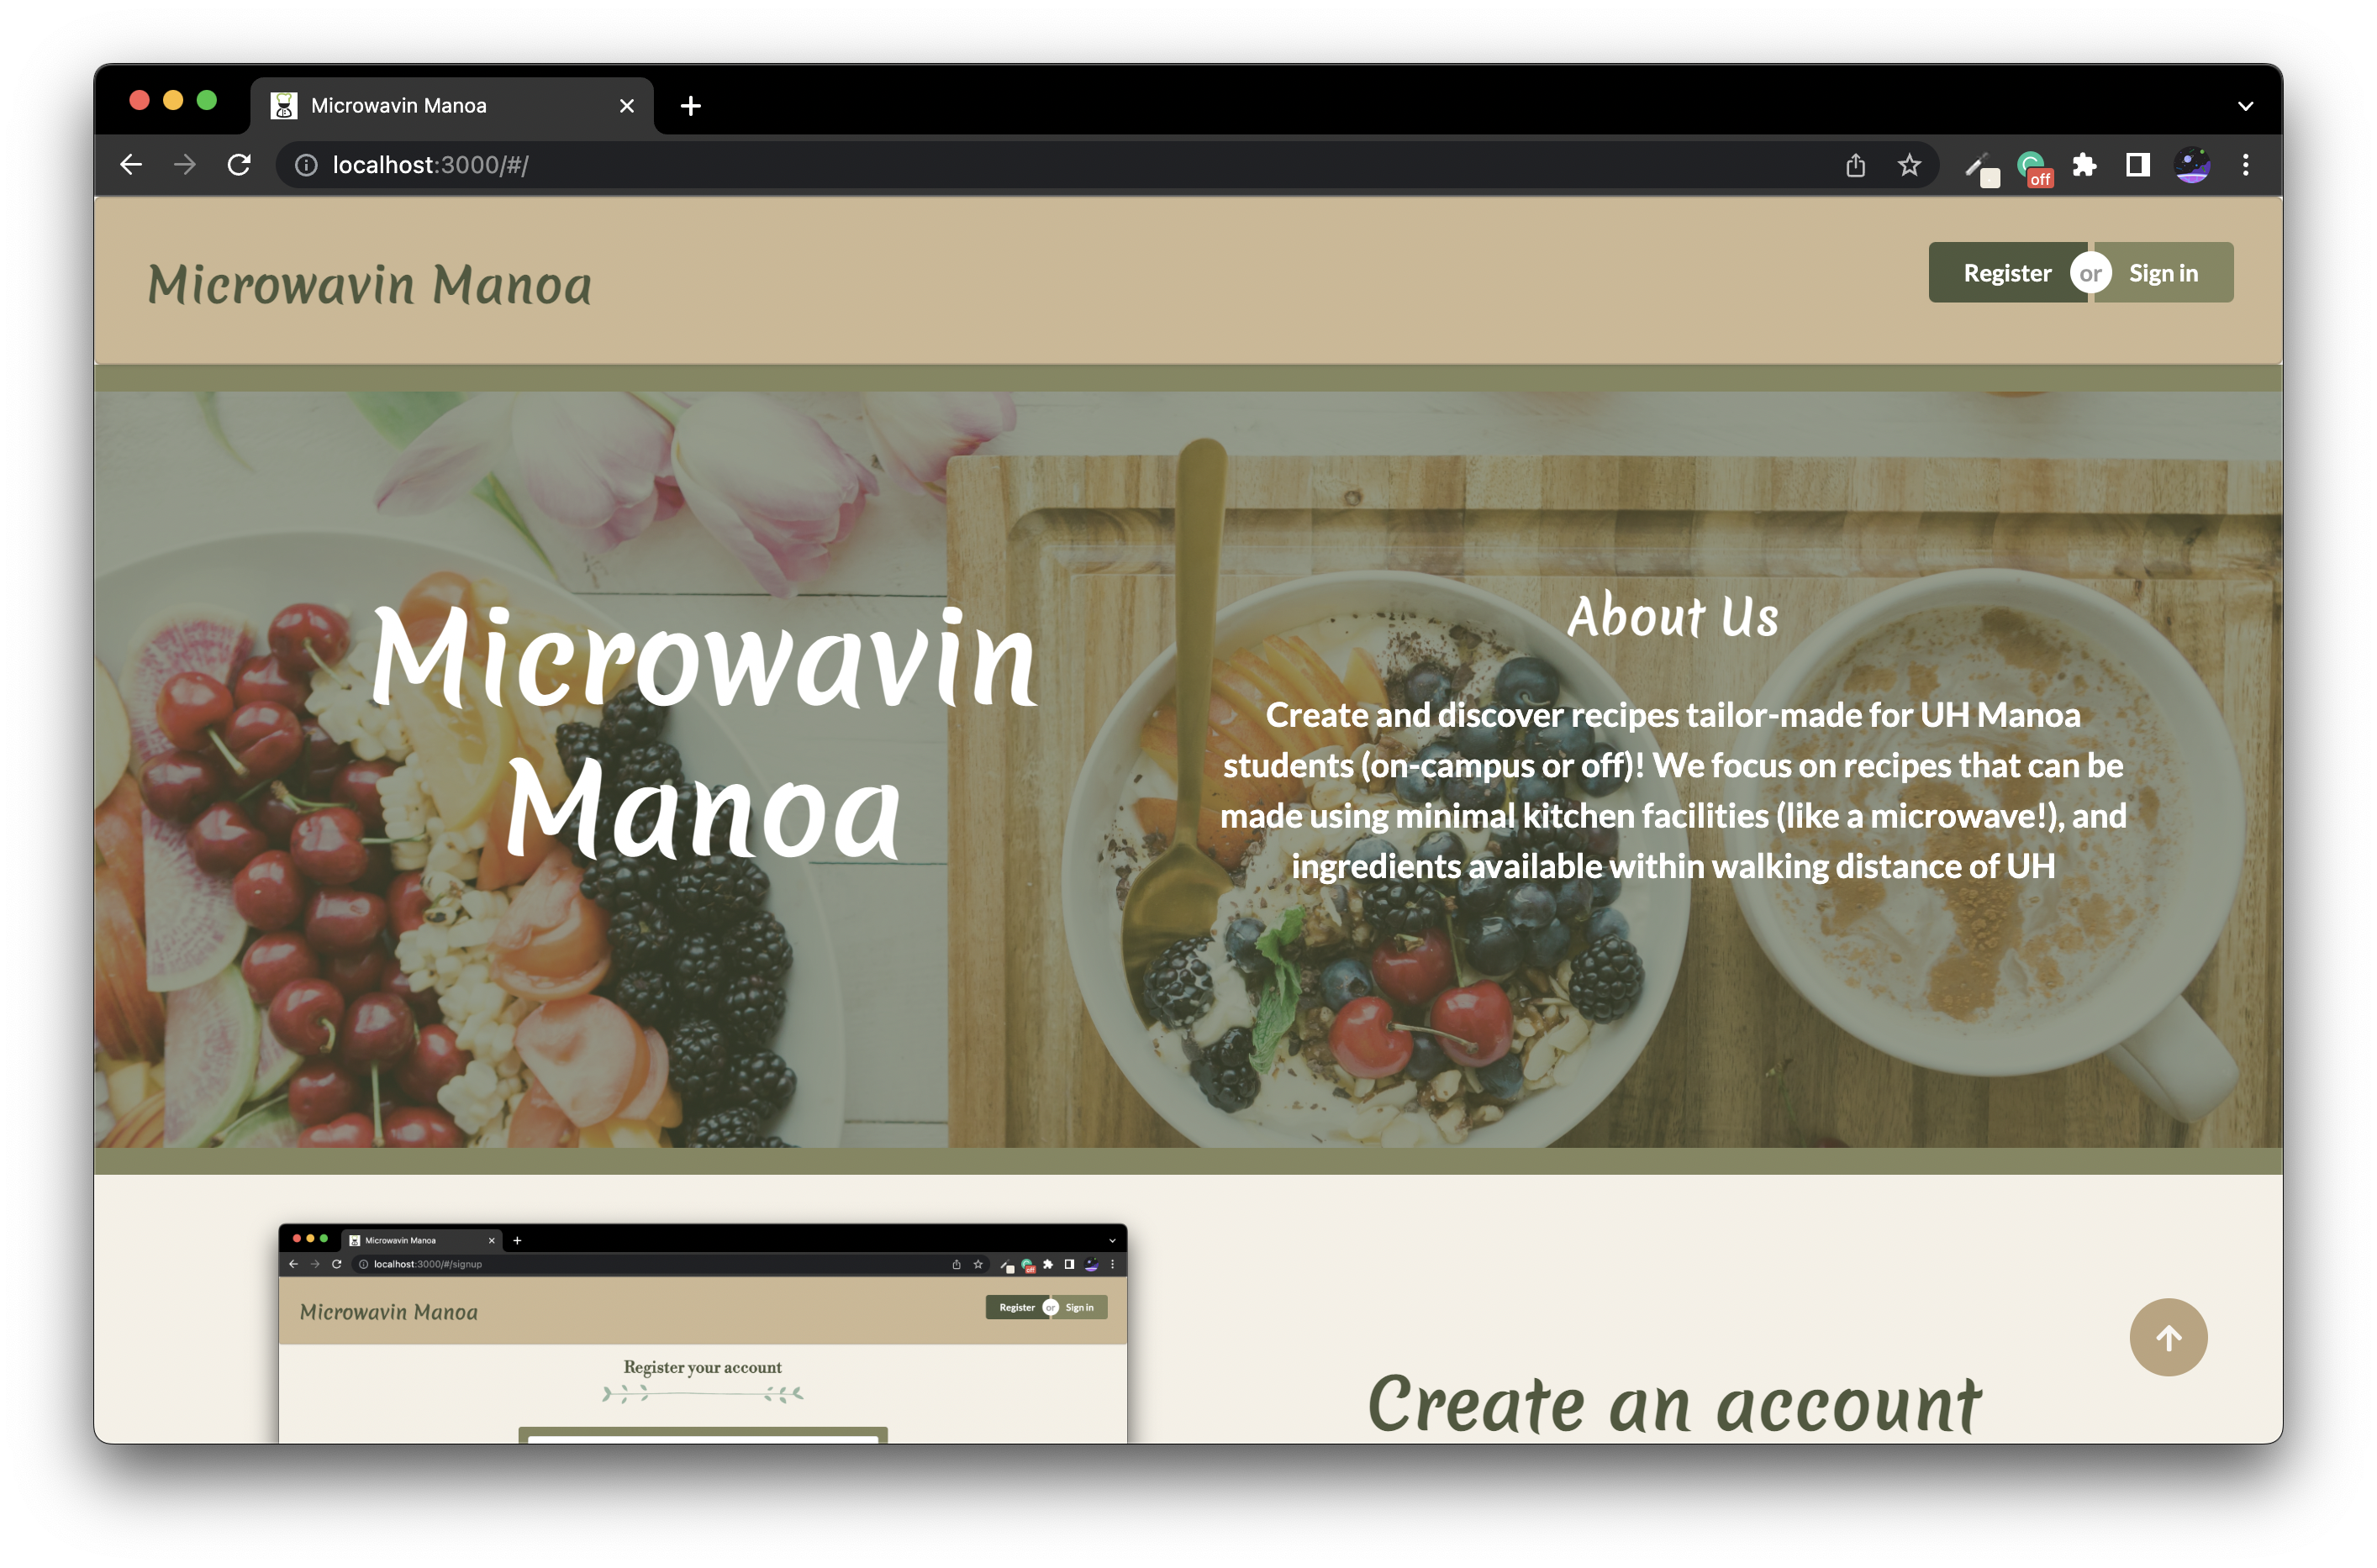
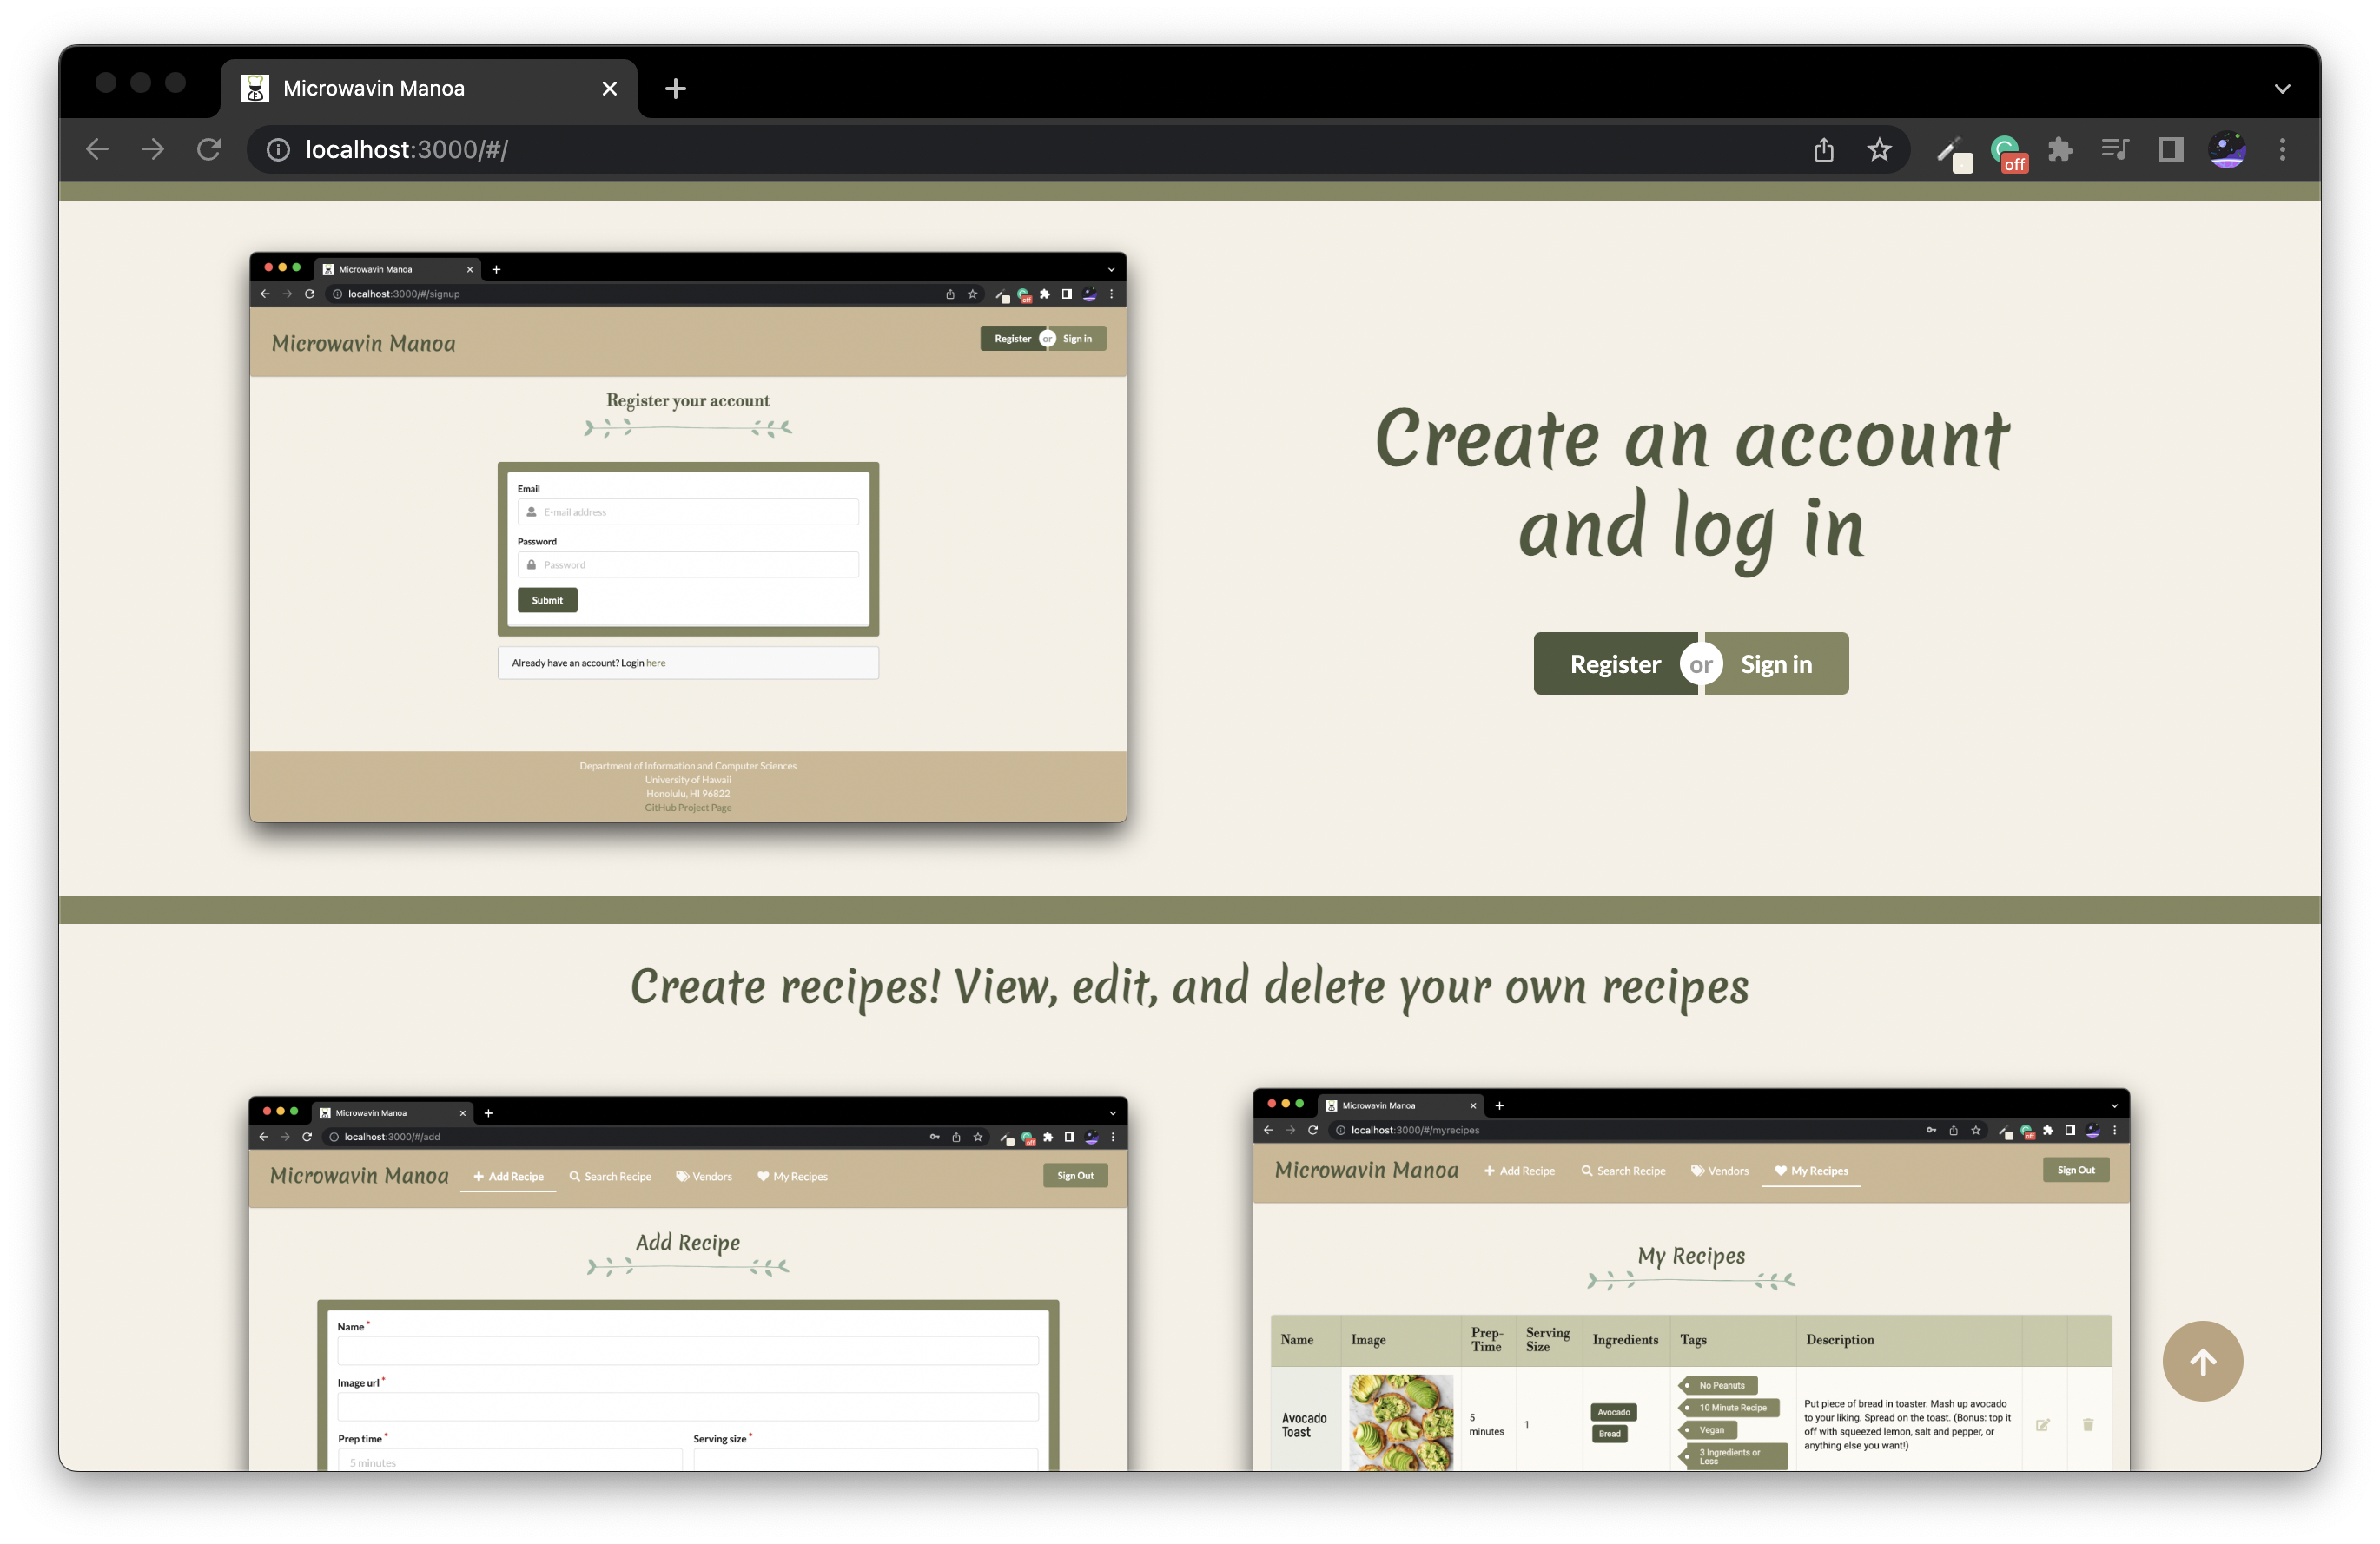
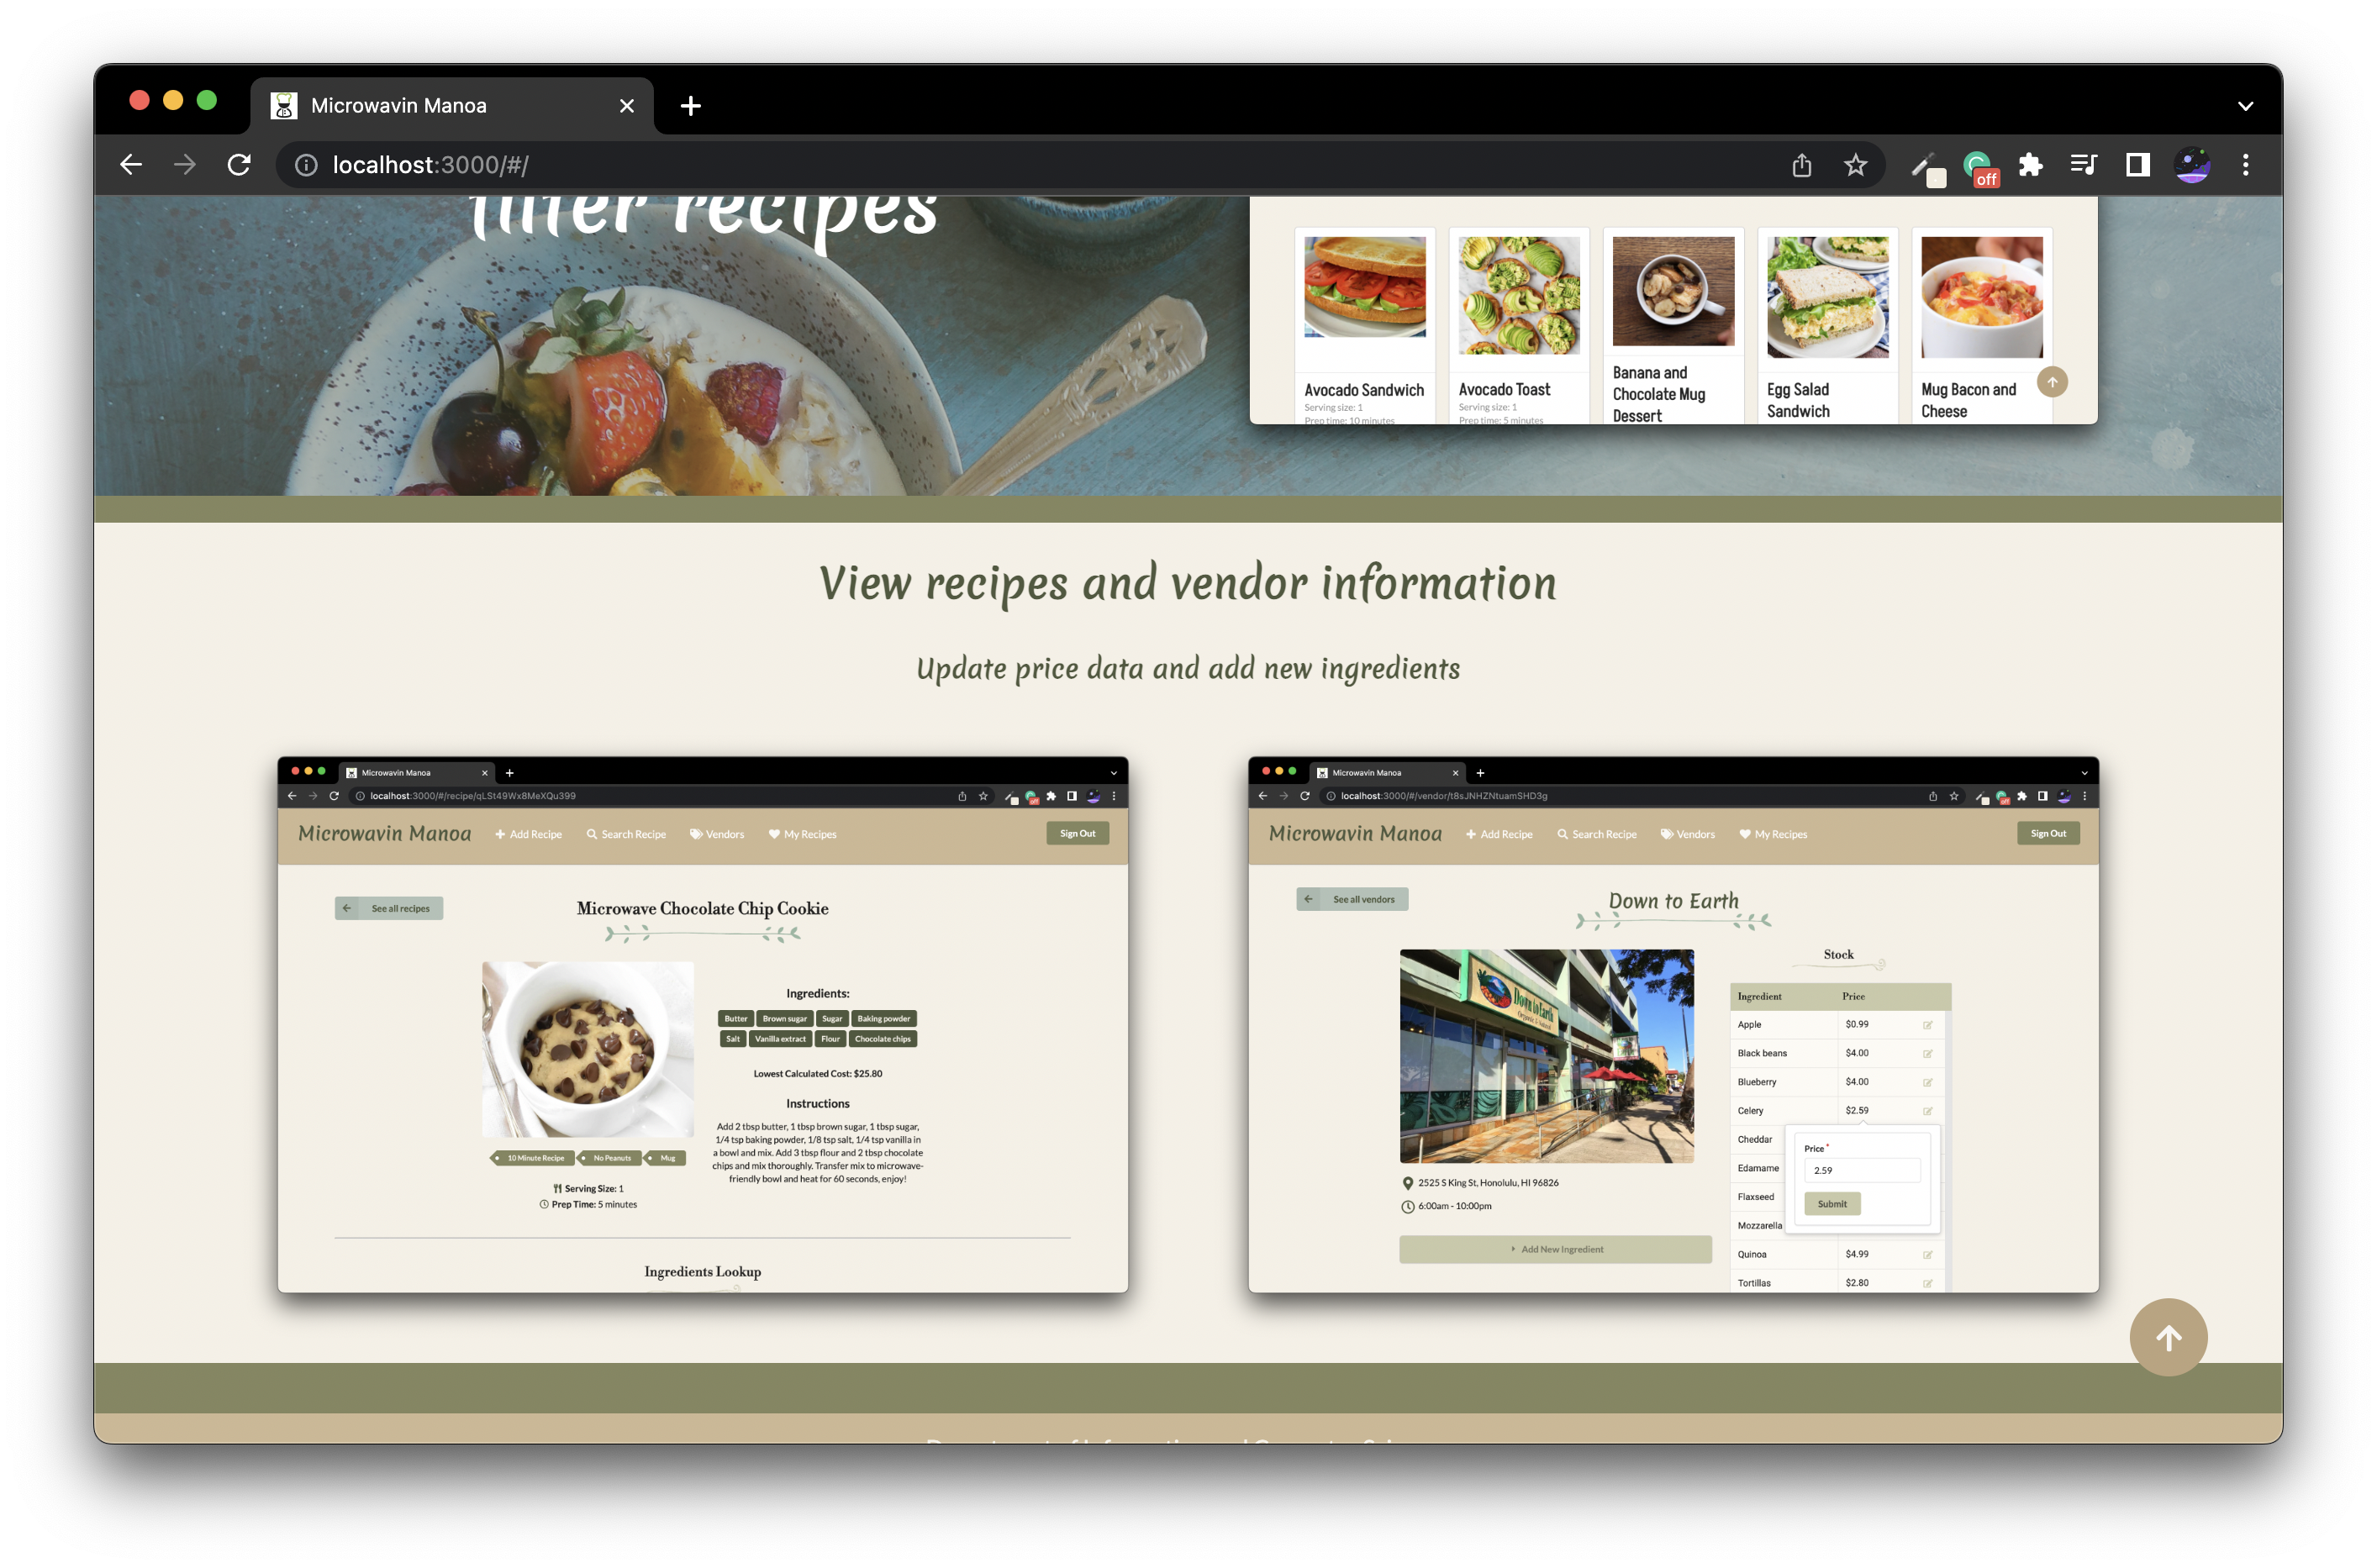
The landing page is the first page presented when users visit the URL. It gives users an overview of what can be done on the site, along with a section saying to create an account.
Signup and Signin Page
If you were previously registered, you are able to “Login” by clicking the button on the upper right button on the navbar. If not, you are able to make an account by clicking “Sign up”.


User Home Page
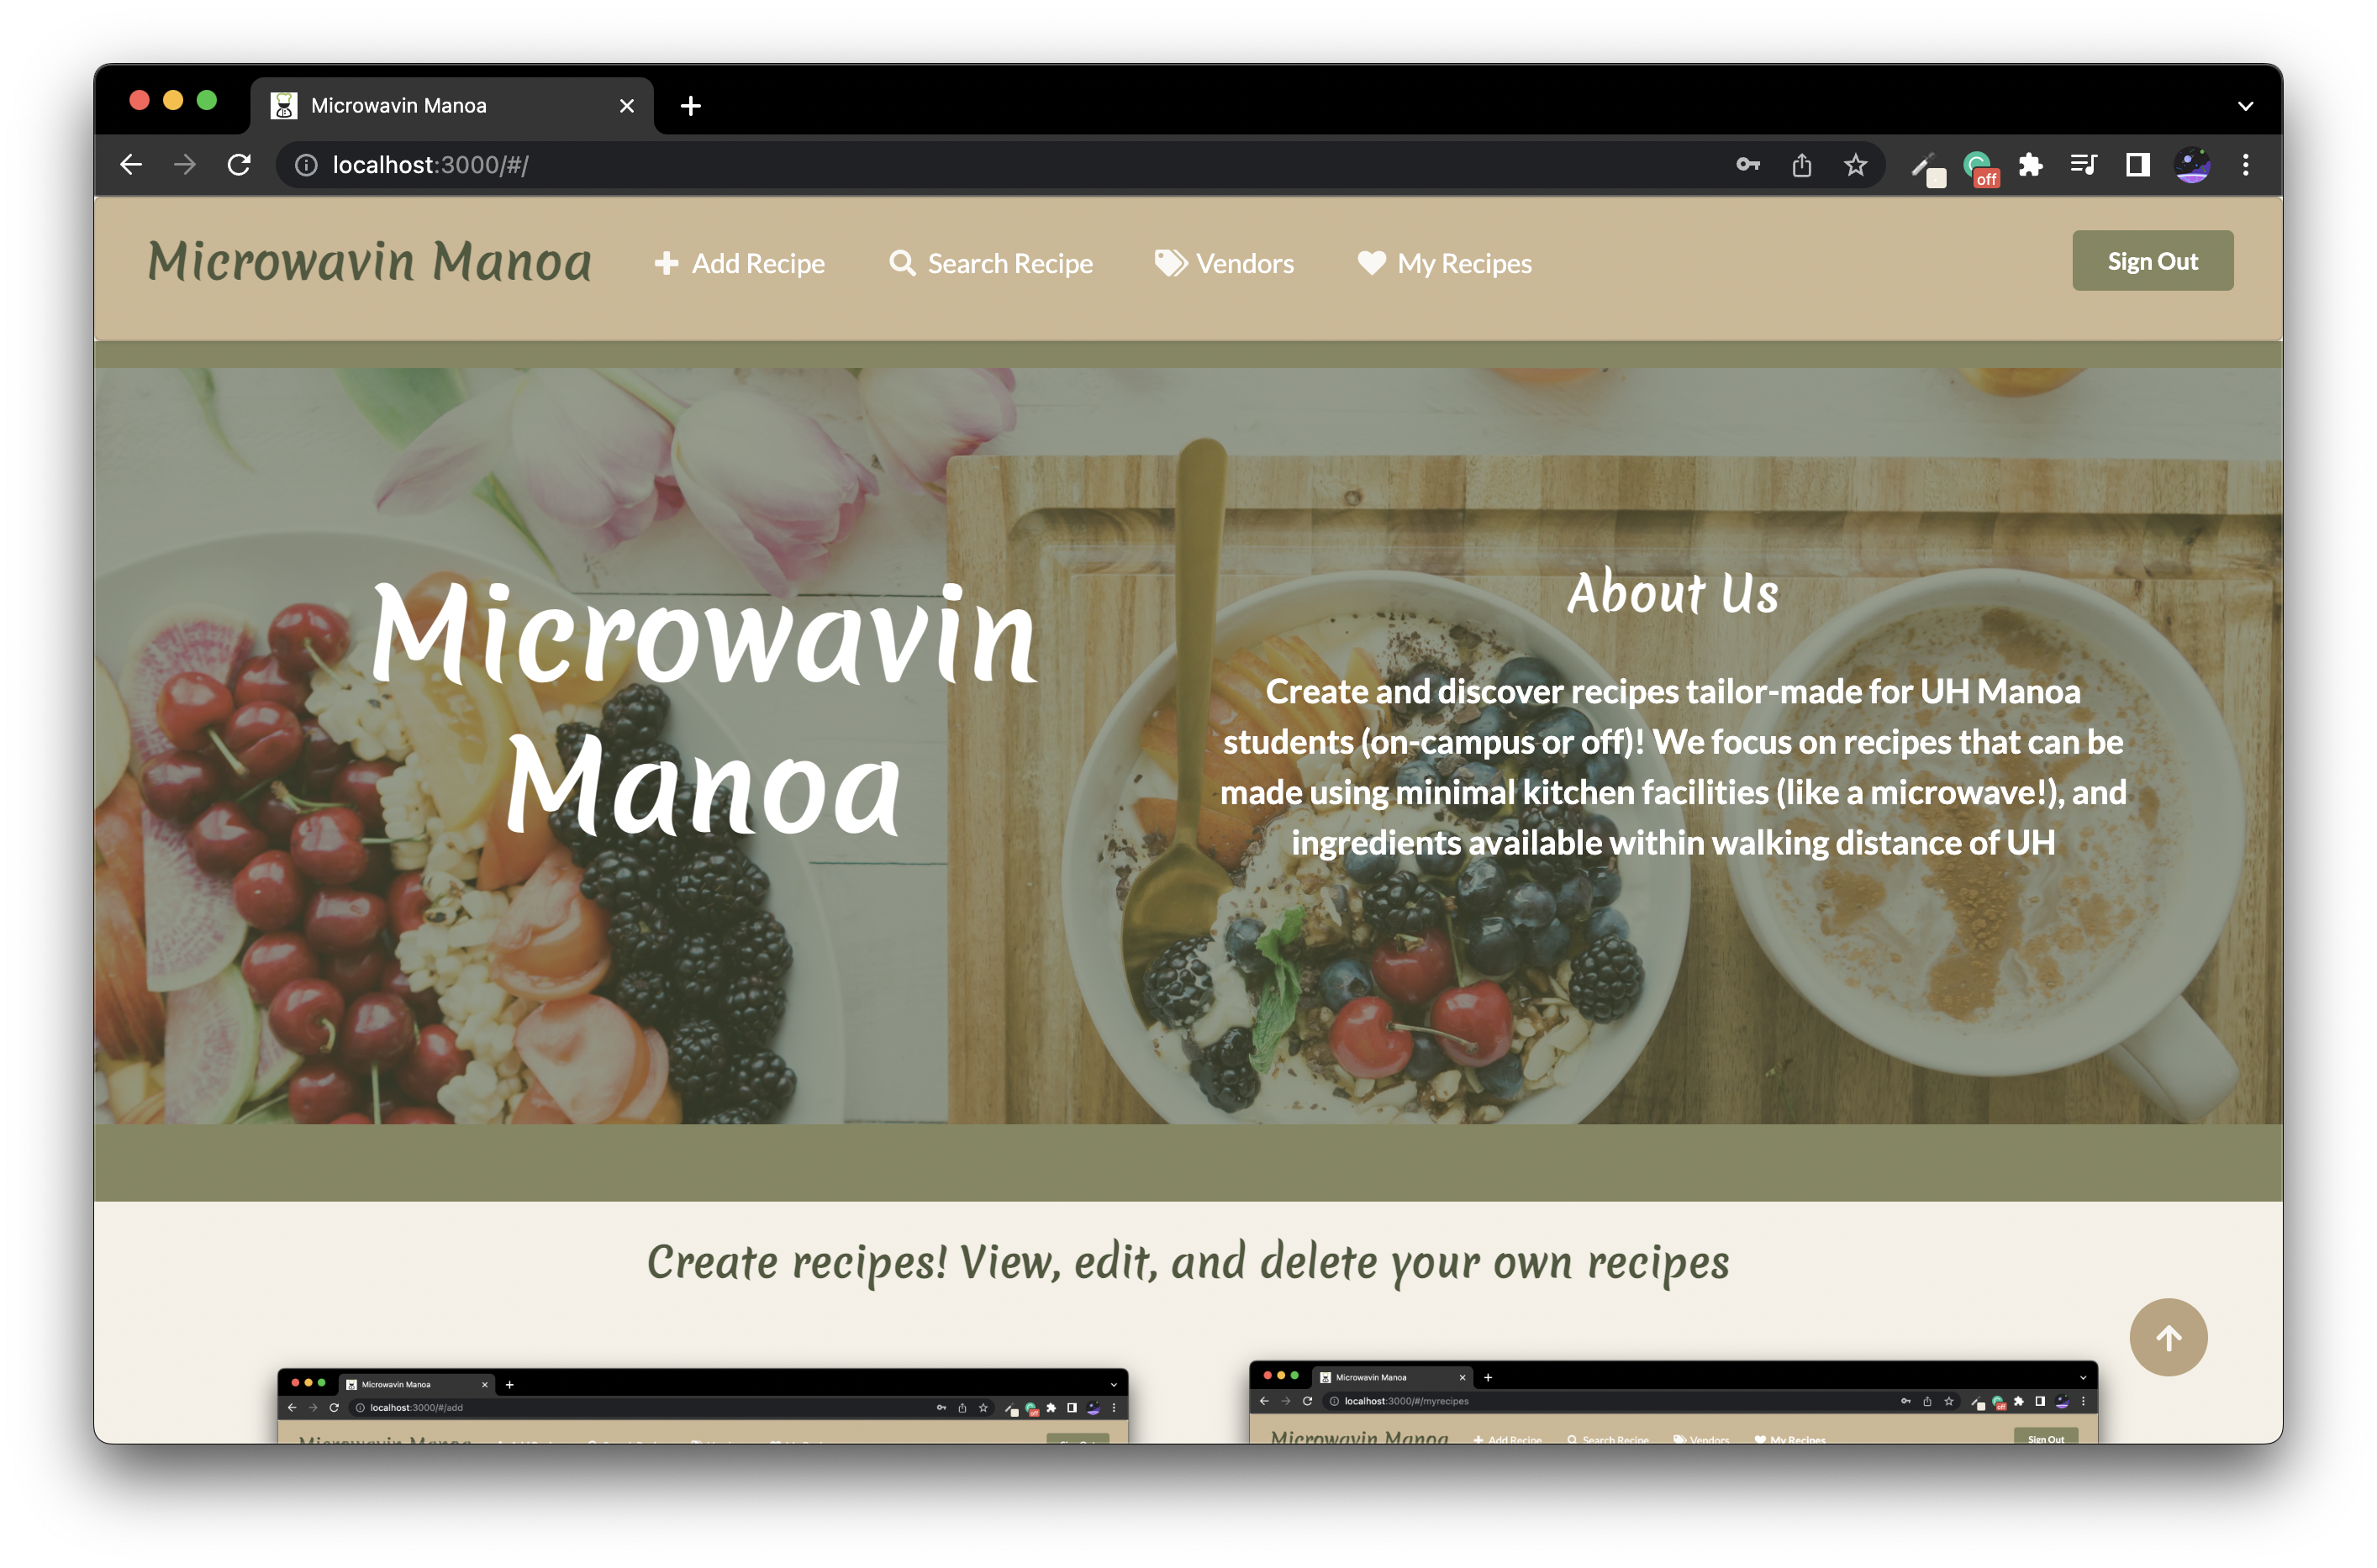
After successfully logging in as a User, the system takes you to user home page. It is like the landing page but without the section saying to create an account. The NavBar now contains links to add recipe, search recipe, all vendors, and my recipes.
Admin Home Page
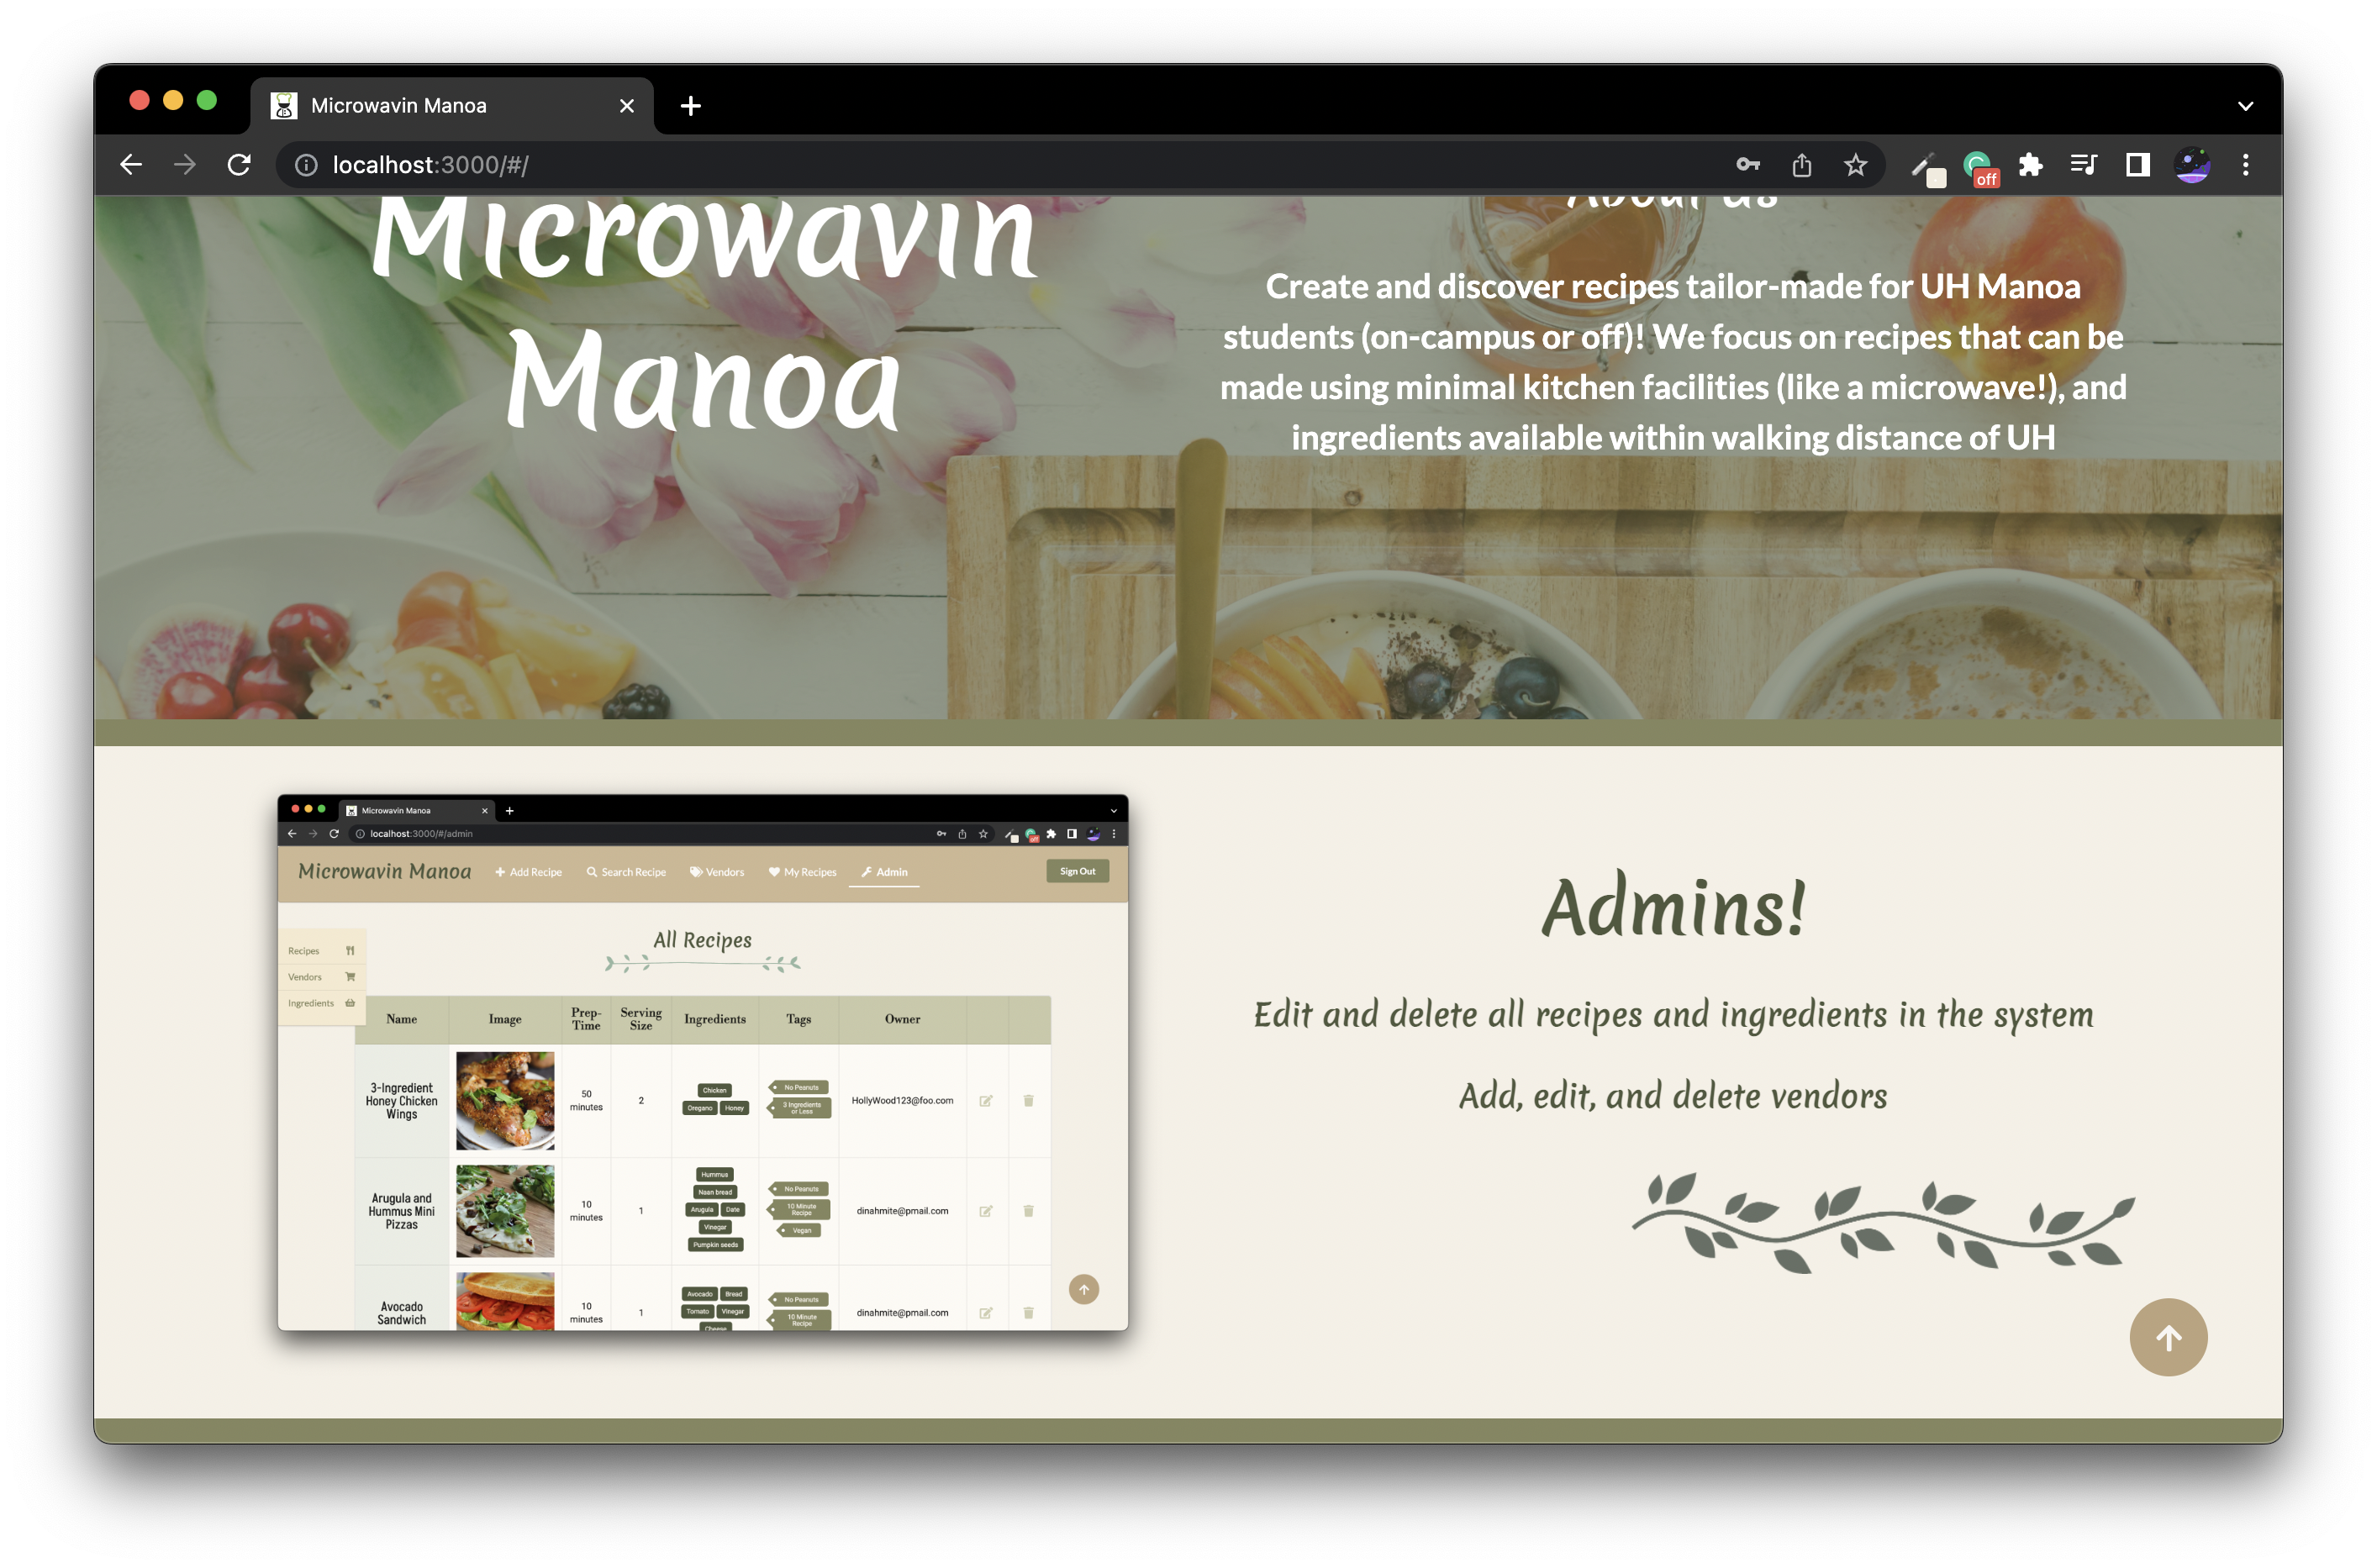
When a user has the admin role, they have an ‘Admin’ link in the NavBar that lets them view, edit, and delete all recipes for all users, along with the ability to add, edit, and delete all vendors and ingredients. There is a new image communicating this to admins.
Add Recipe Page
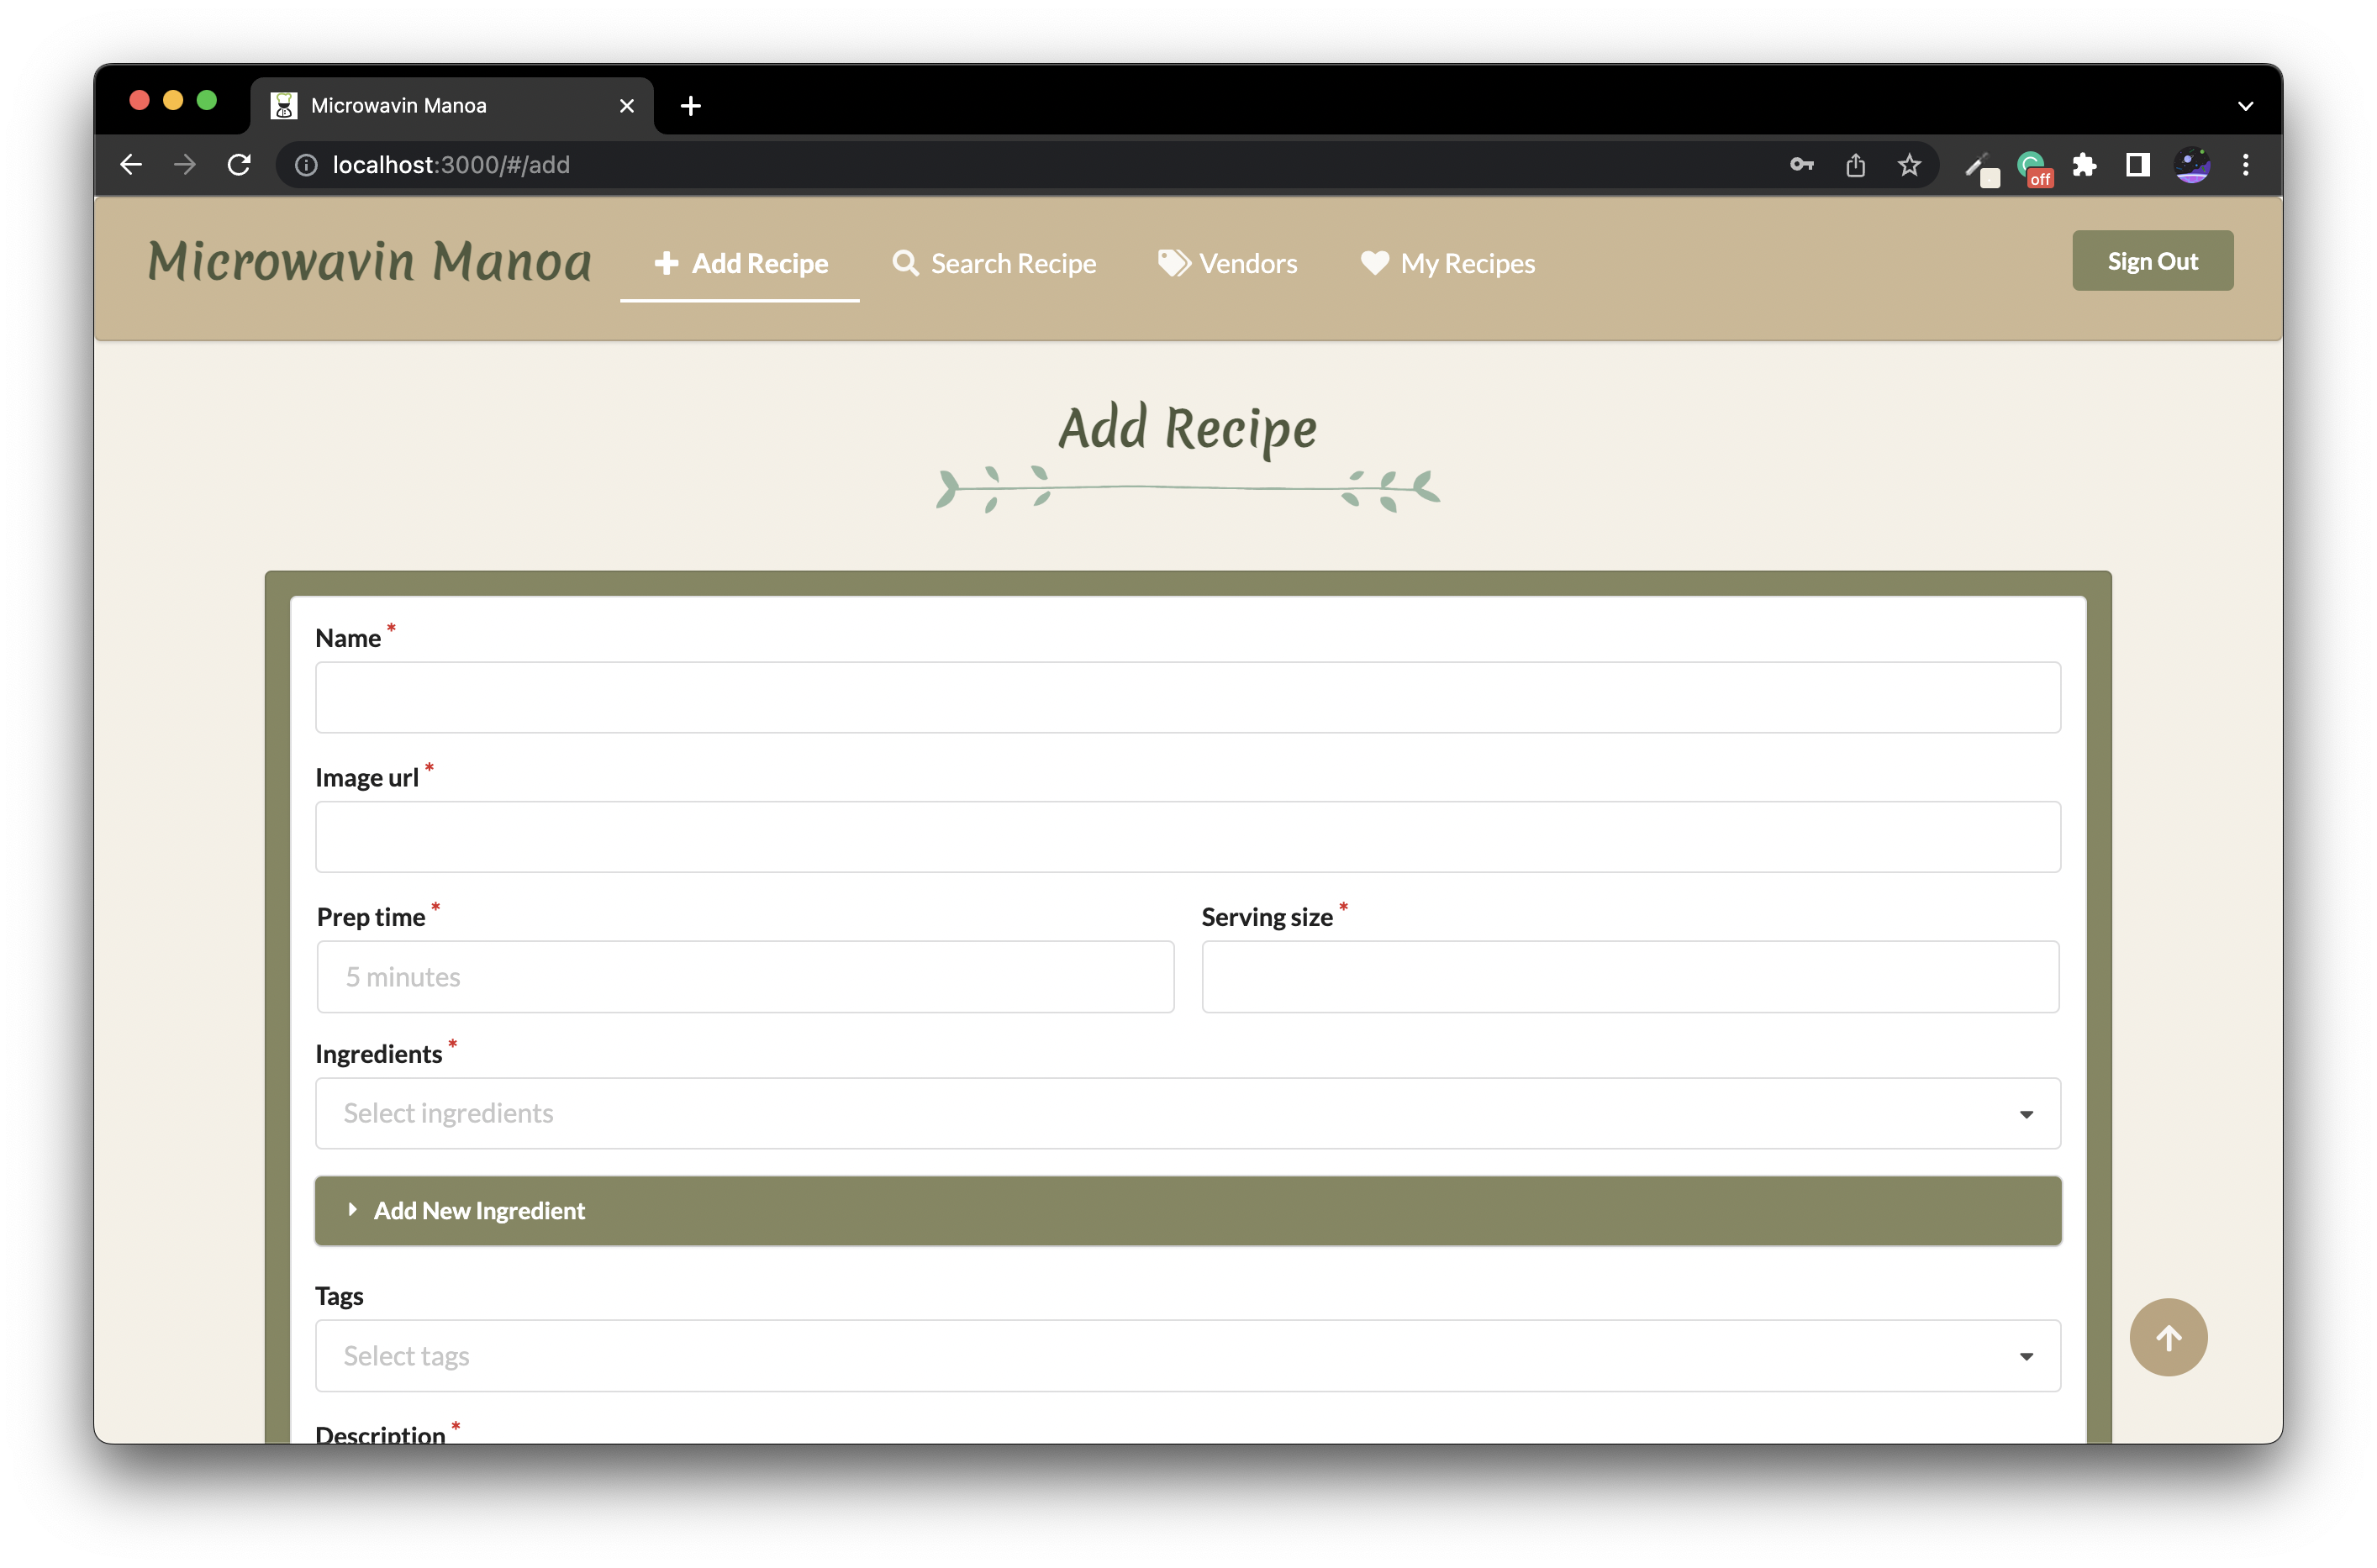
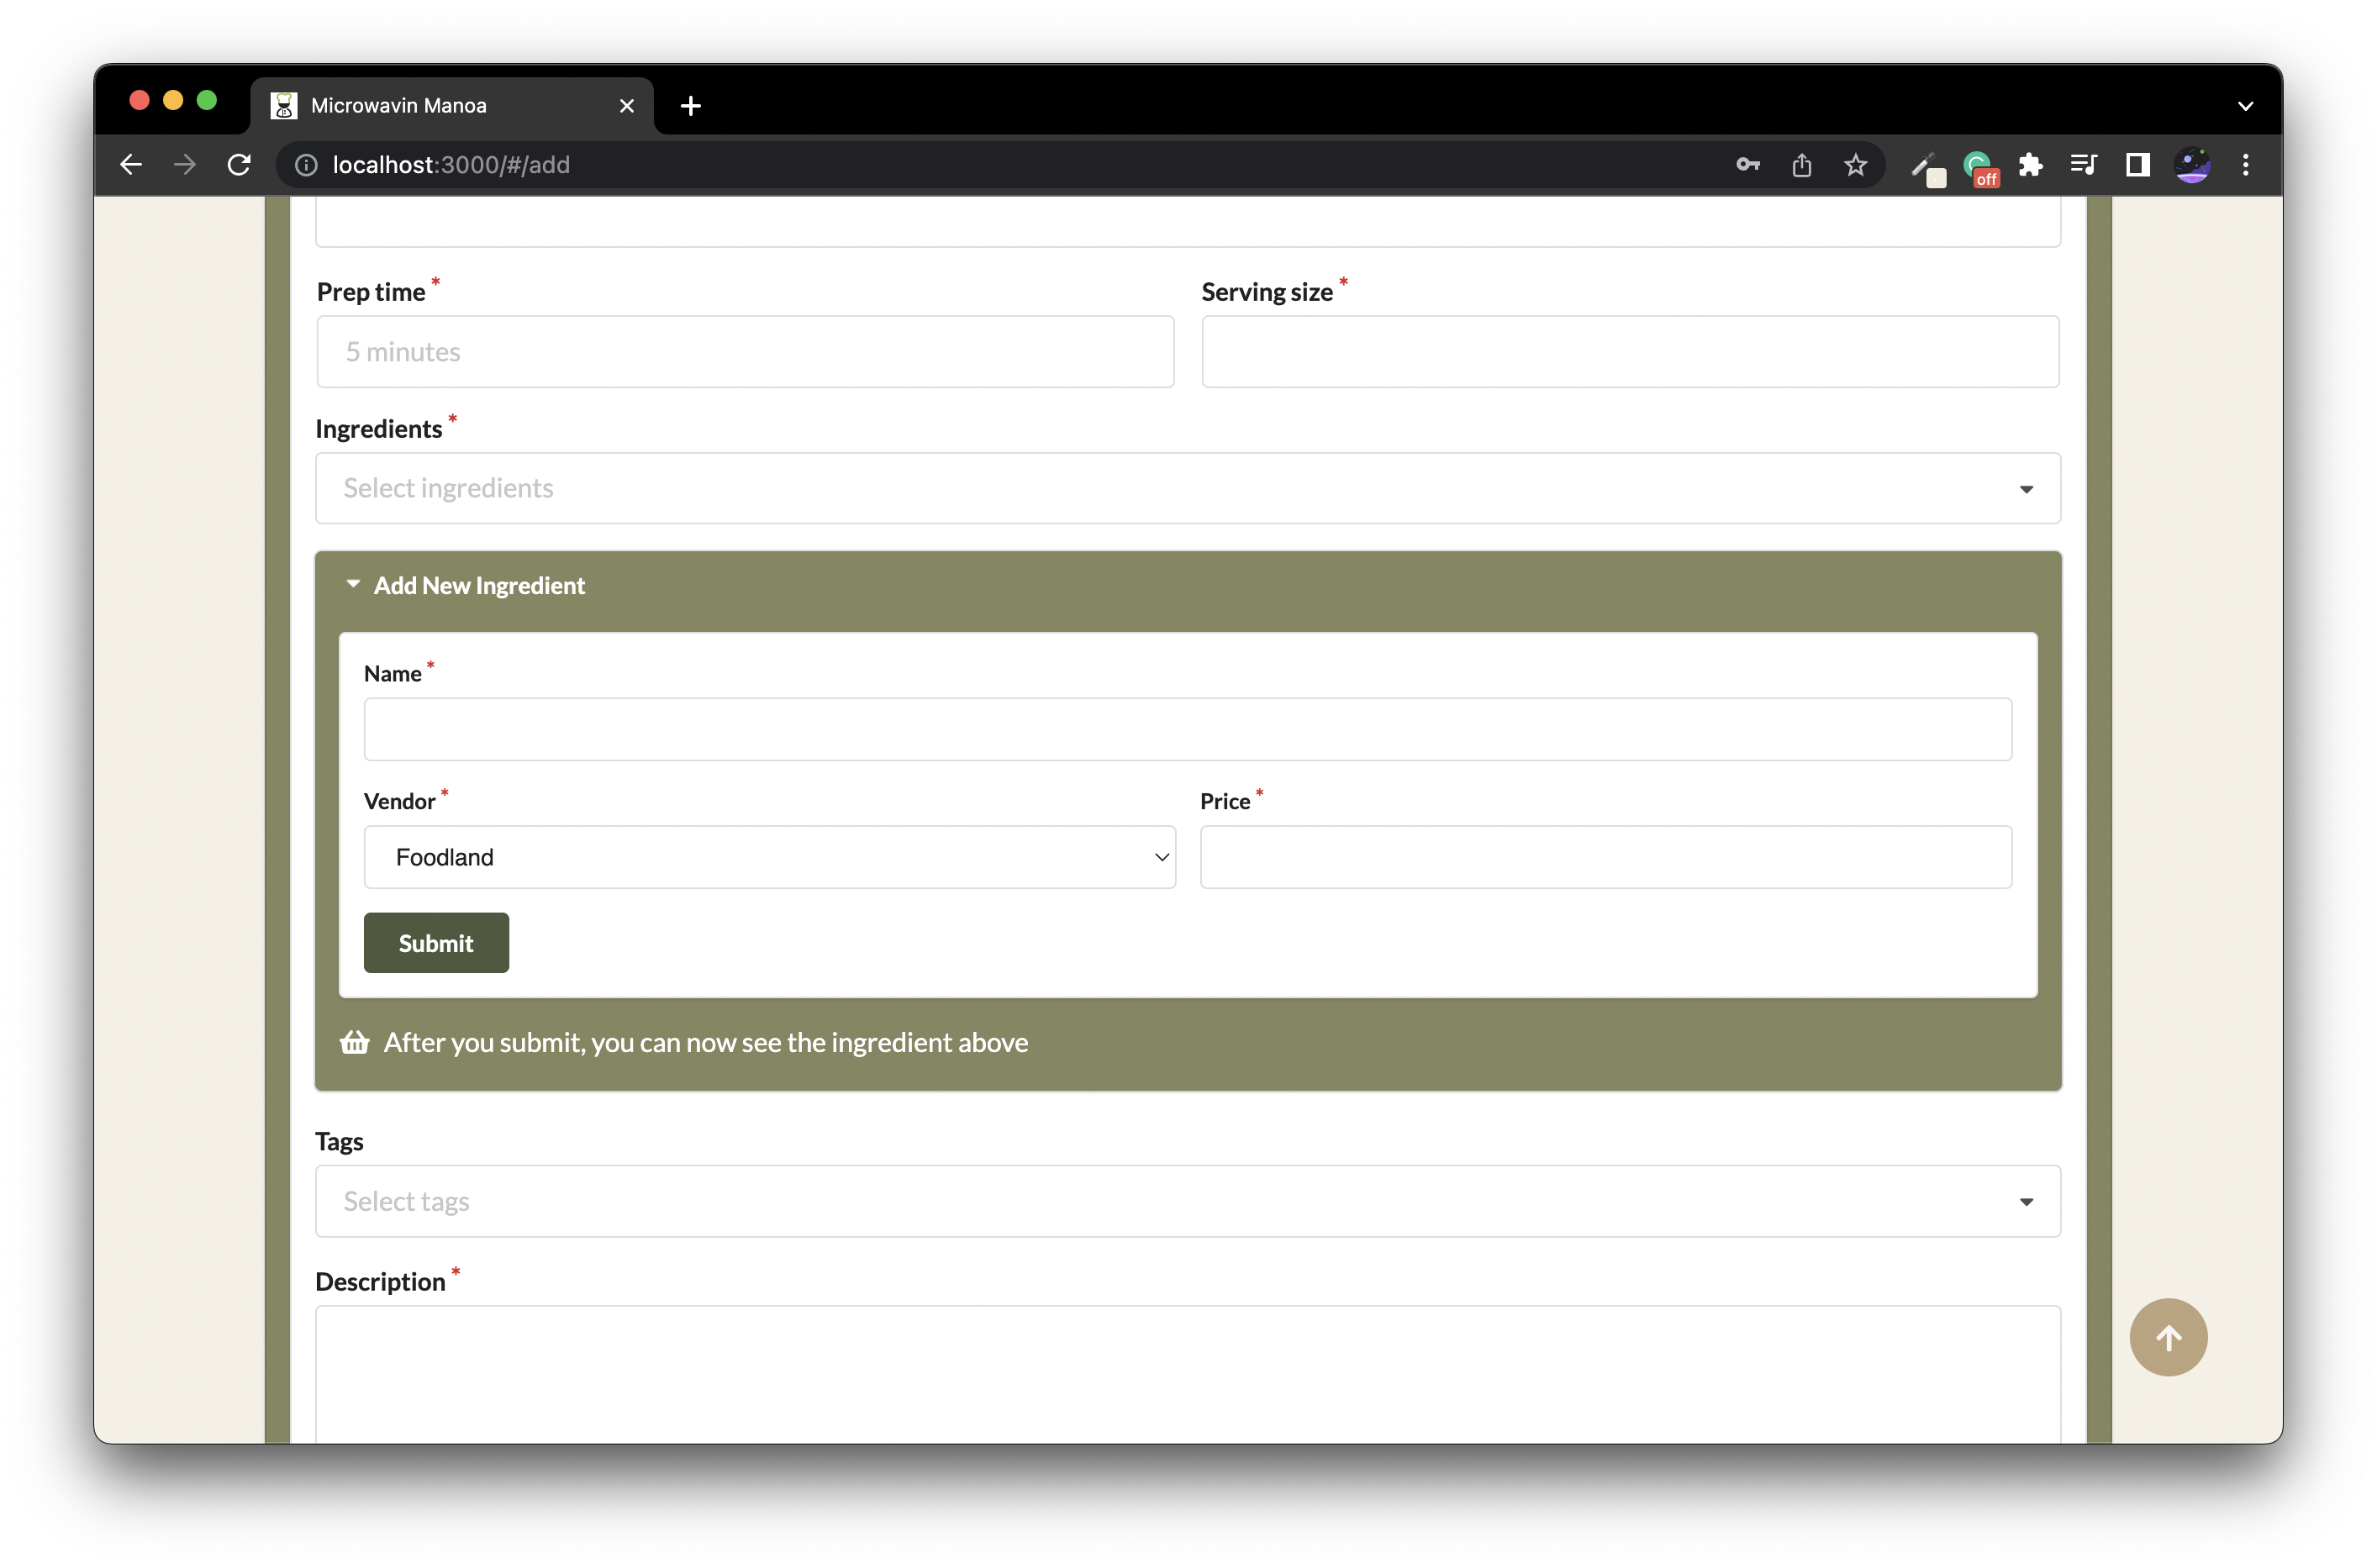
After logging in, Users and Admins are able to add recipes. If an ingredient that they want for the recipe is not already in the system, there is a popup to add an ingredient with a certain vendor and price. Now the ingredient will be available to select for the recipe’s ingredients.
Search Recipe Page
On this page, Users or Admins can see all recipes in the system (alphabetized for easier lookup). Recipes can also be filtered by their respective tags and ingredients. There is also a button to see a random recipe.

Individual Recipe Page
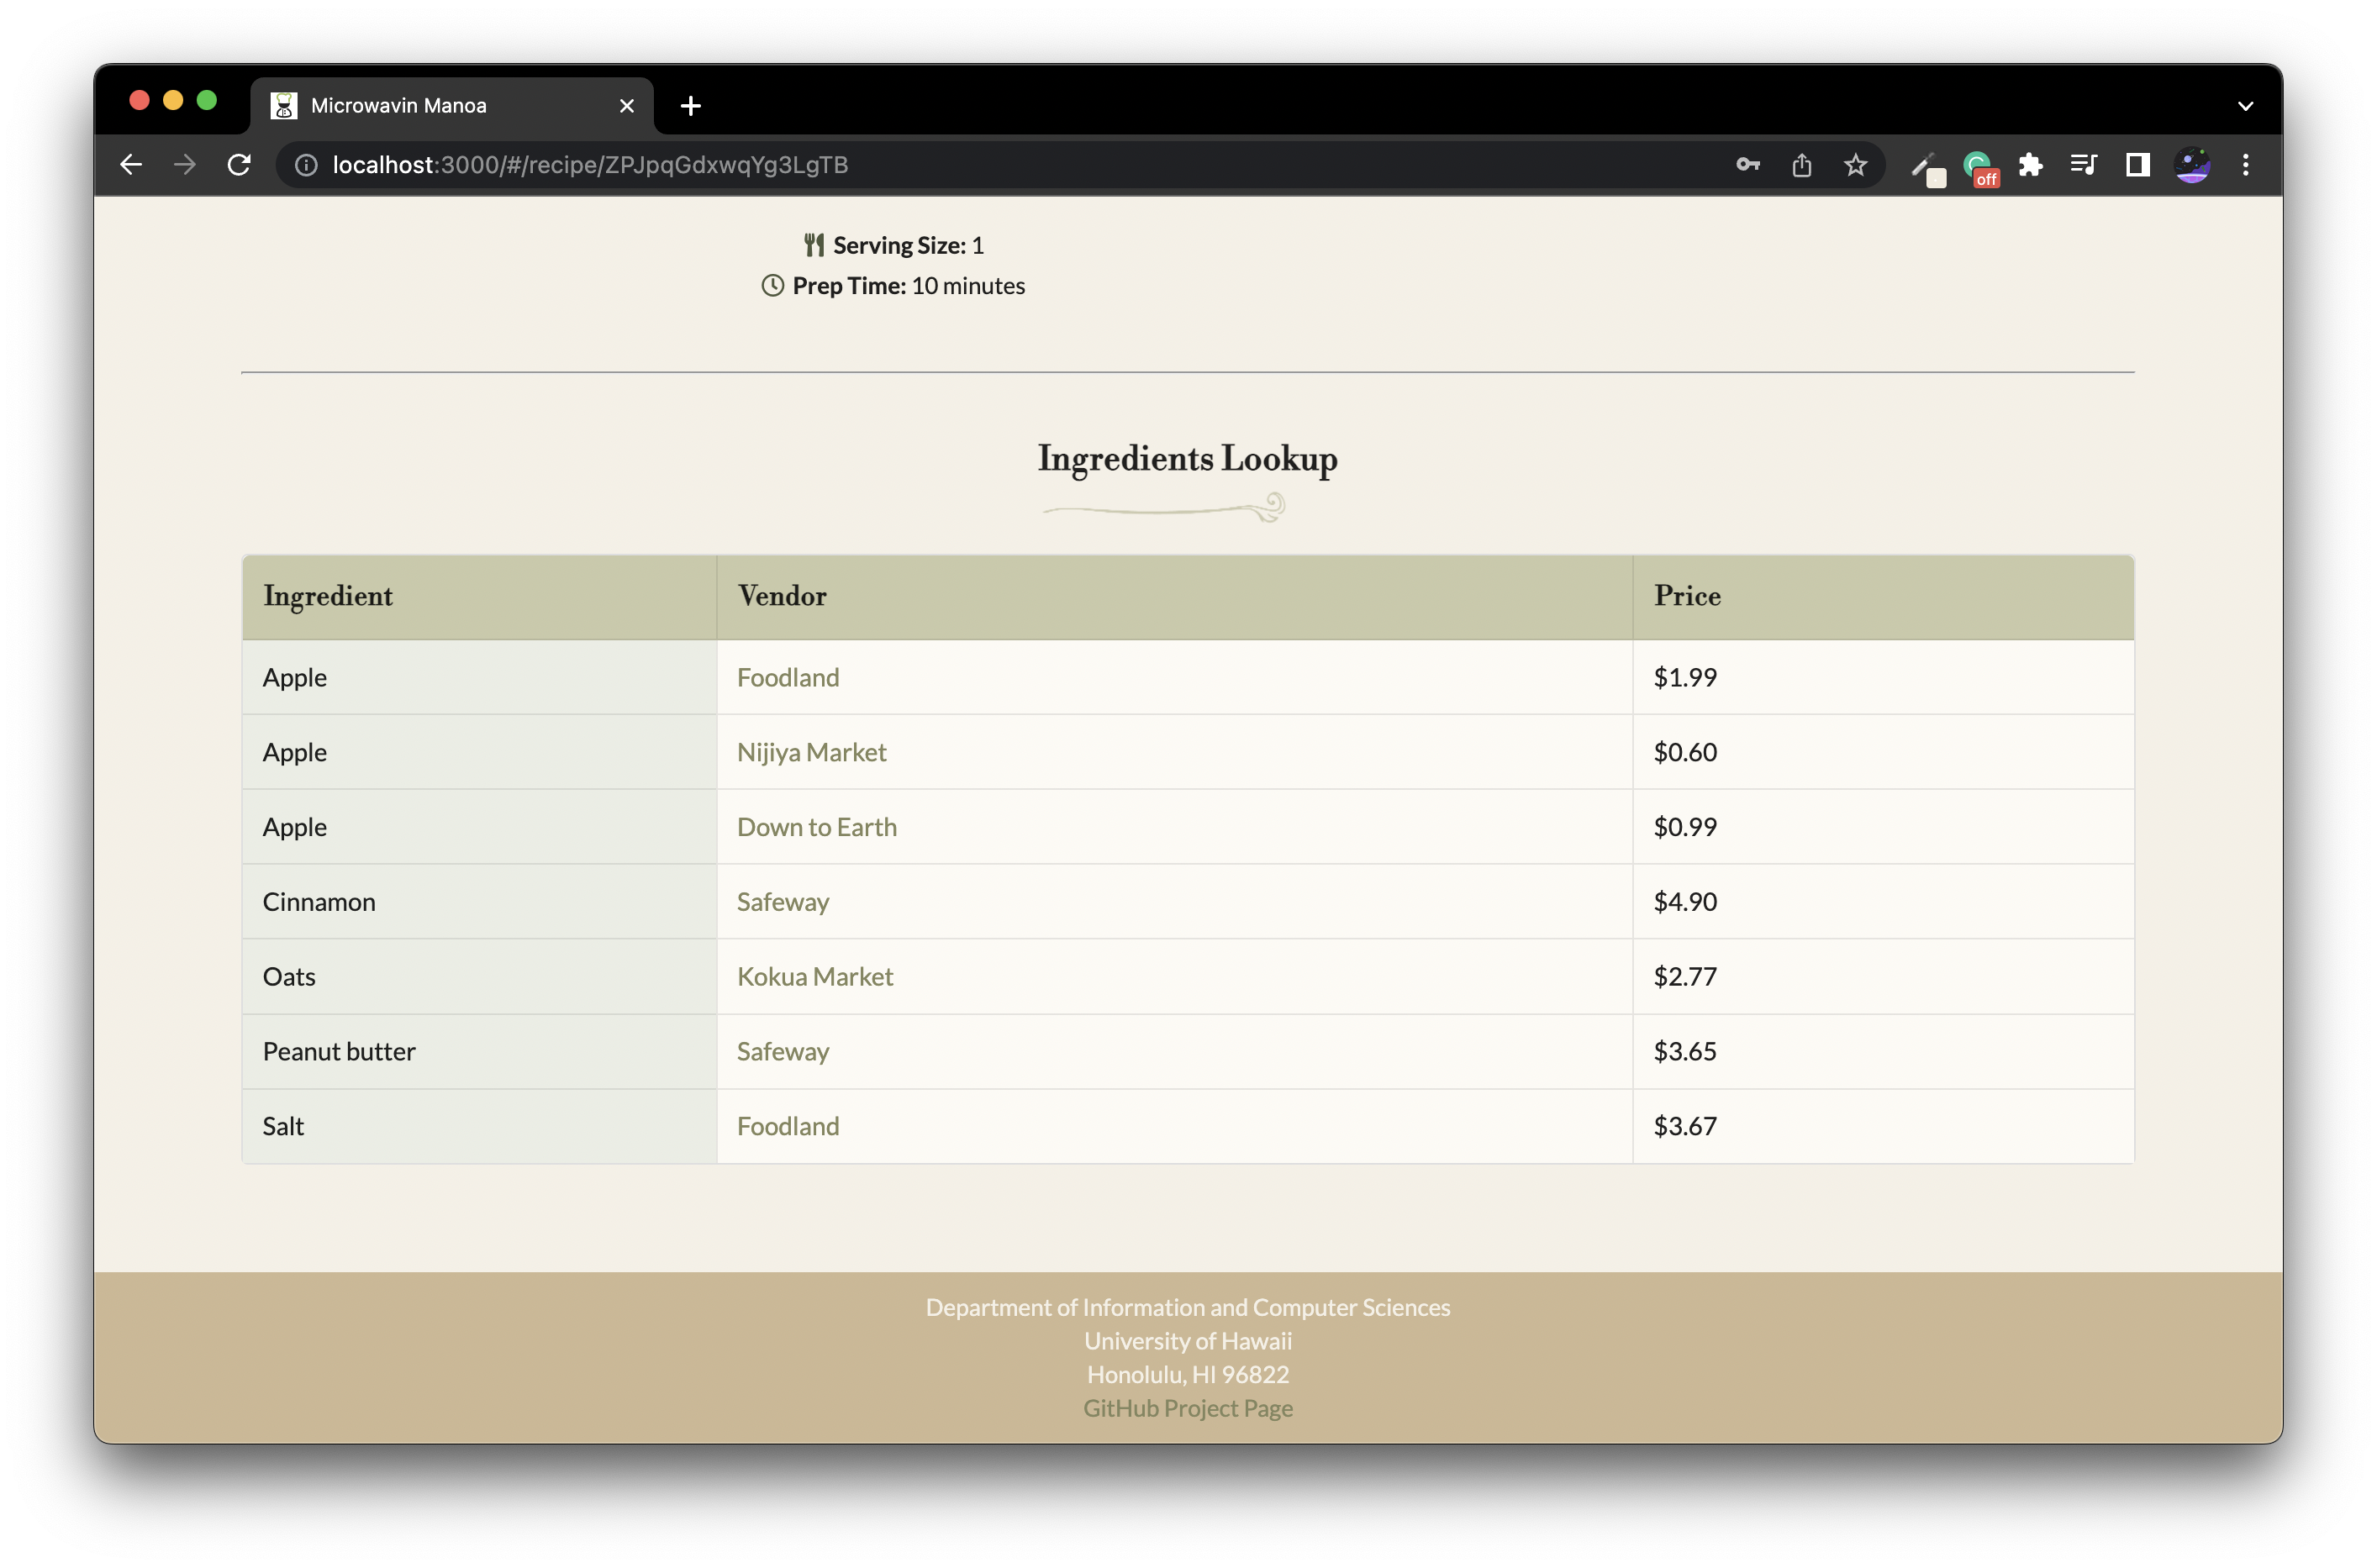
Upon clicking a recipe, the page will display all information for that recipe. This includes the name, image, ingredients, tags, serving size, prep time, and description. Additionally, there is a table to easily look up all the required ingredients, where to get them, and at what price. This table includes the link to the vendor where the ingredient can be bought. Using this information, the lowest total cost to make a recipe is calculated using the lowest price for each ingredient.

All Vendors Page
Both Users and Admins can access a page to see all the vendors in the system.
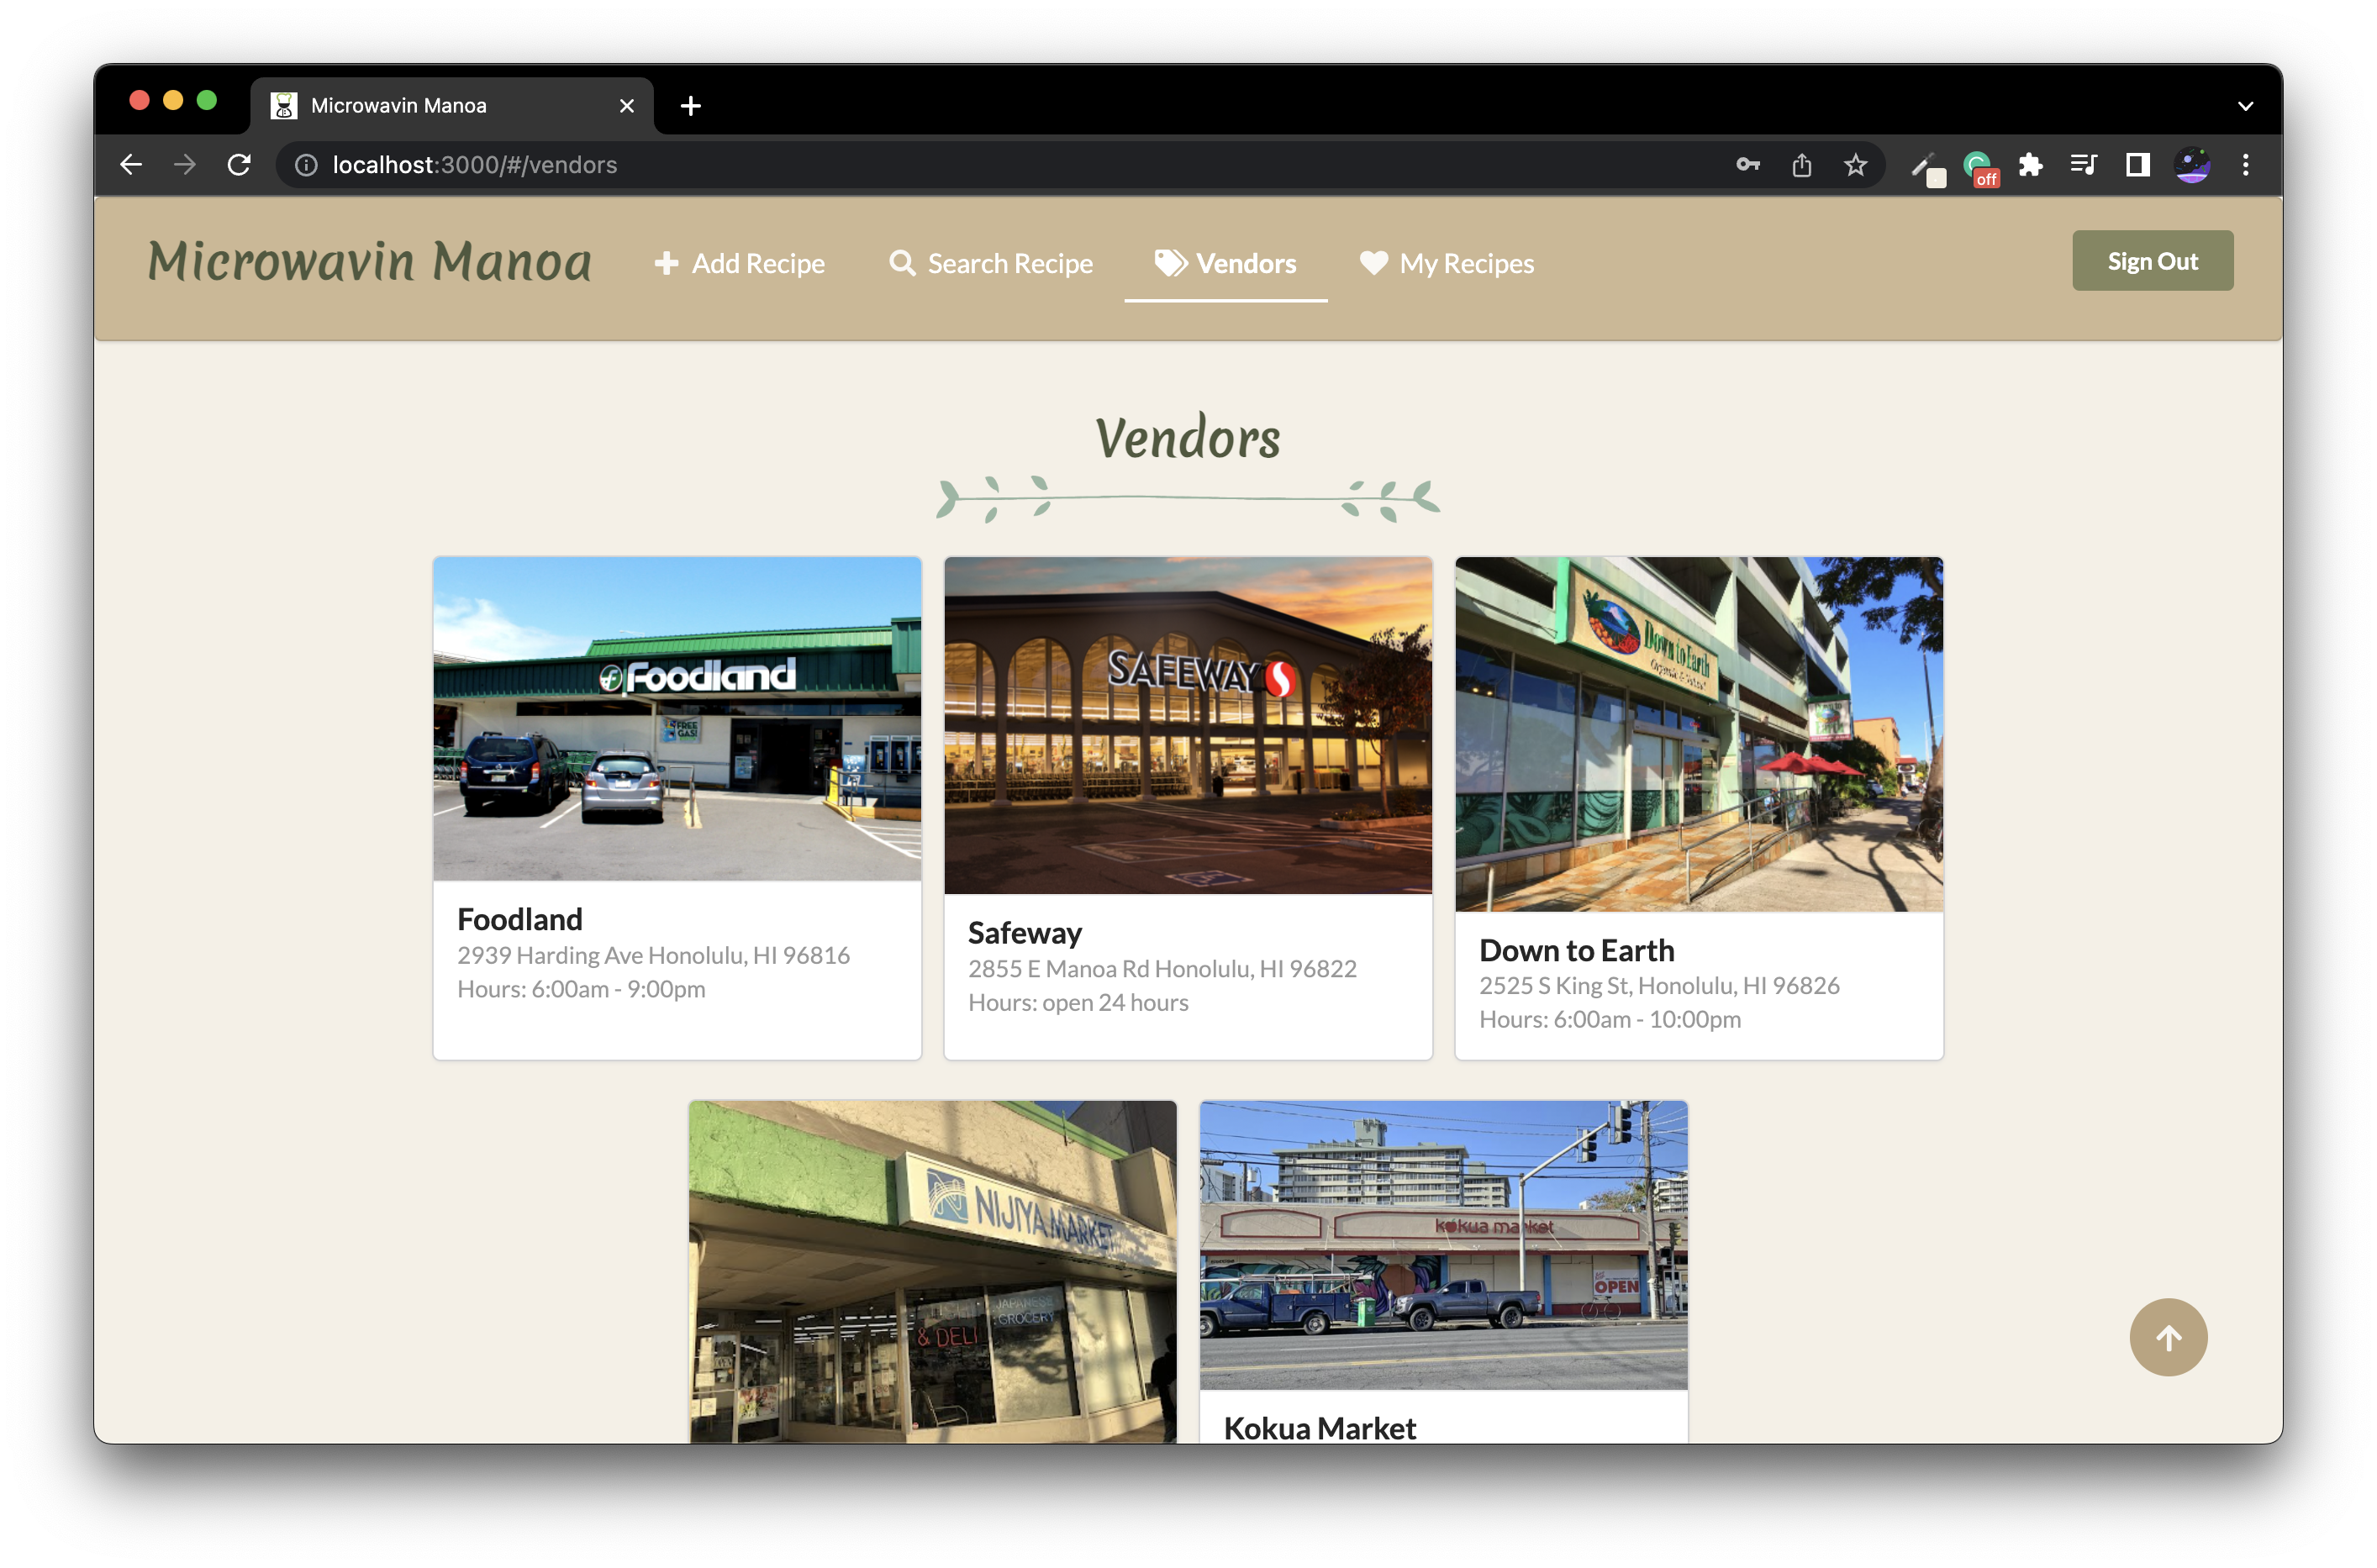
Vendor Profile Page
Upon clicking on a vendor, the page will display information for that vendor. This includes the name, image, address, hours, and all available ingredients and their prices. Here, the prices of ingredients can be updated by anyone, and new ingredients can be added to that particular store. If the vendor is one of the default vendors, there is a google maps embed for that store. If it is a vendor that an admin added later, the google maps will show all grocery store around UH Manoa.

My Recipes Page
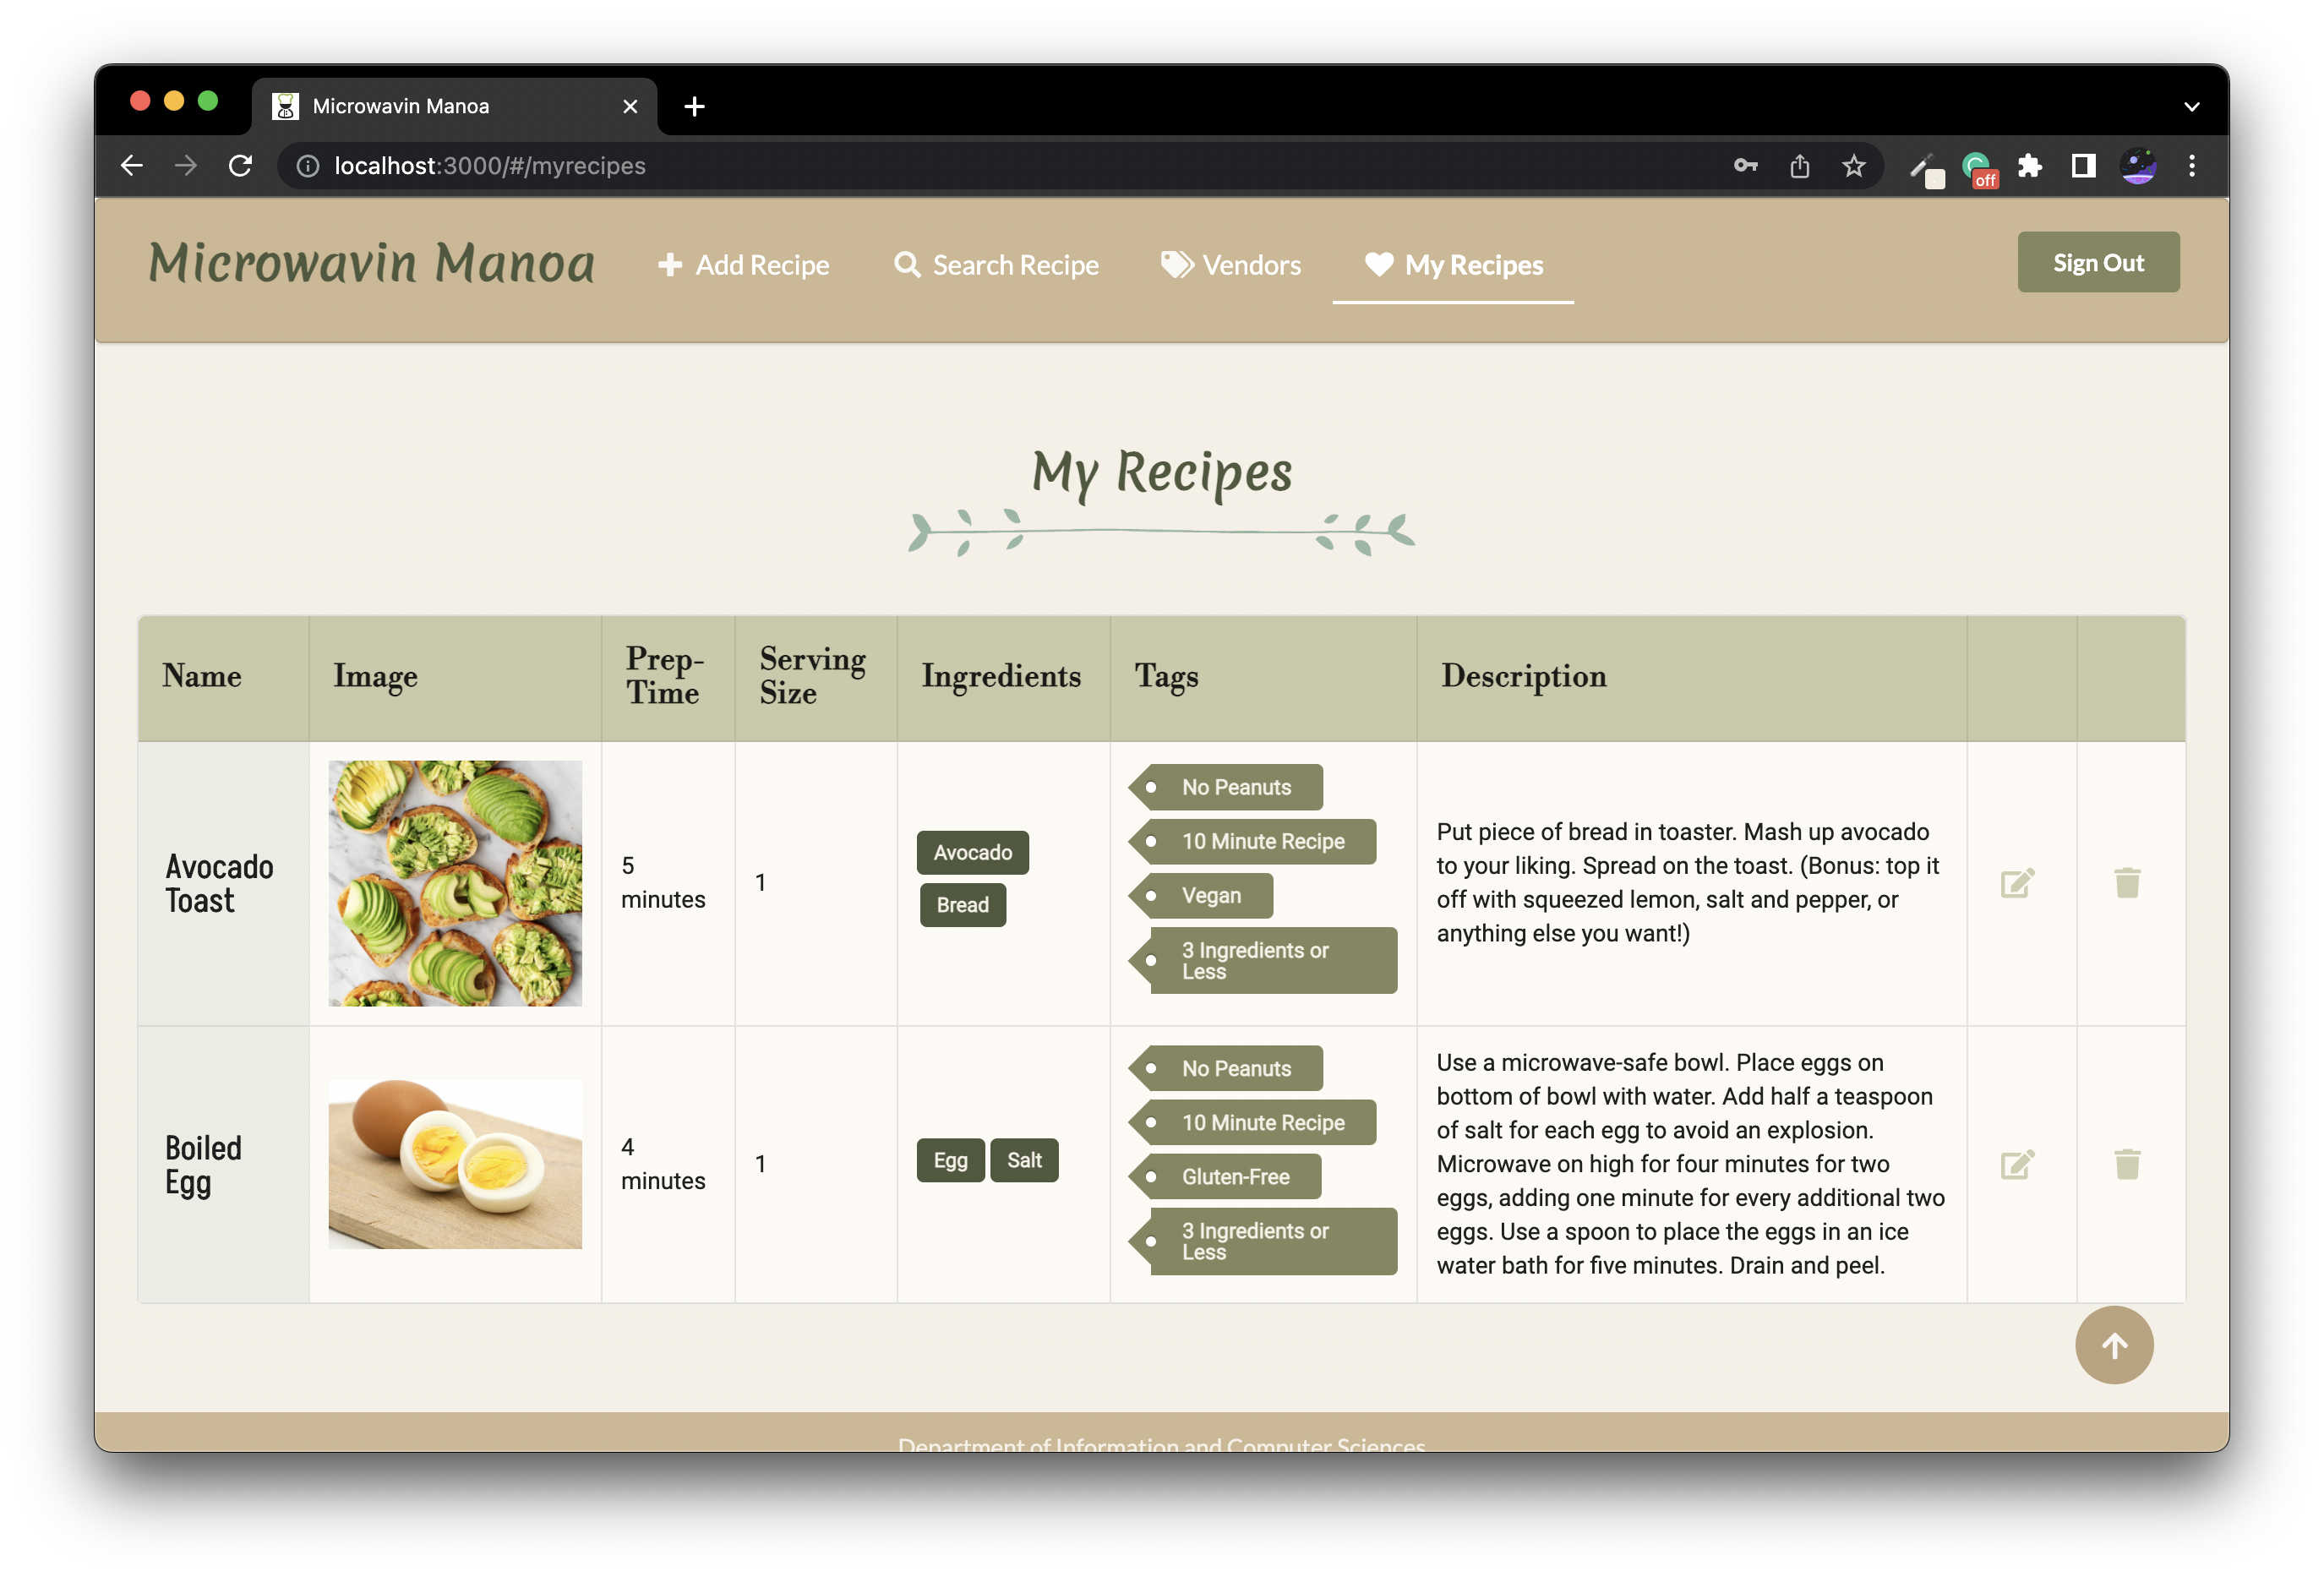
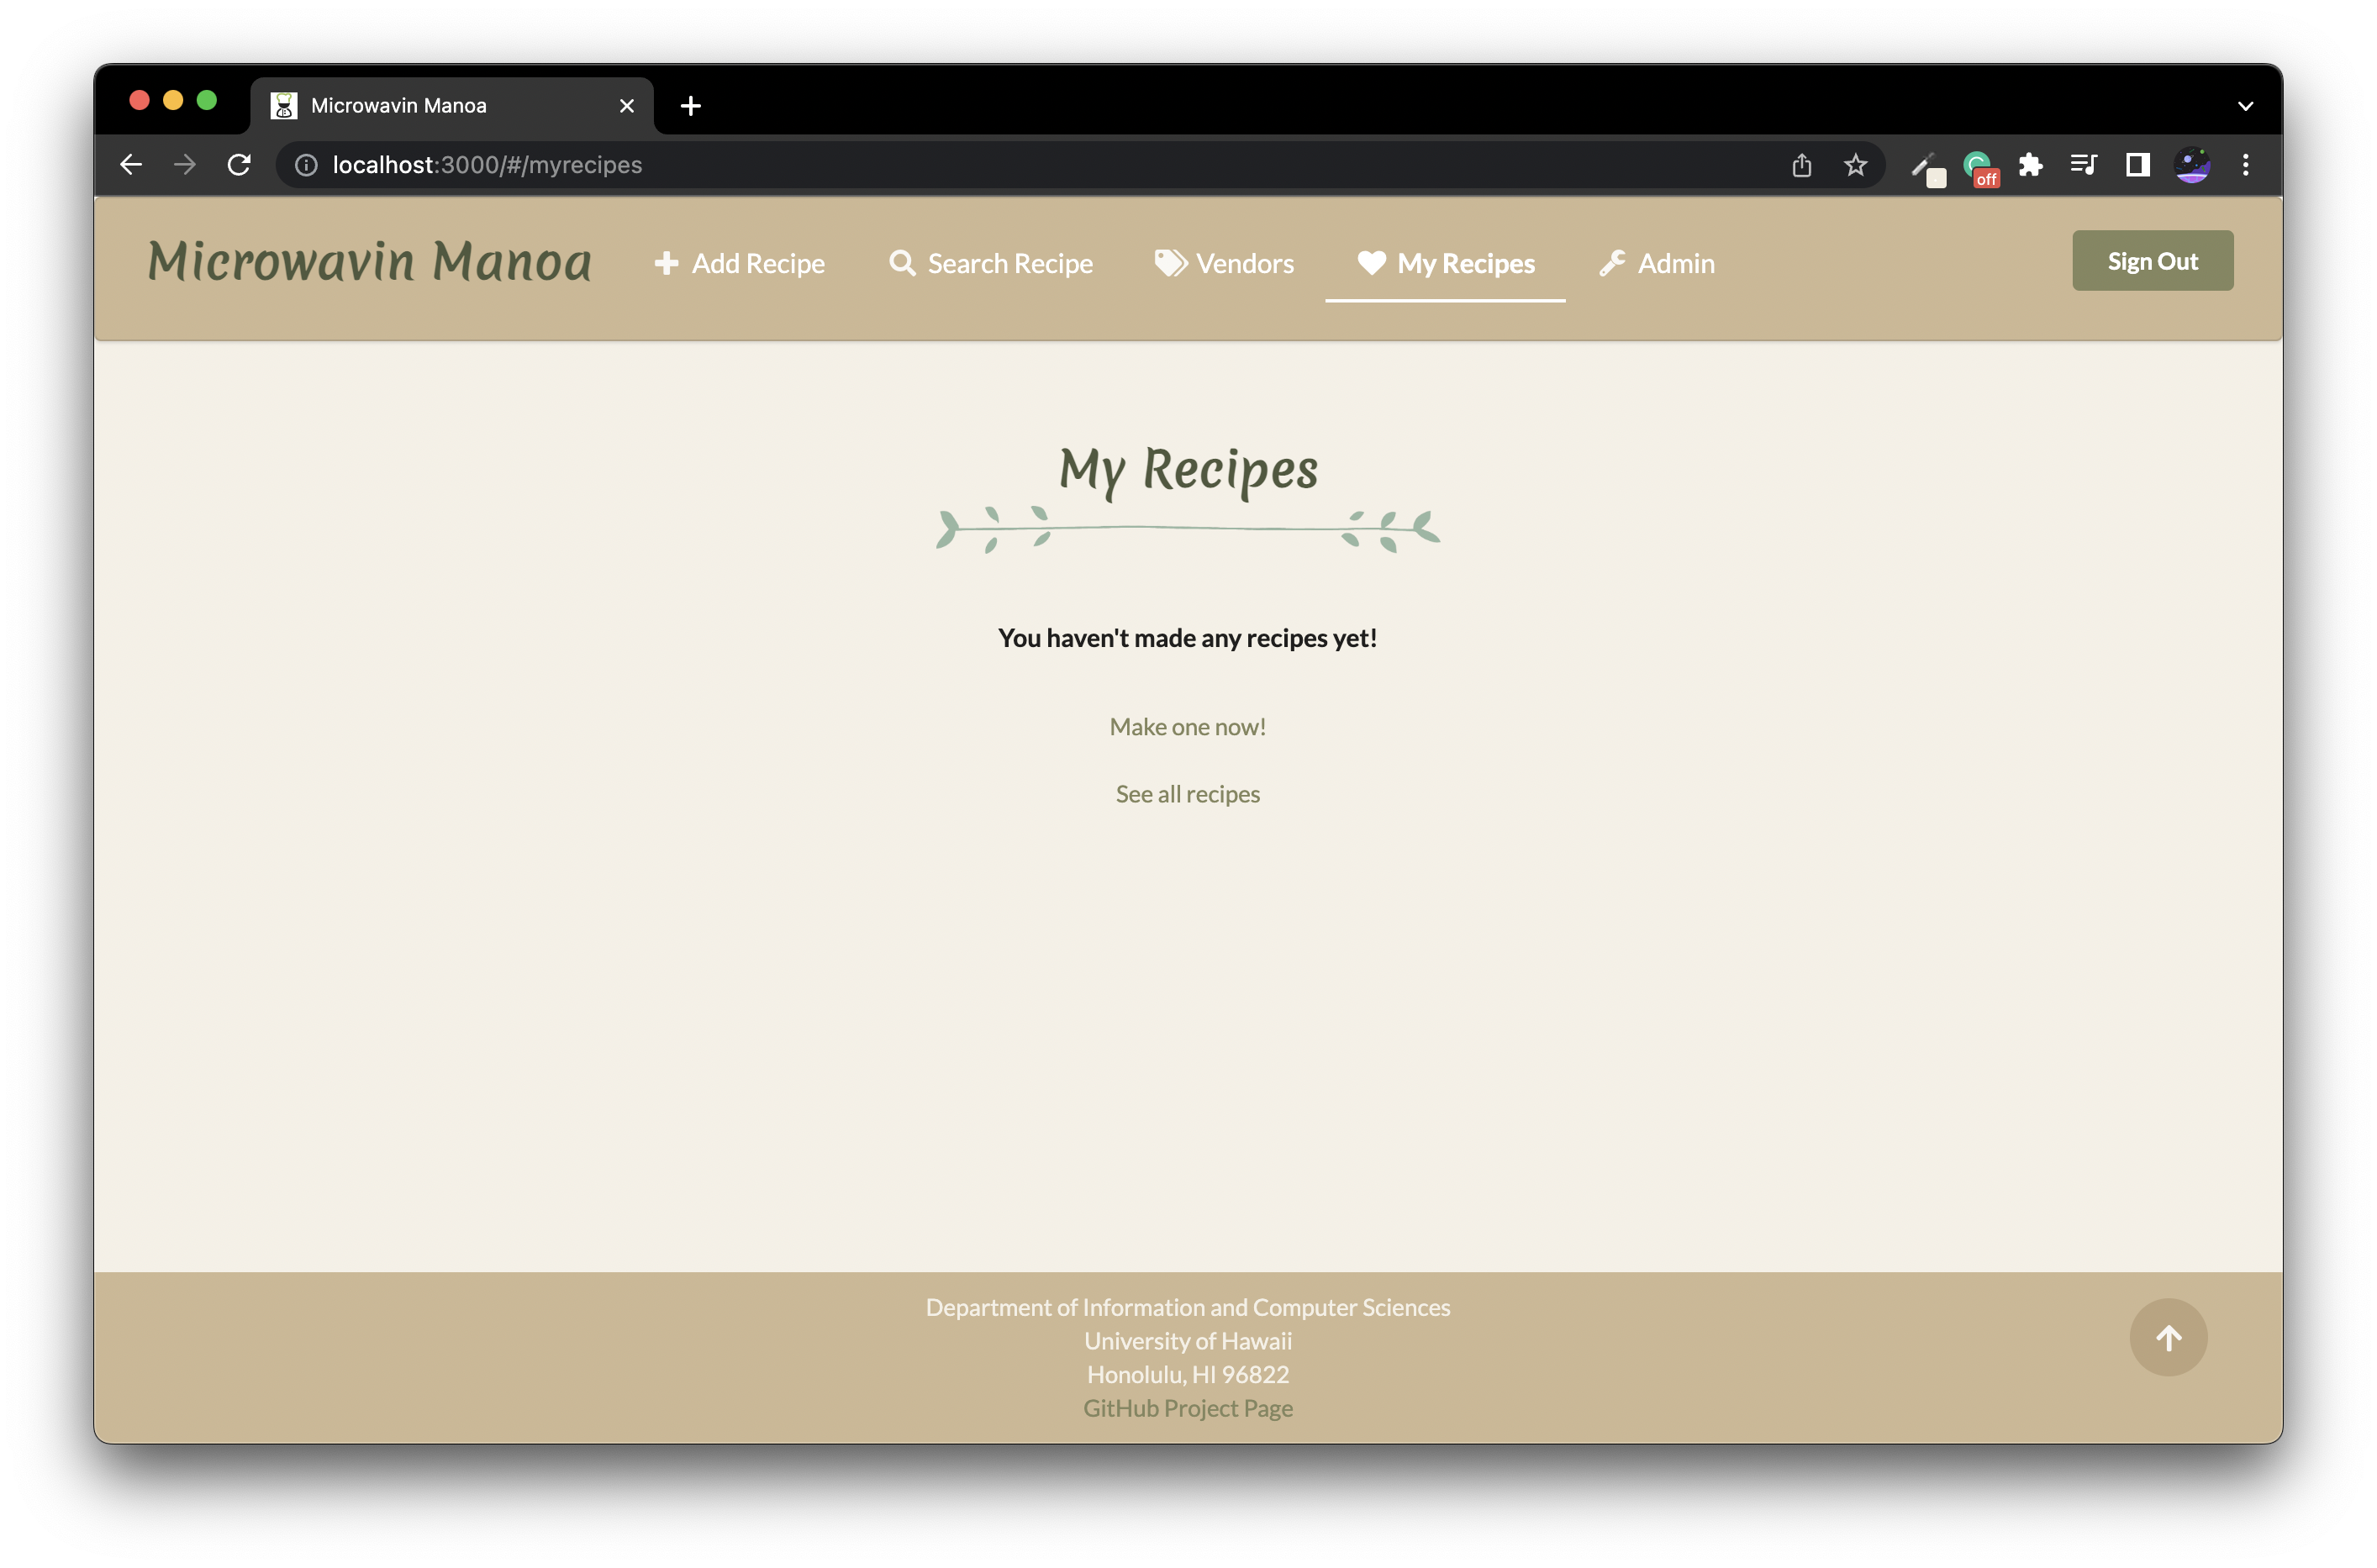
On this page, Users and Admins have access to all the recipes they have created. Here, they can also edit and delete the recipes they have made.
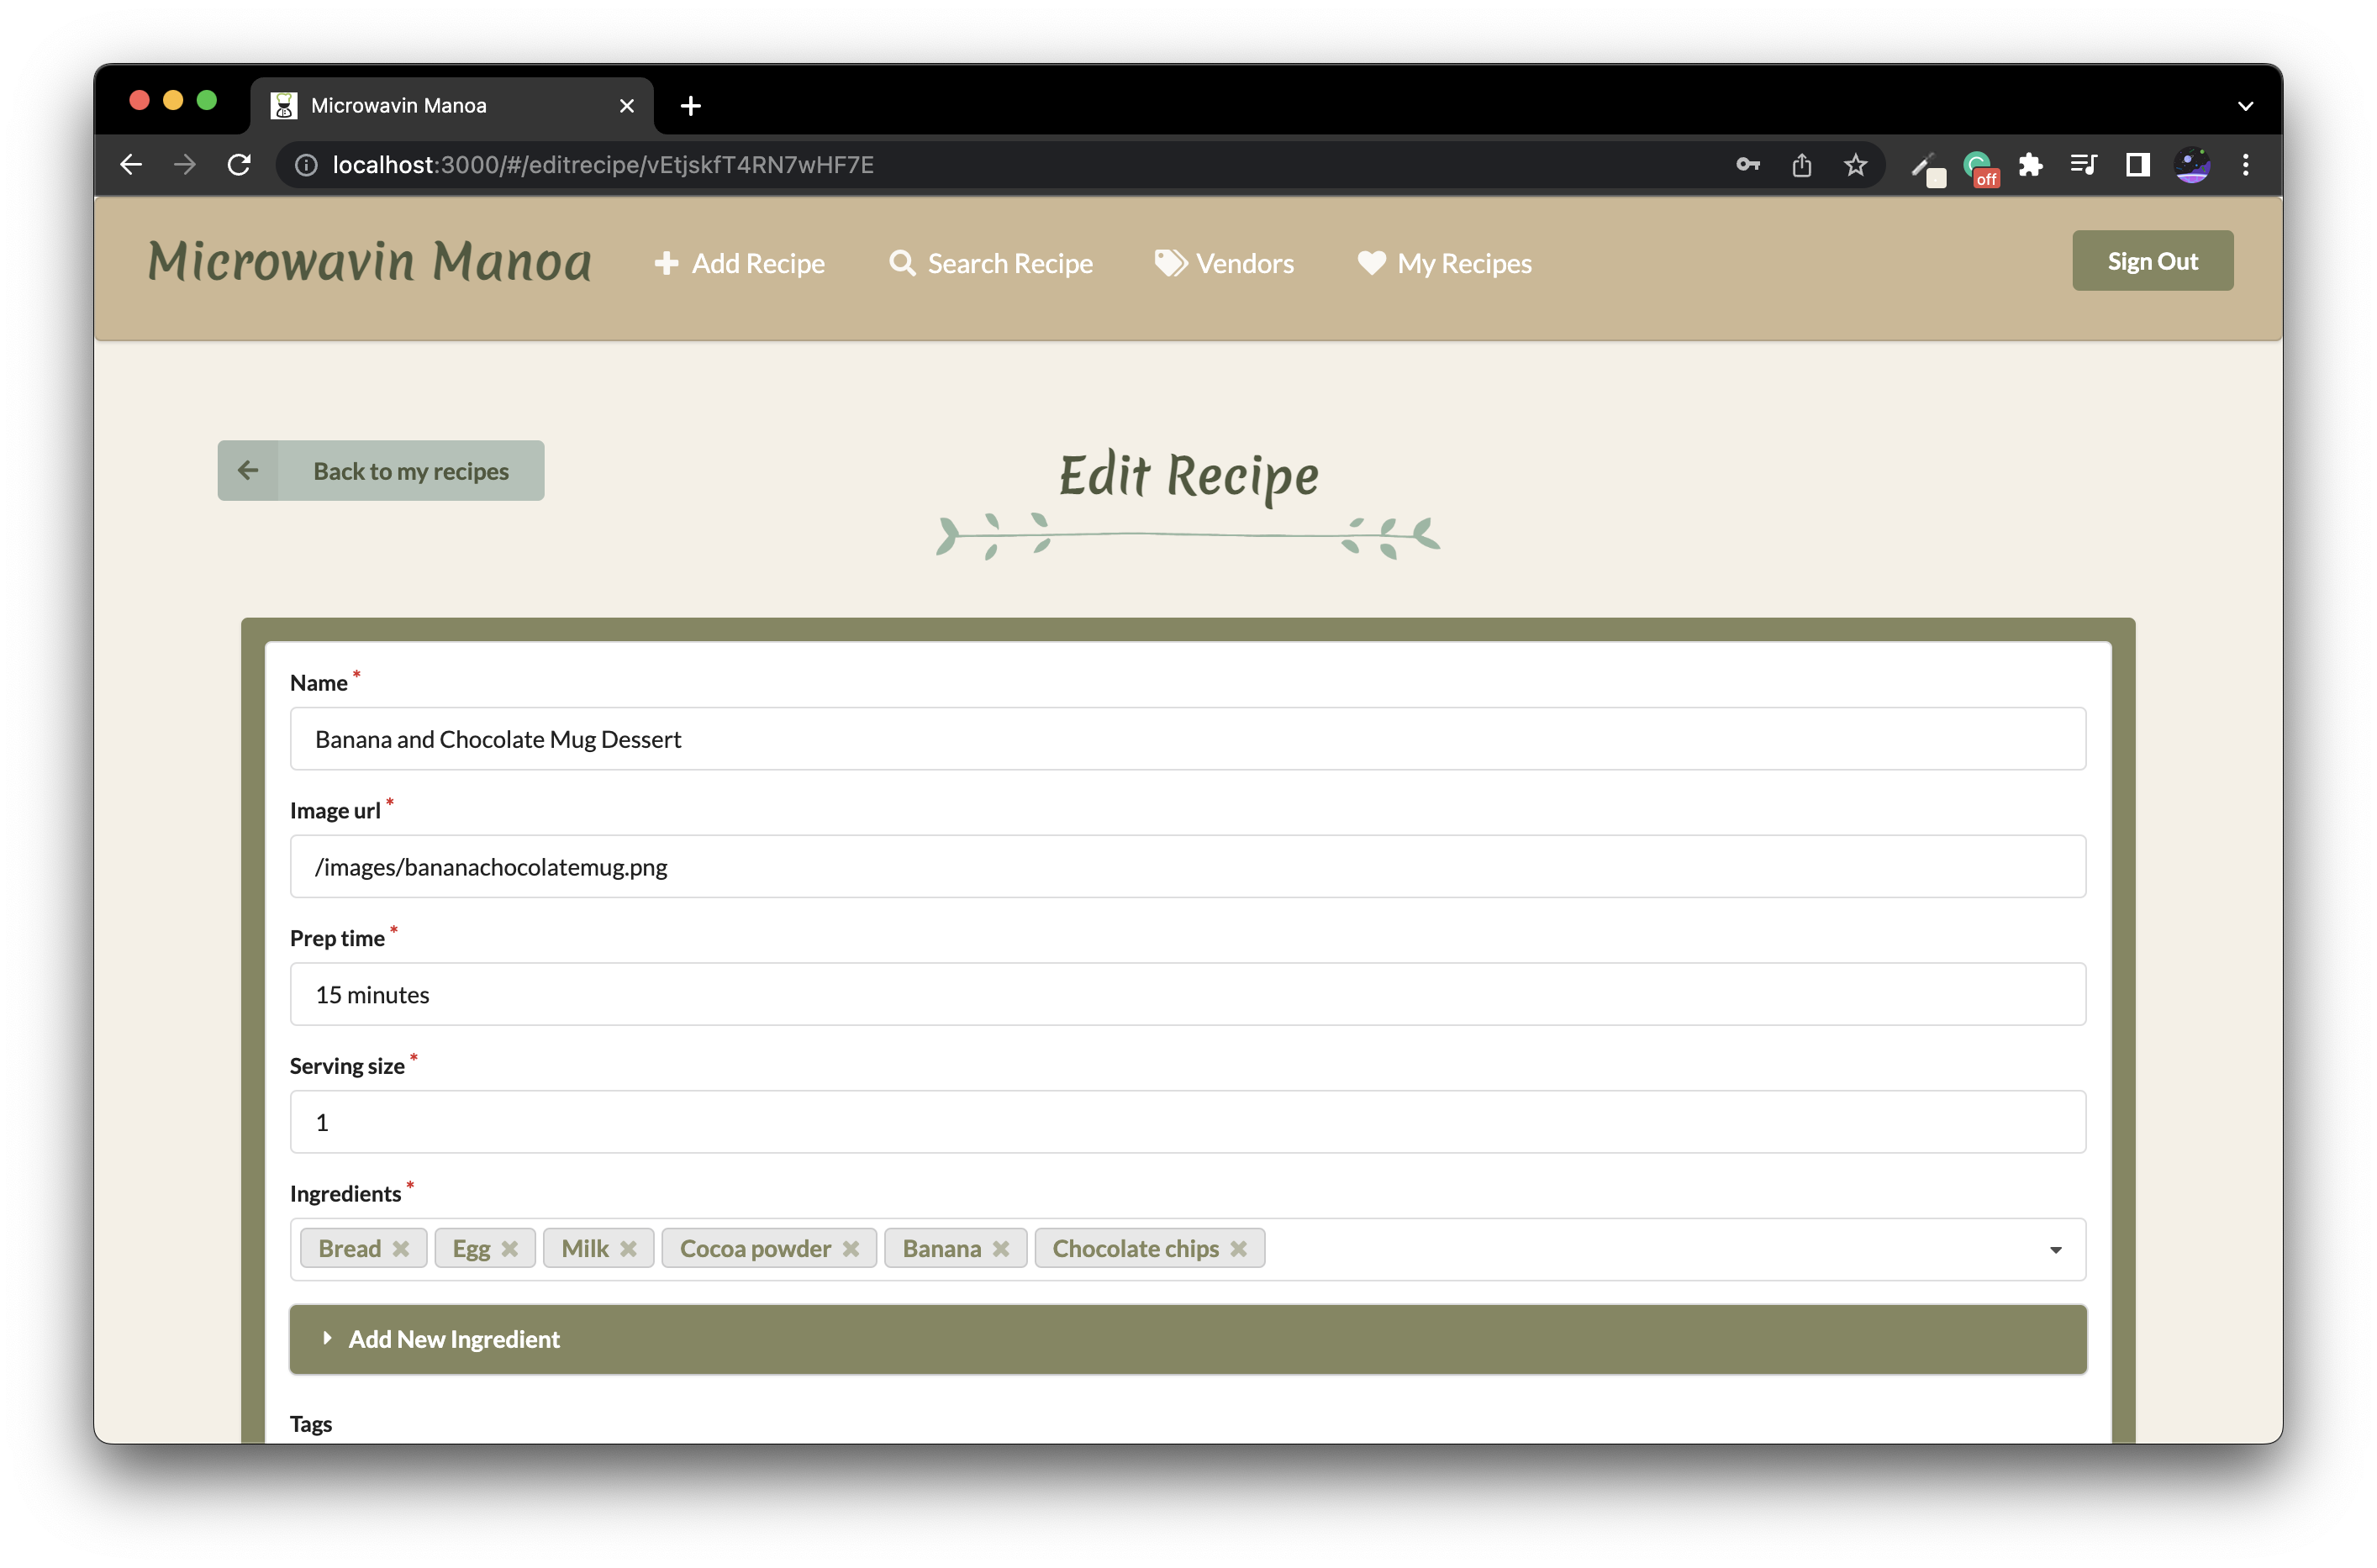
Edit Recipe Page
Both Users and Admins can be redirected to this page to edit an existing recipe. The back button changes depending on whether they are a user or admin
Admin Page
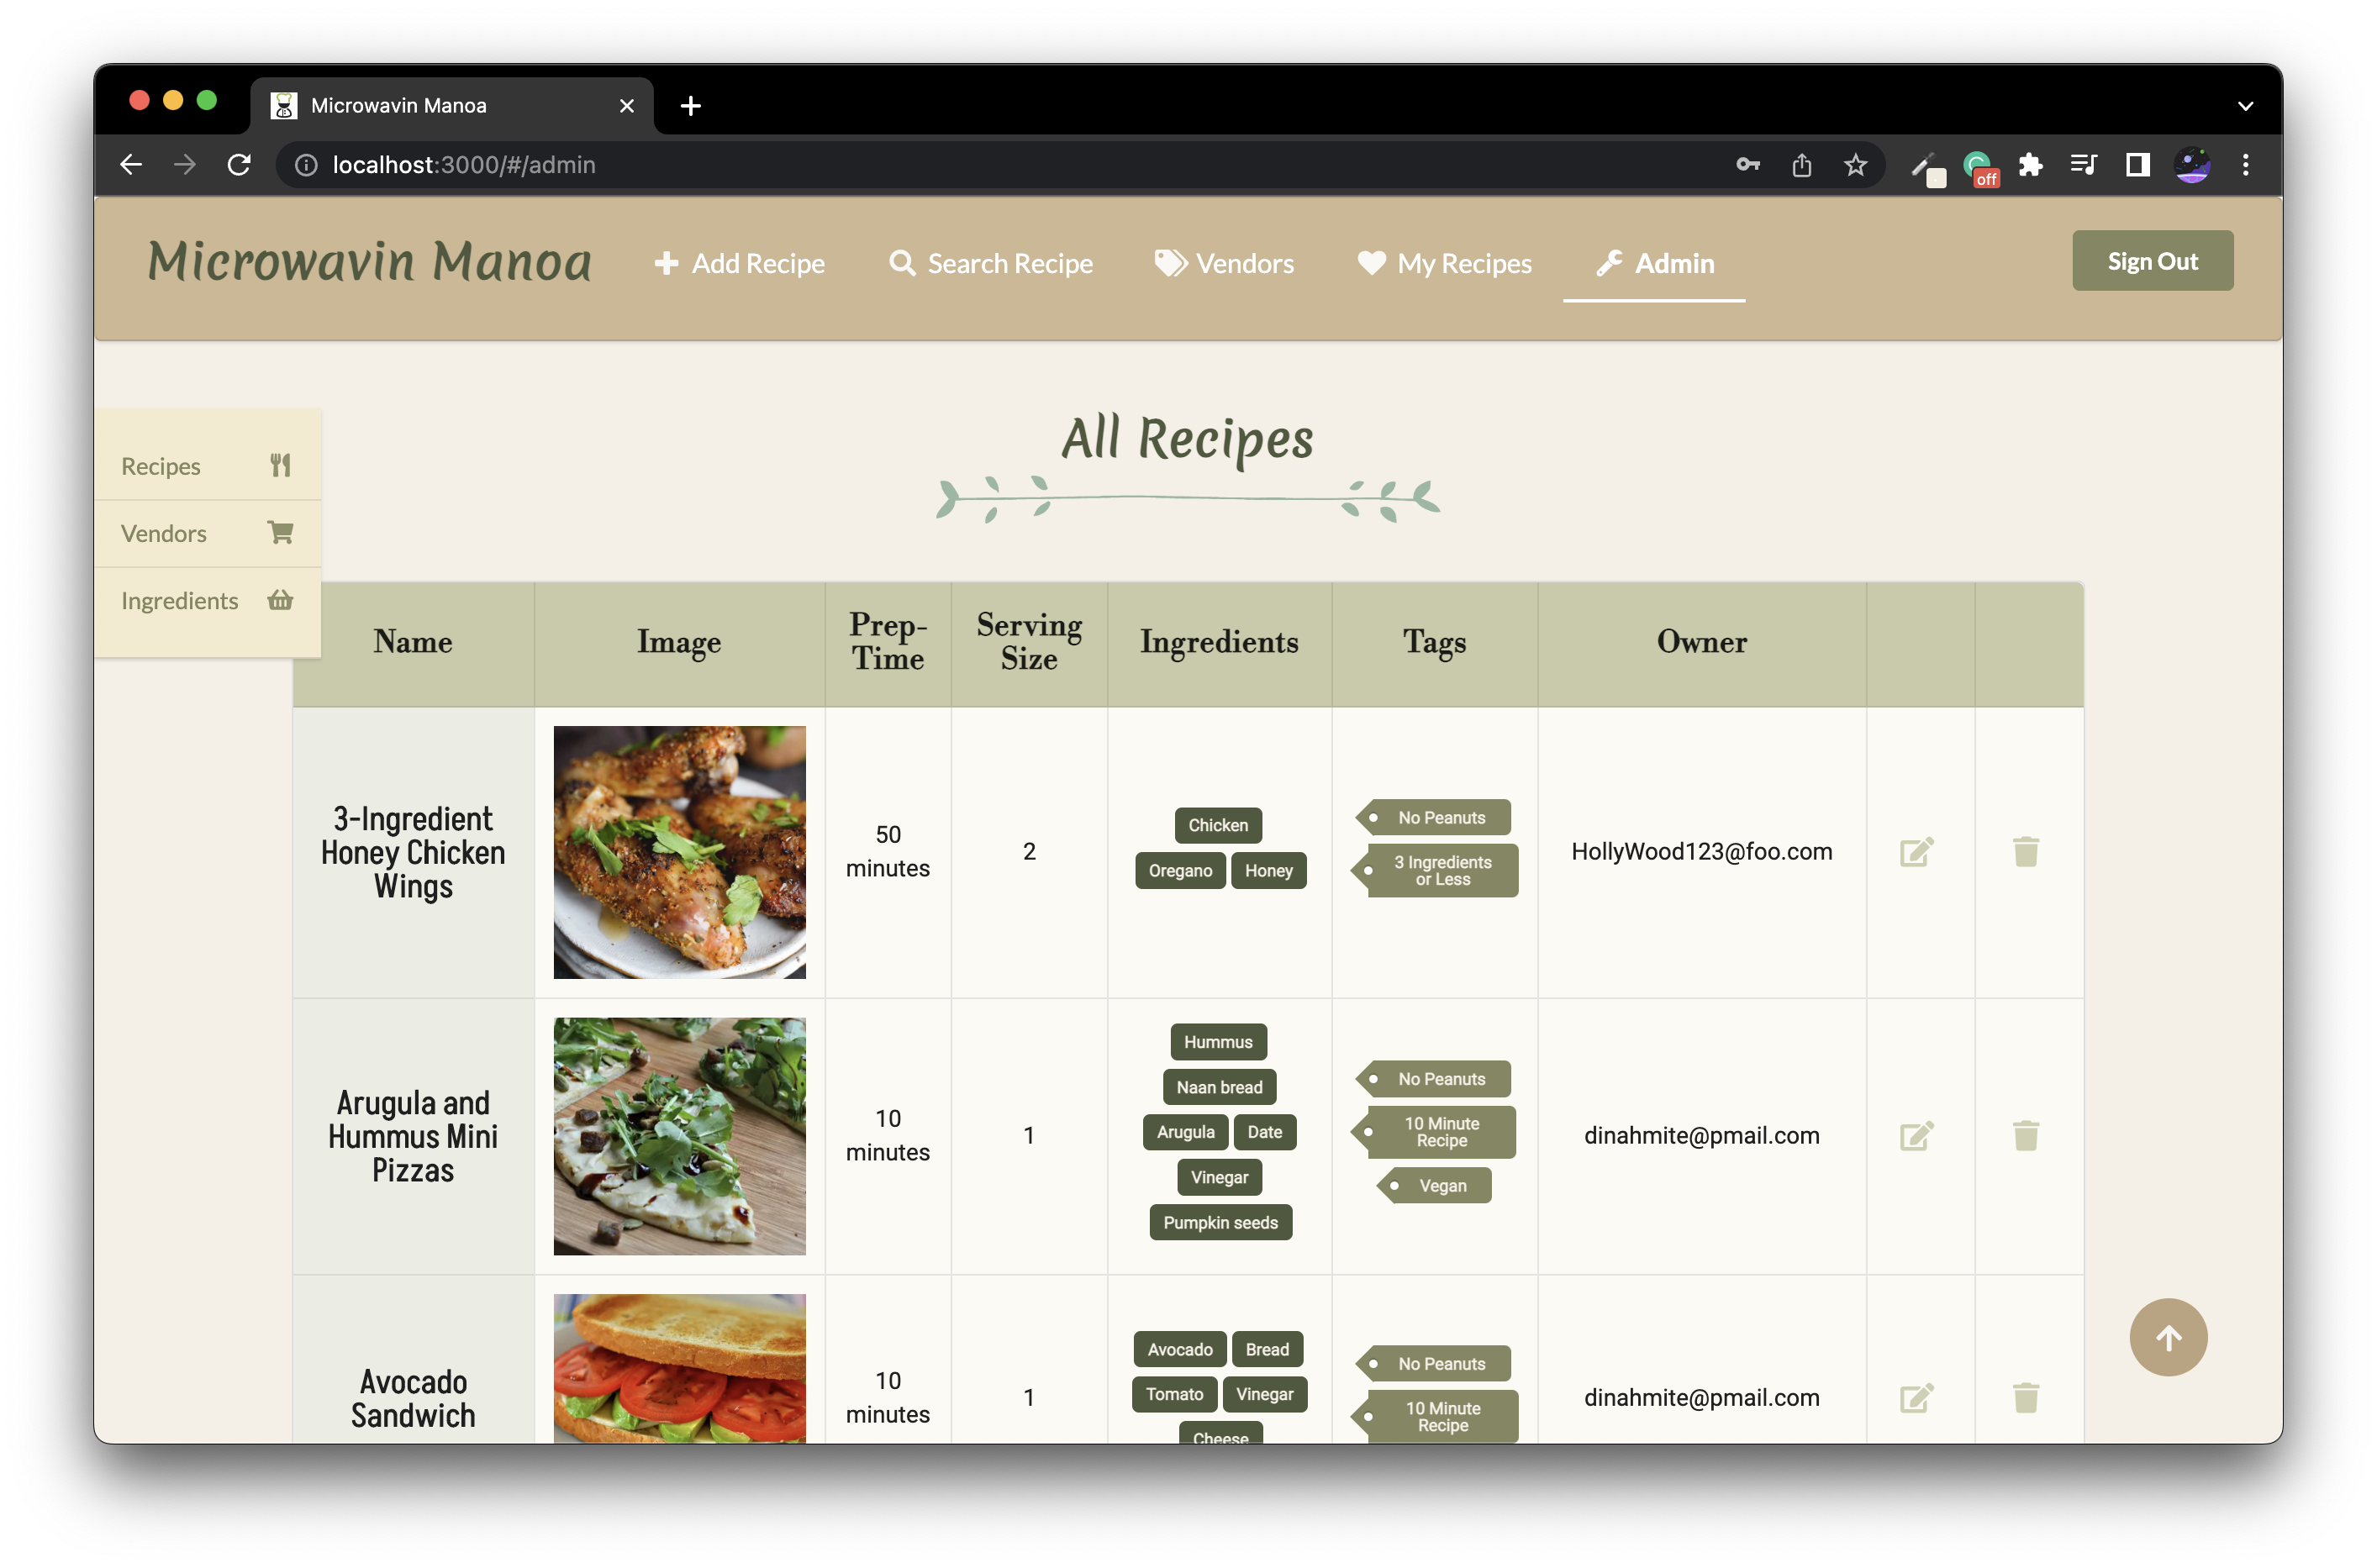
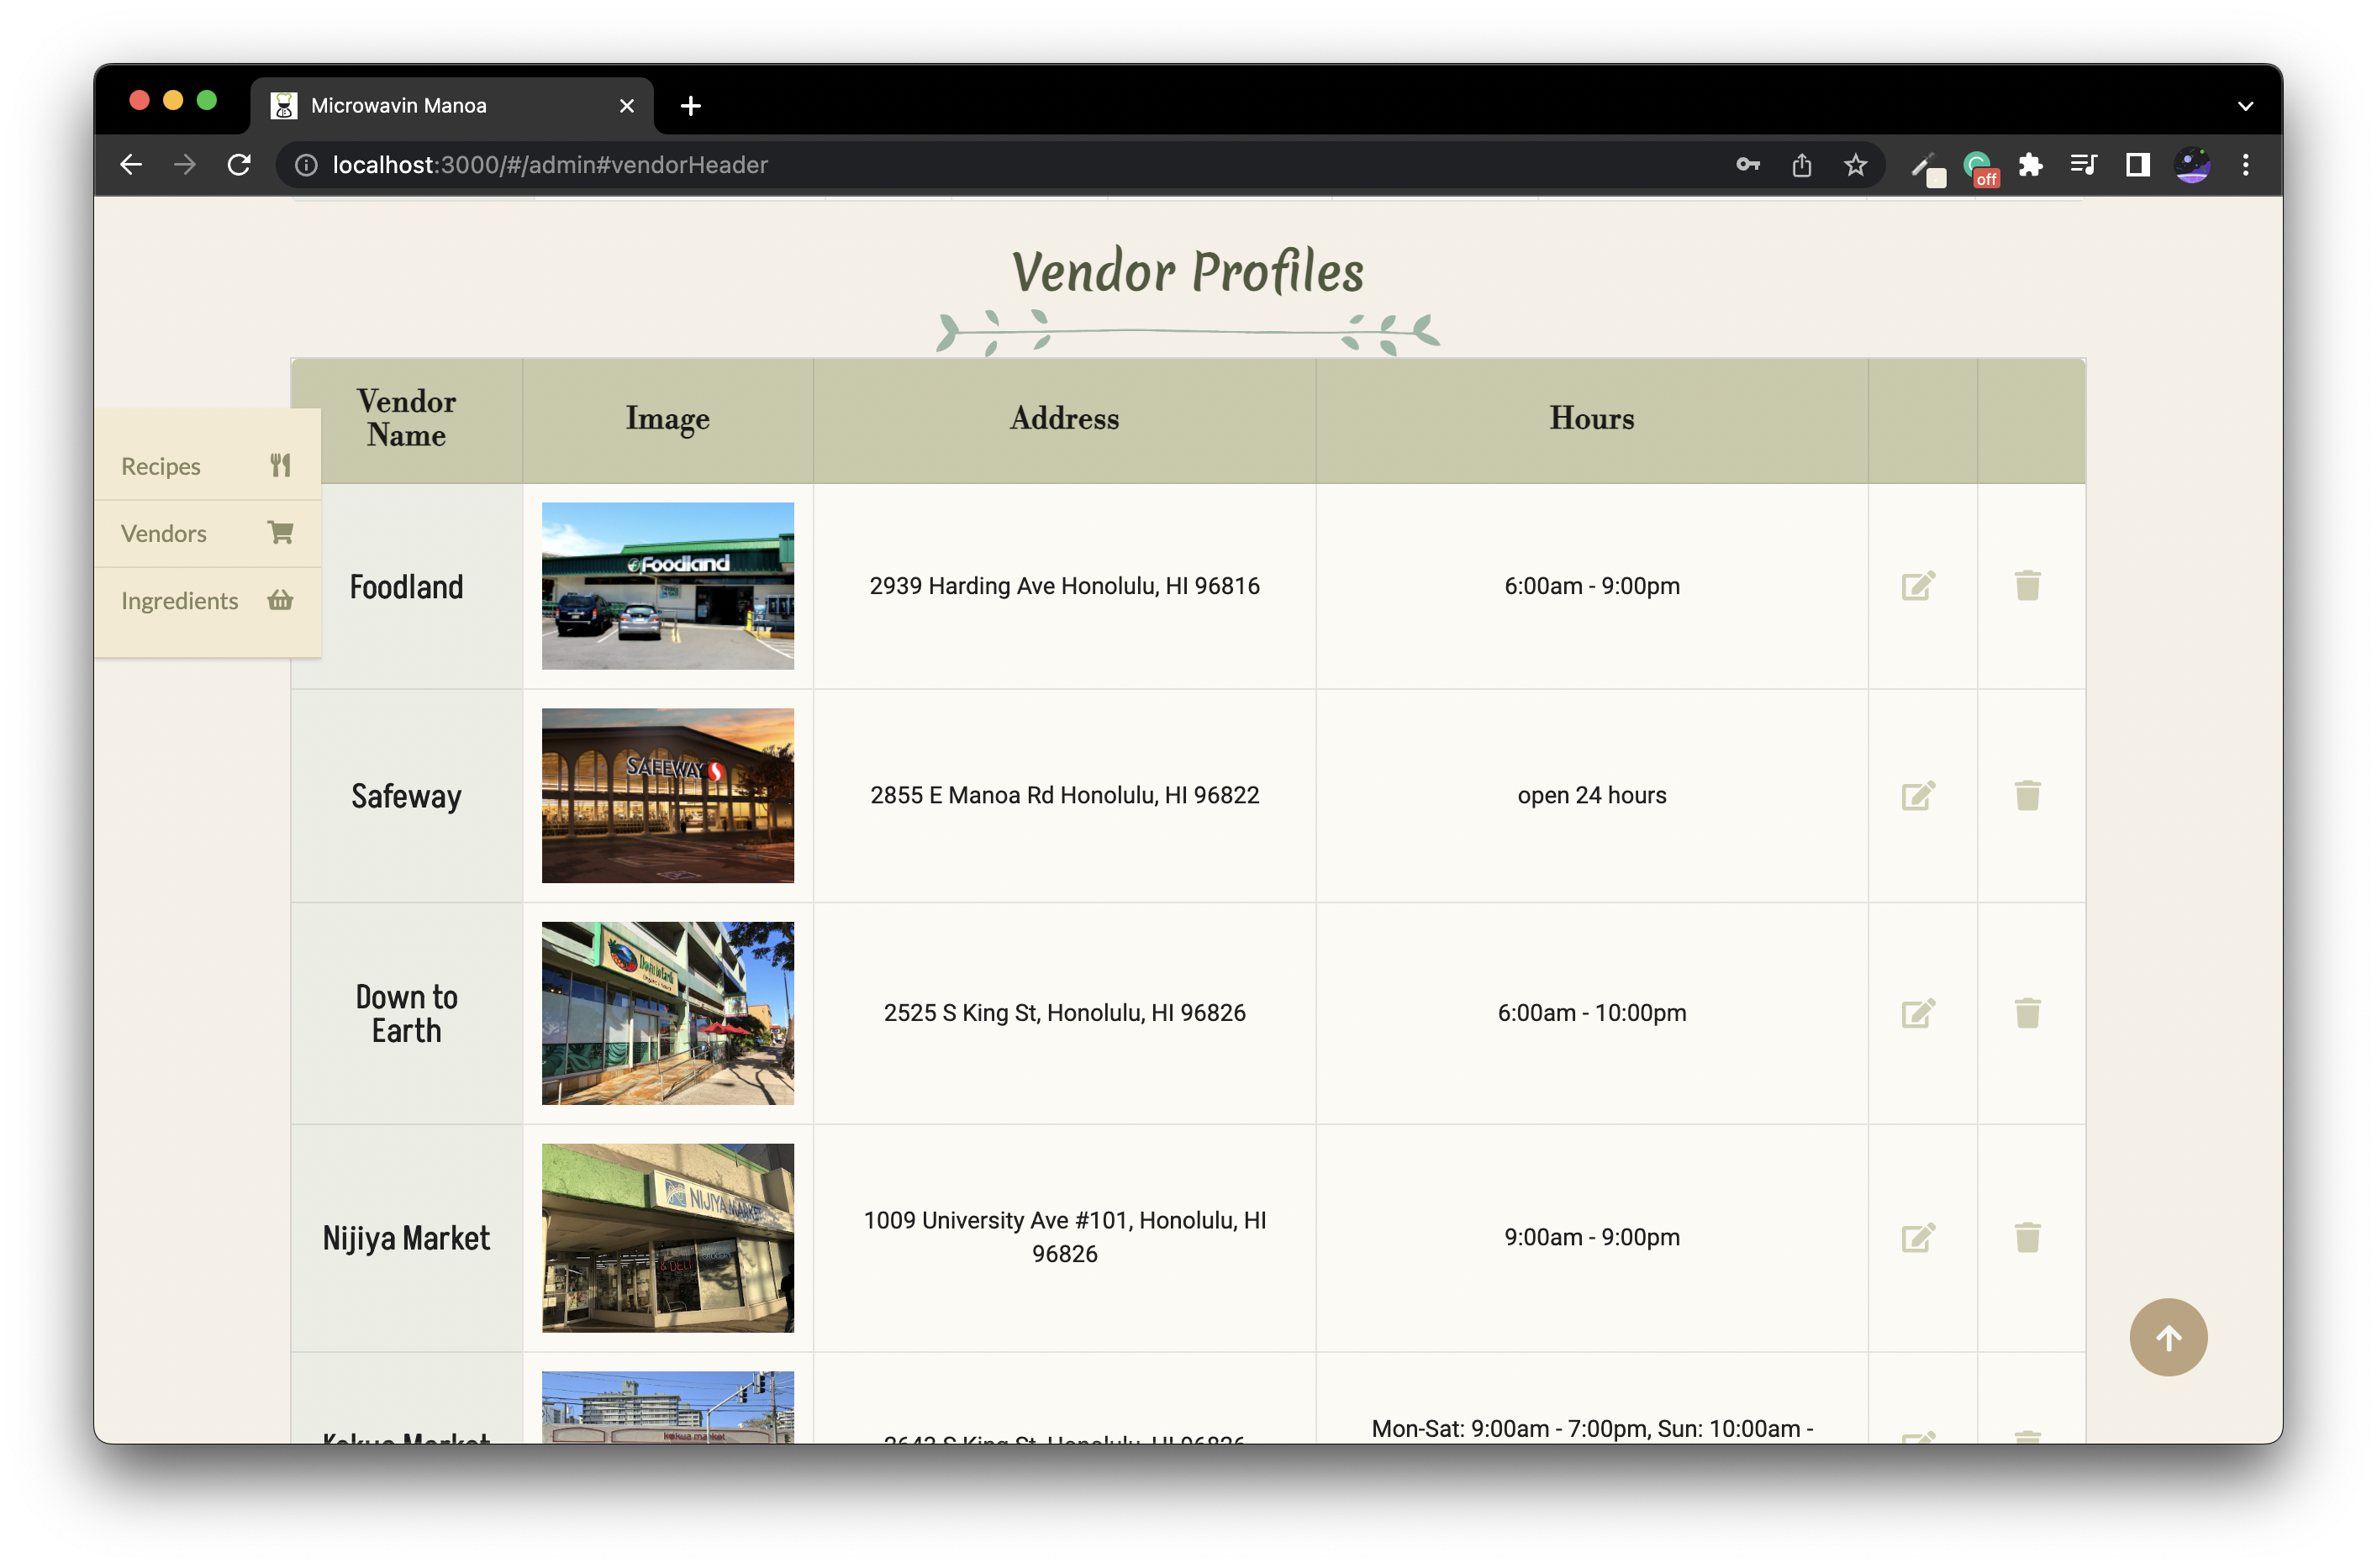
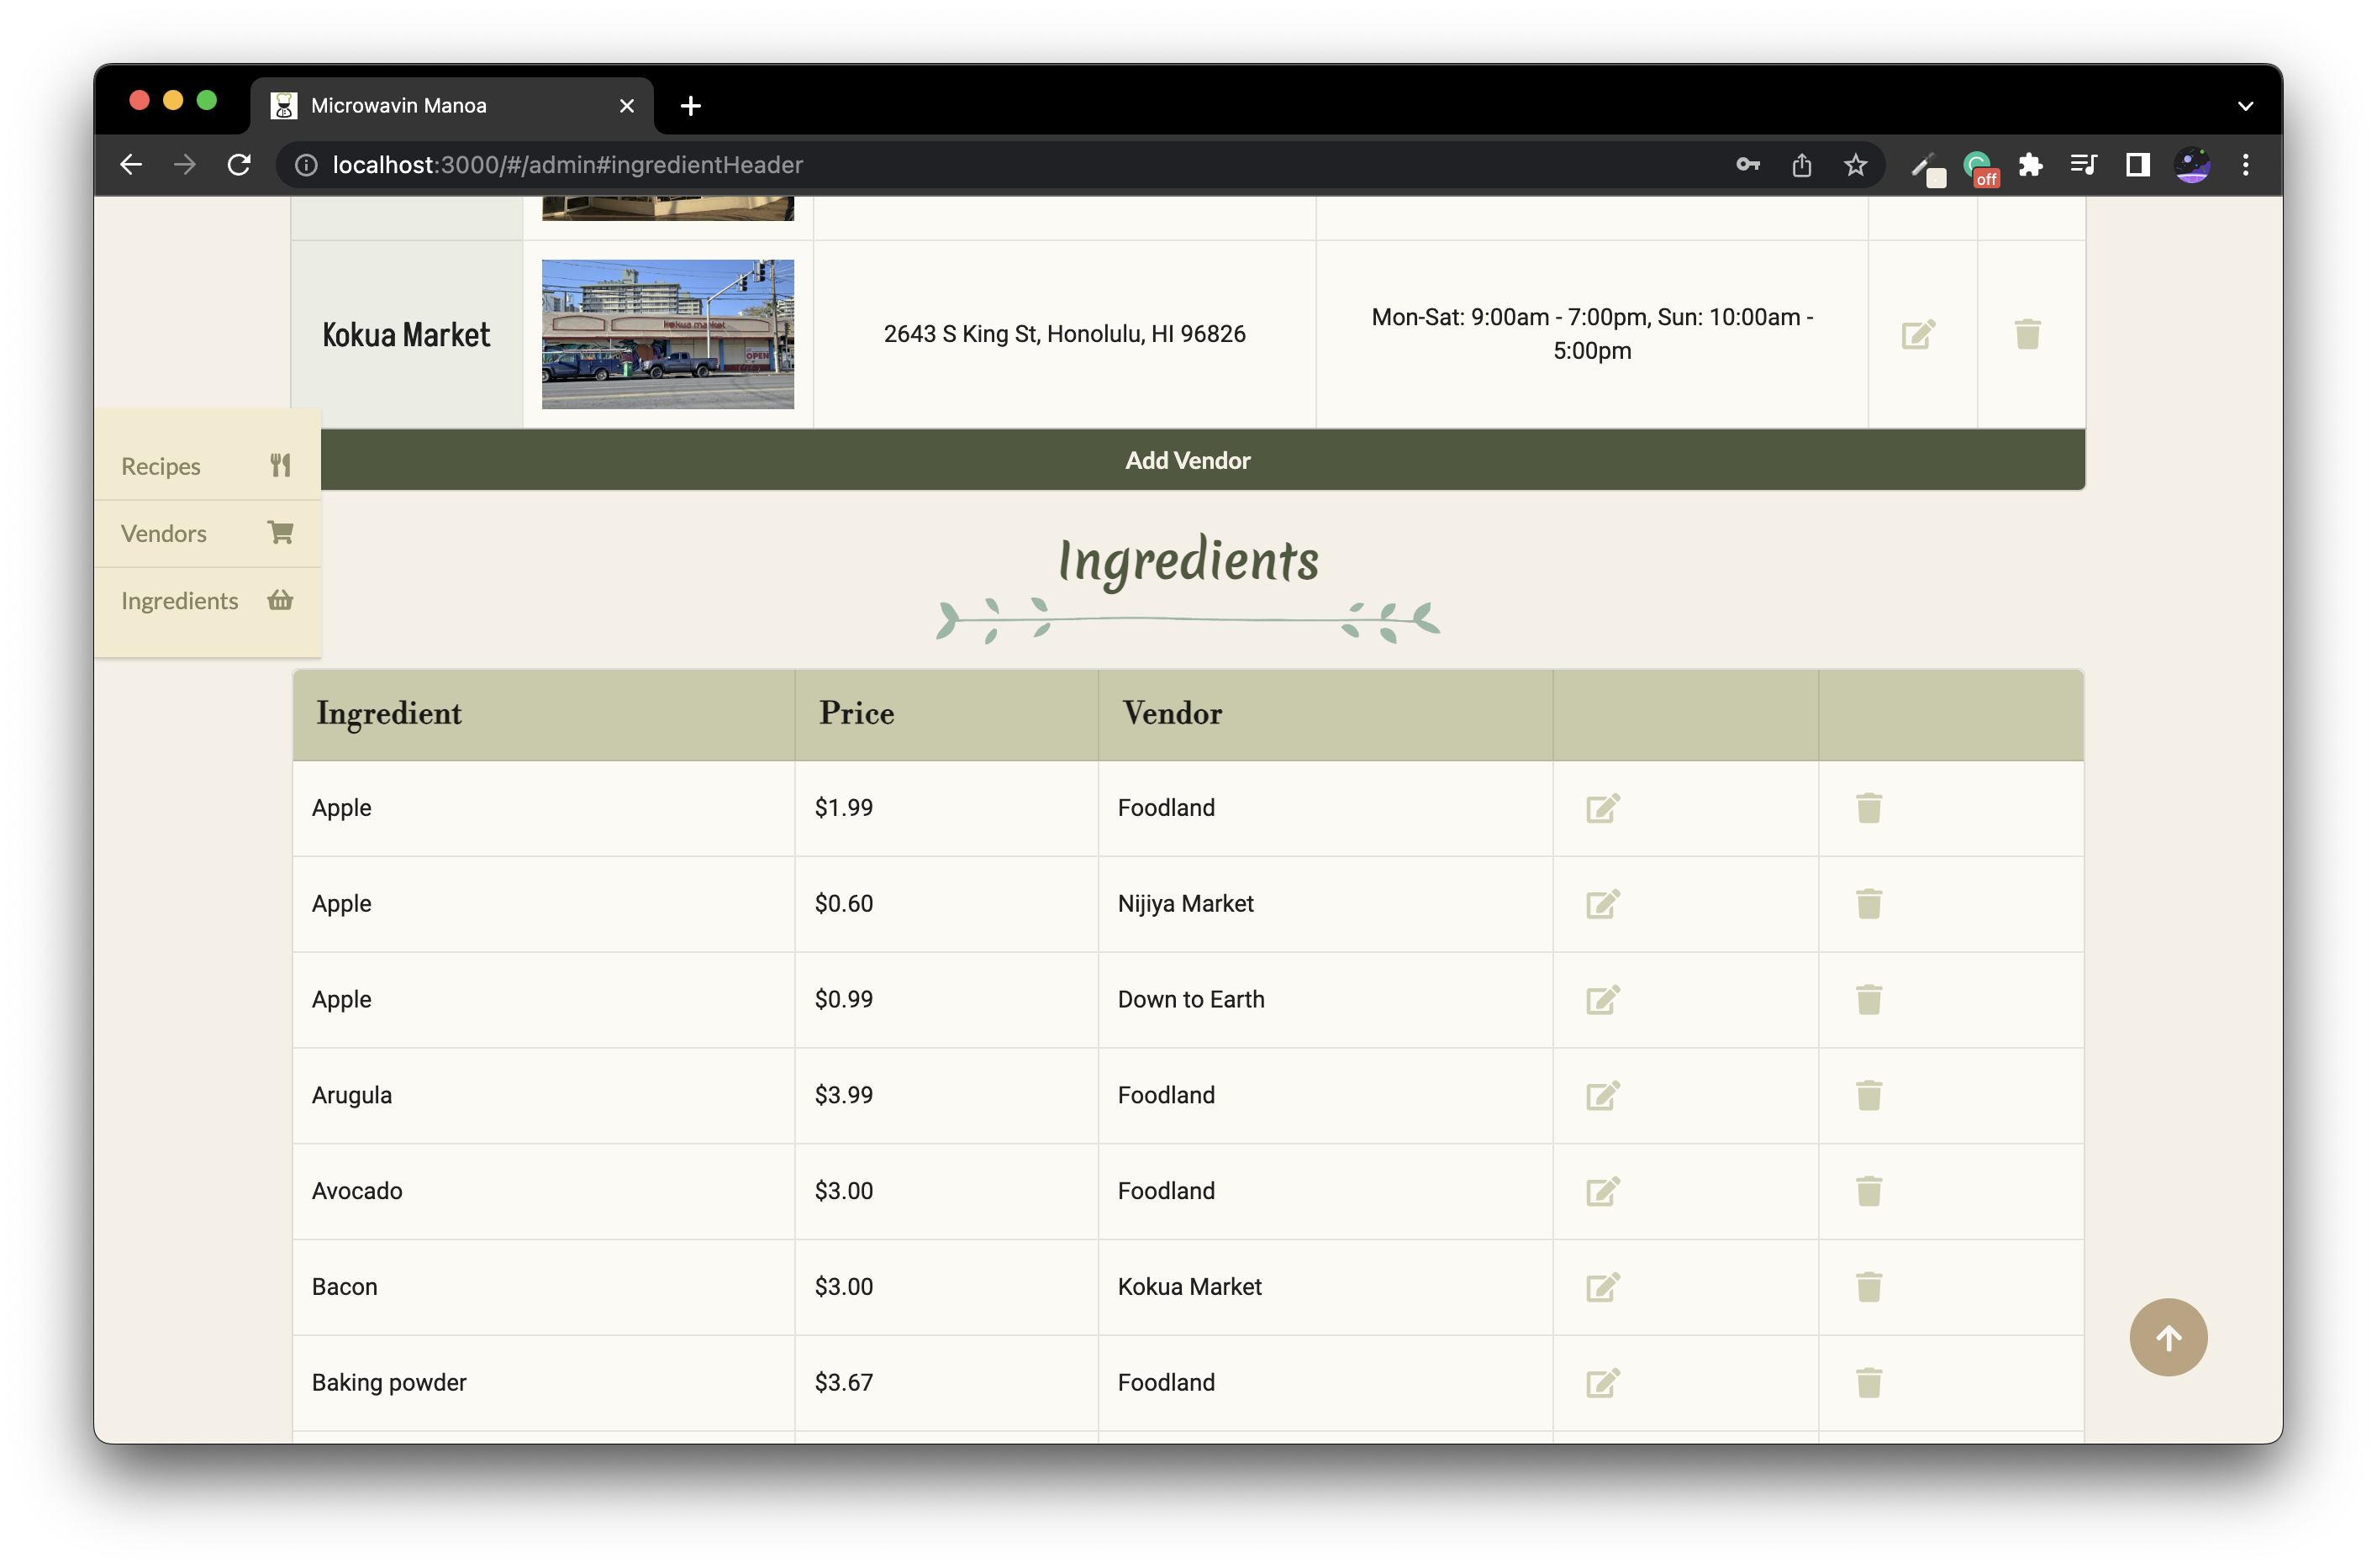
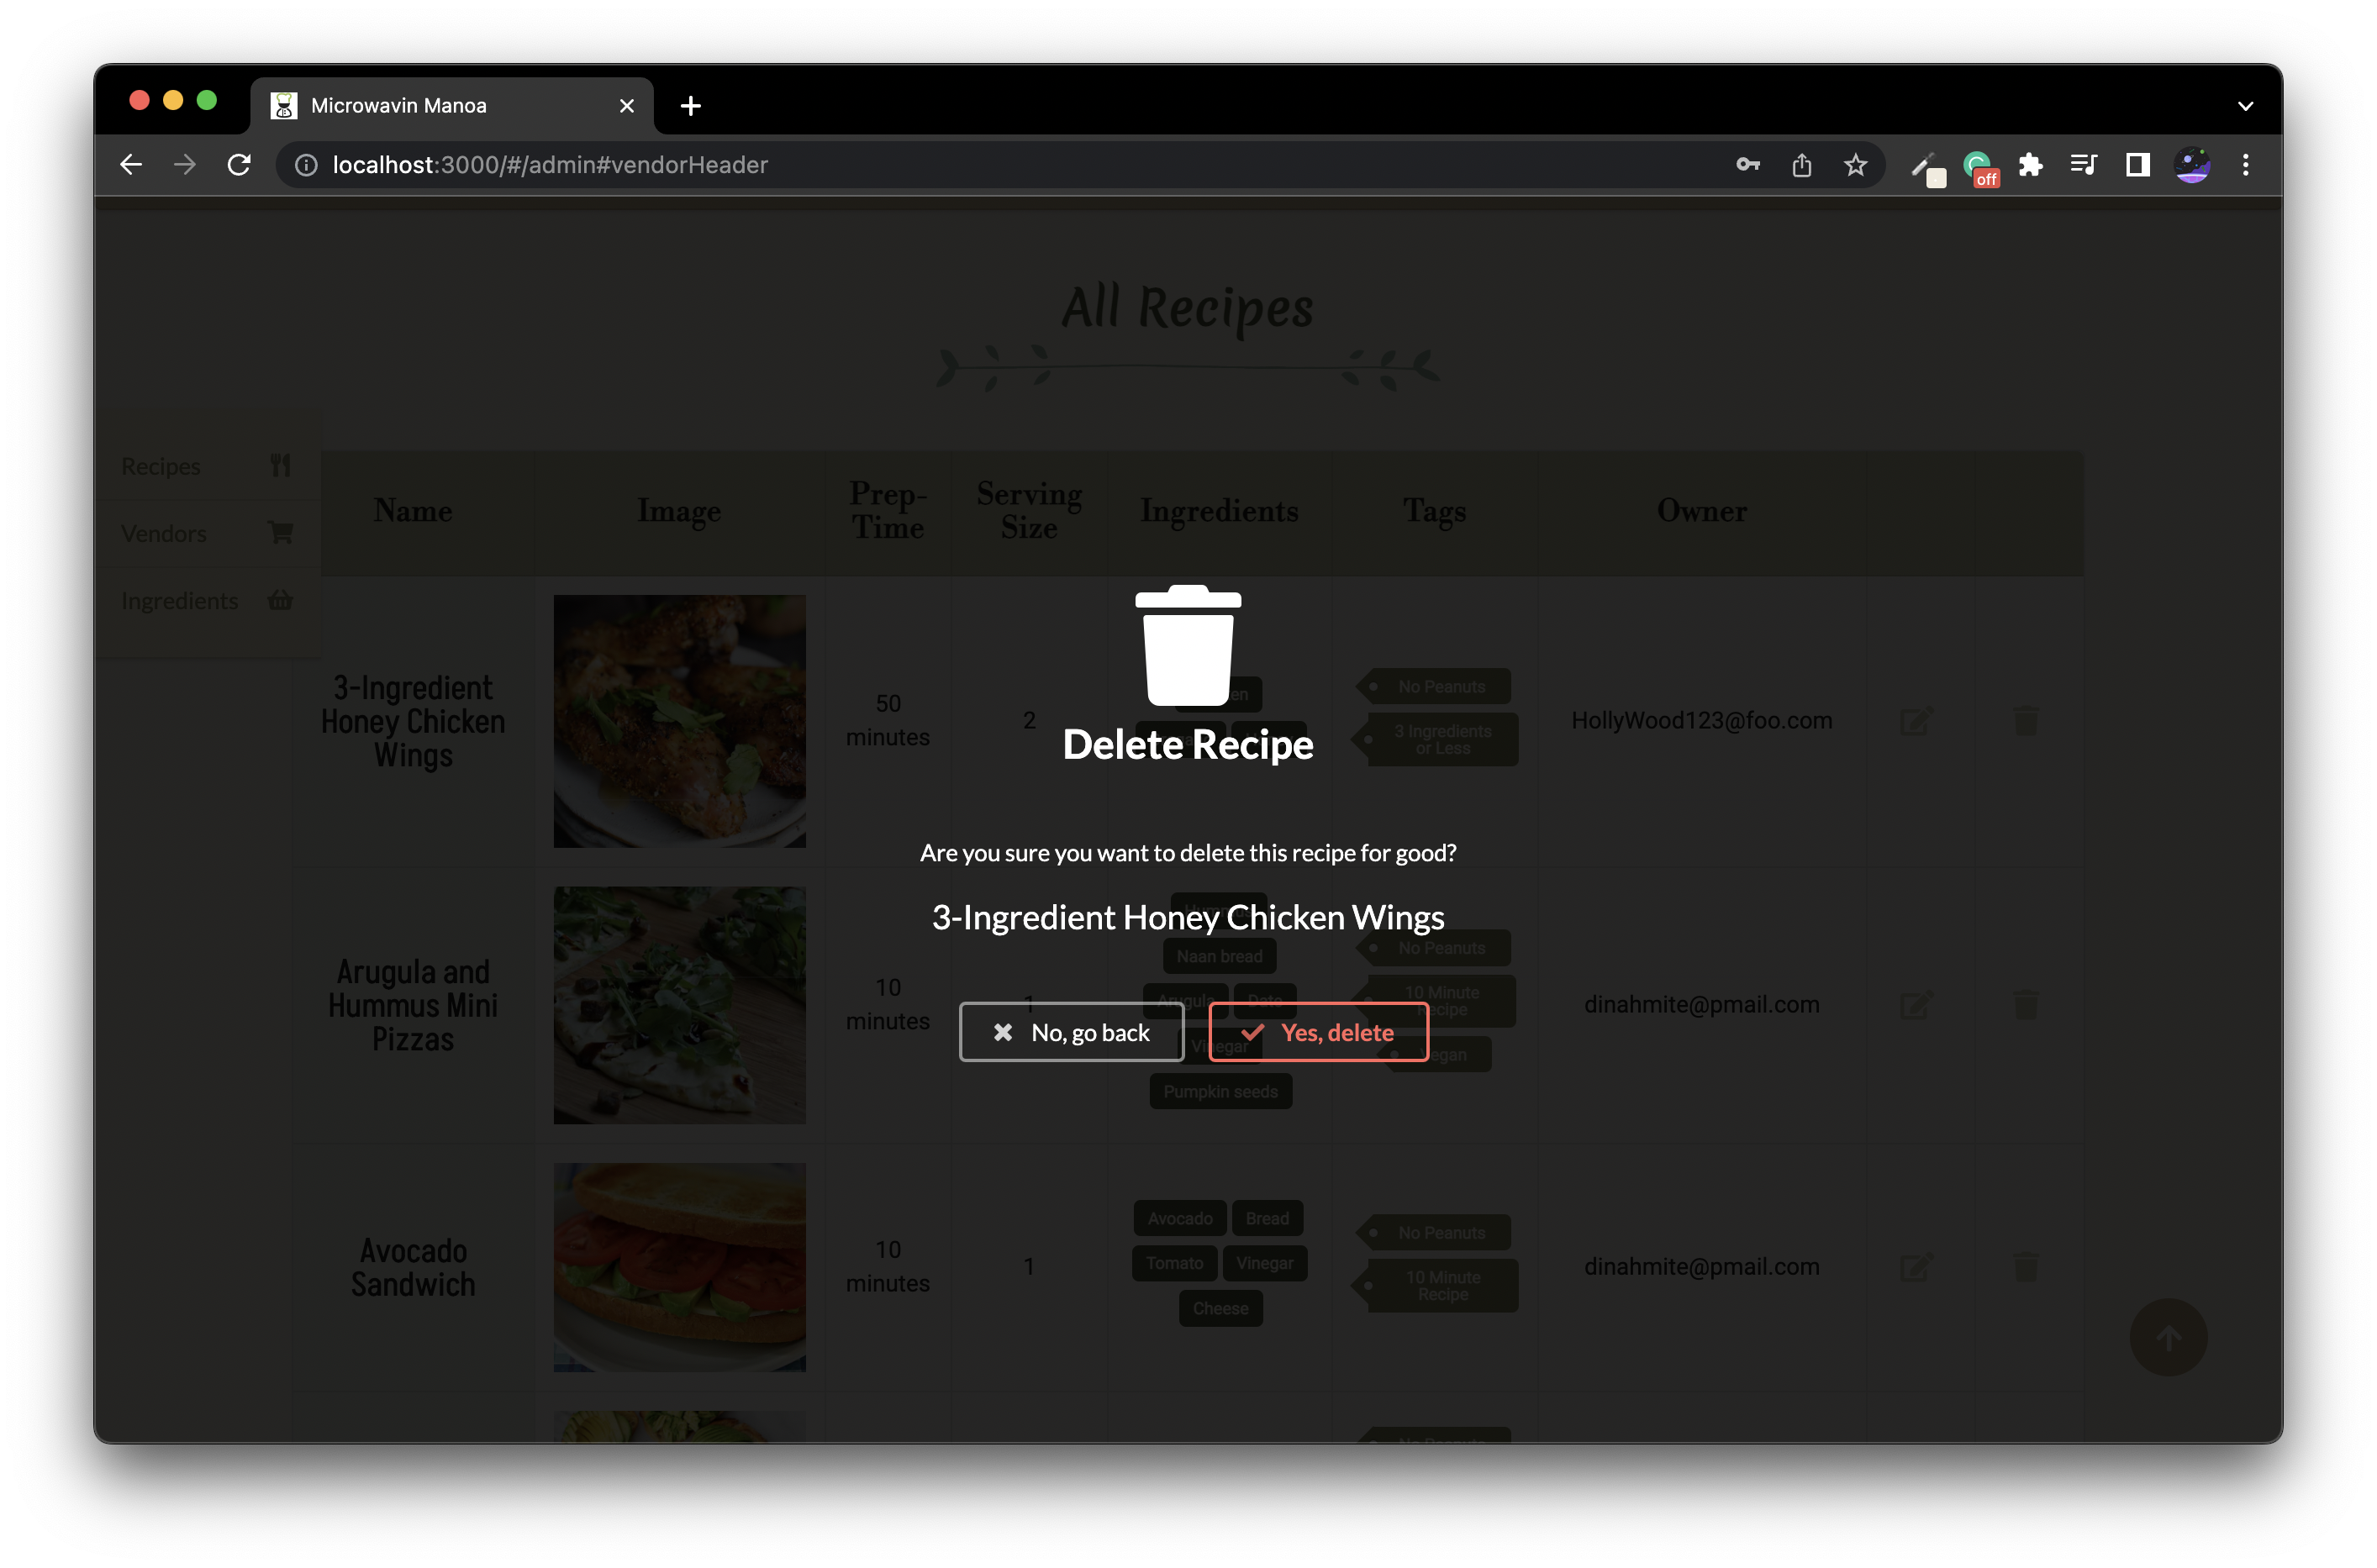
On this page, Admins can see all recipes, vendors, and ingredients in the system. For easier navigation there is a tag on the side to navigate between the three. Here, recipes, vendors and ingredients can be edited and deleted.
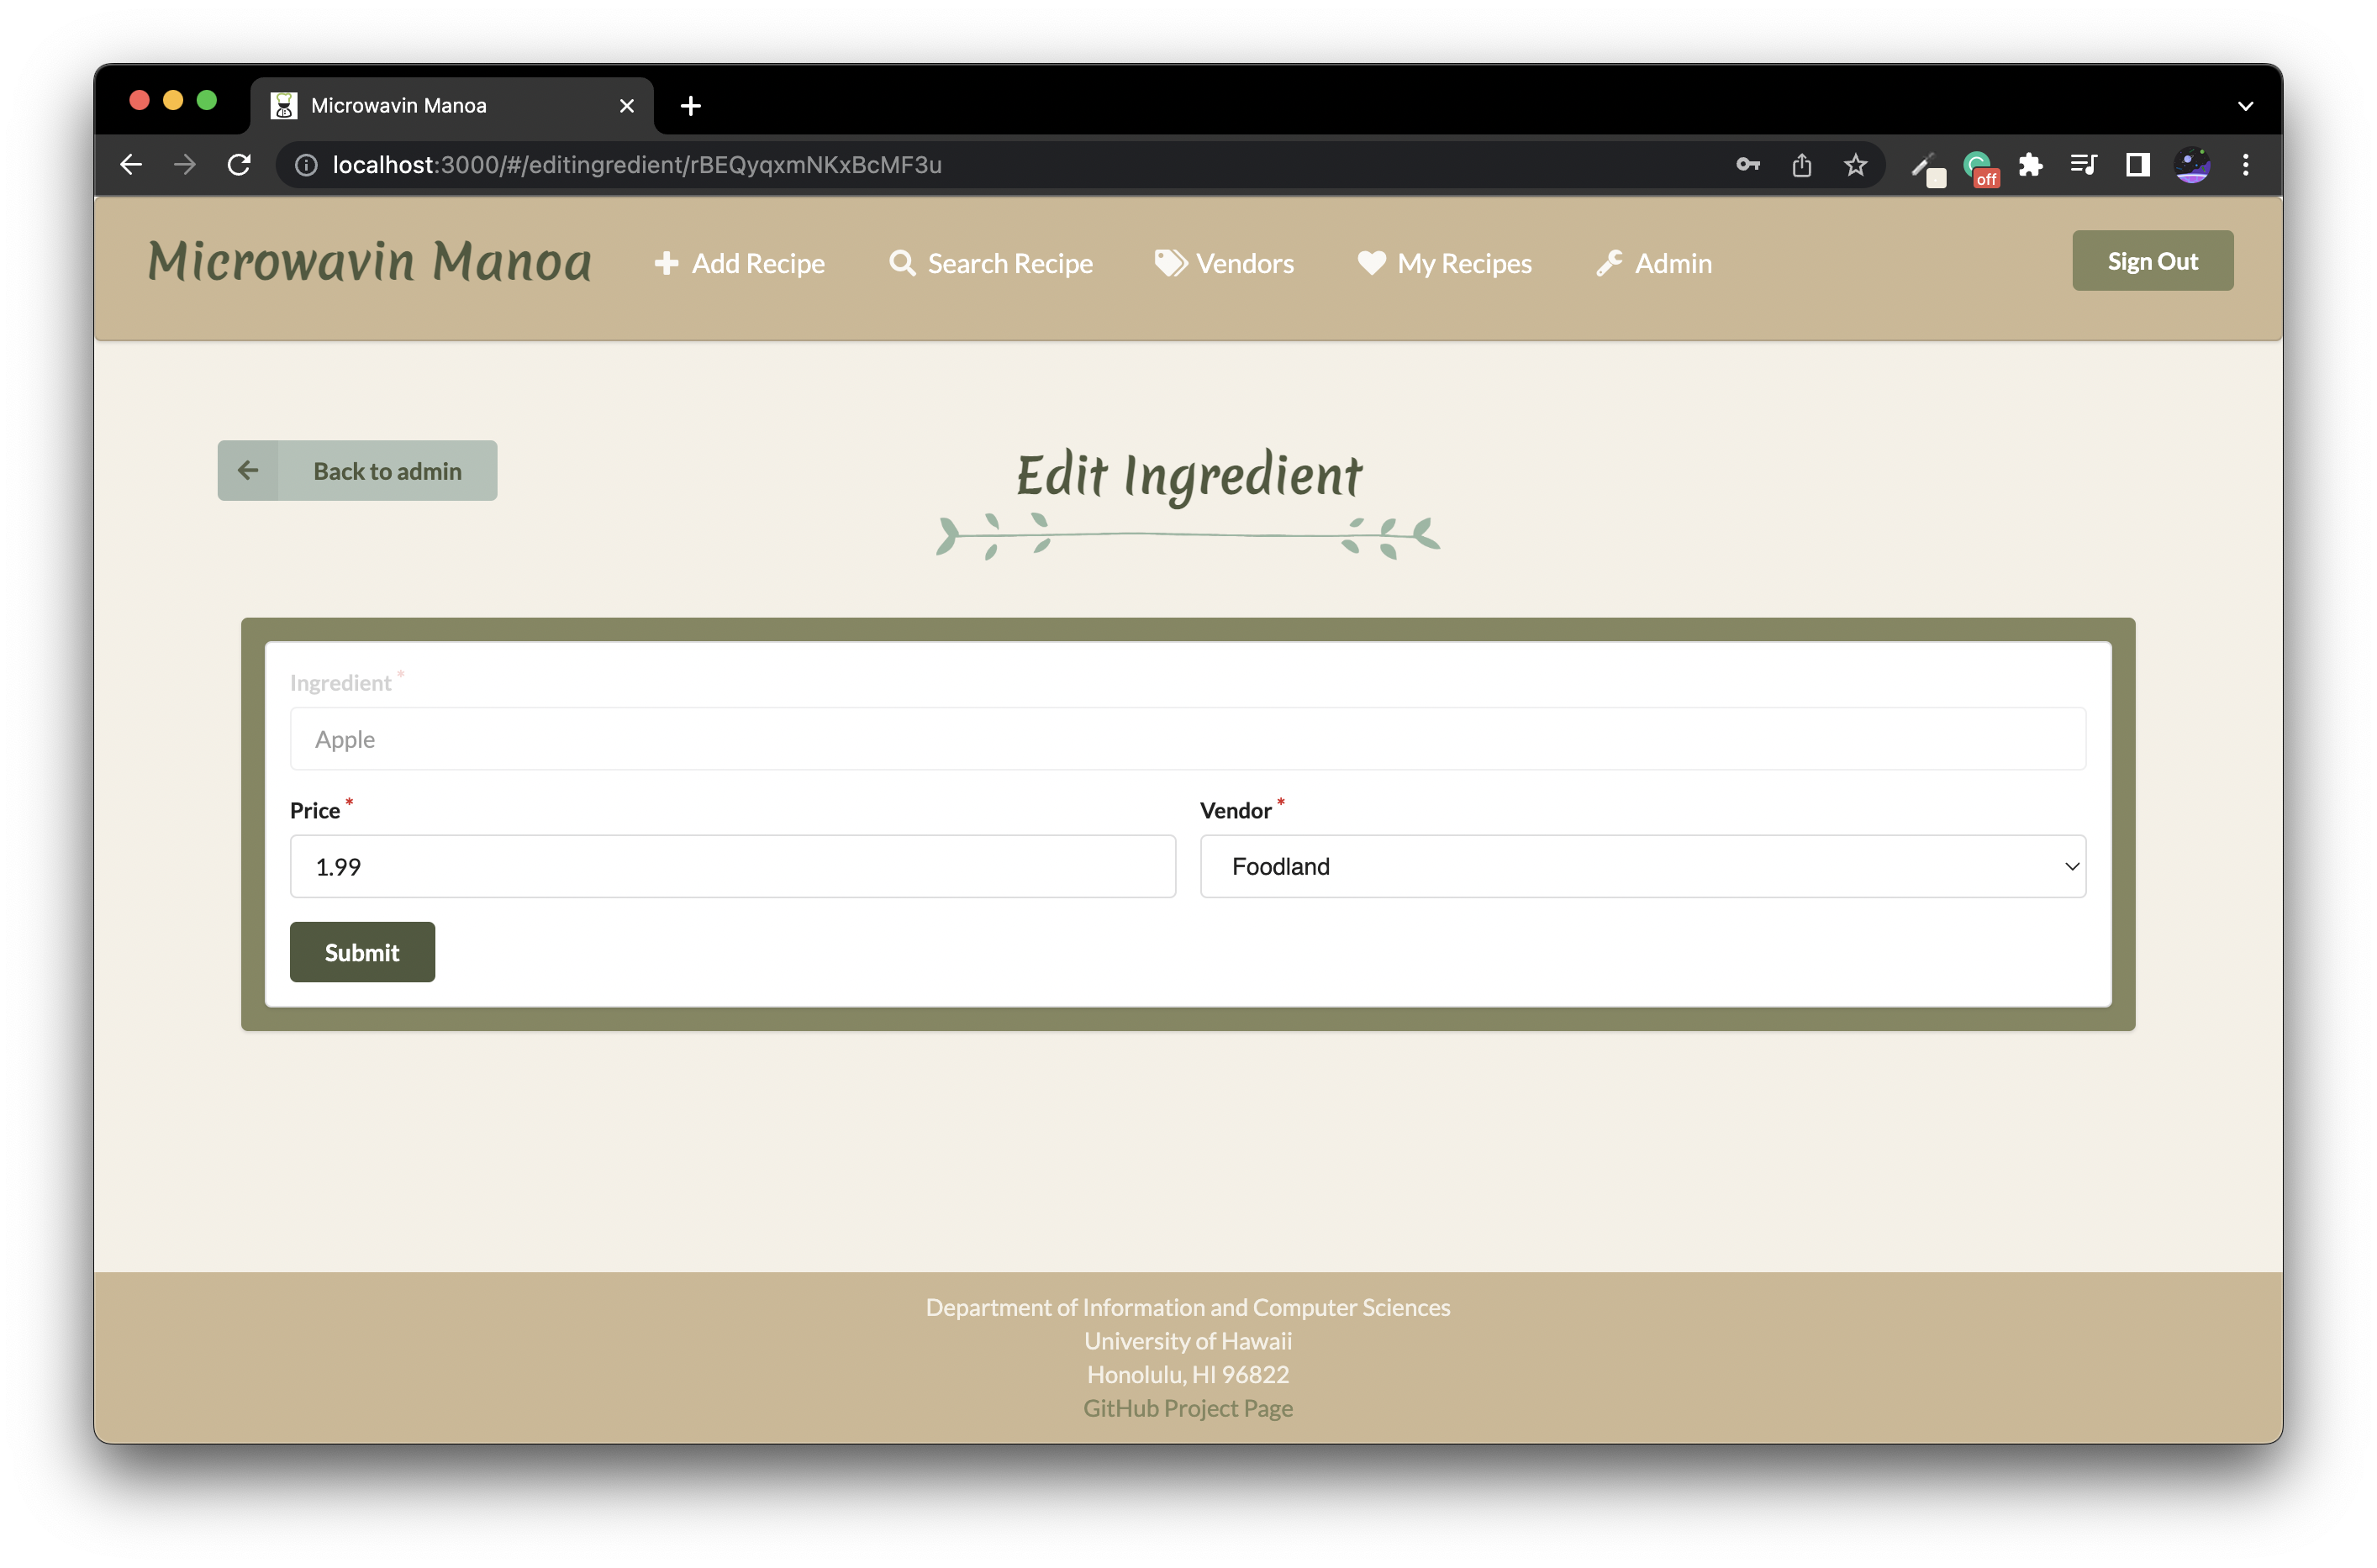
Edit Ingredient Page
Admins can edit the price and location of existing ingredients.
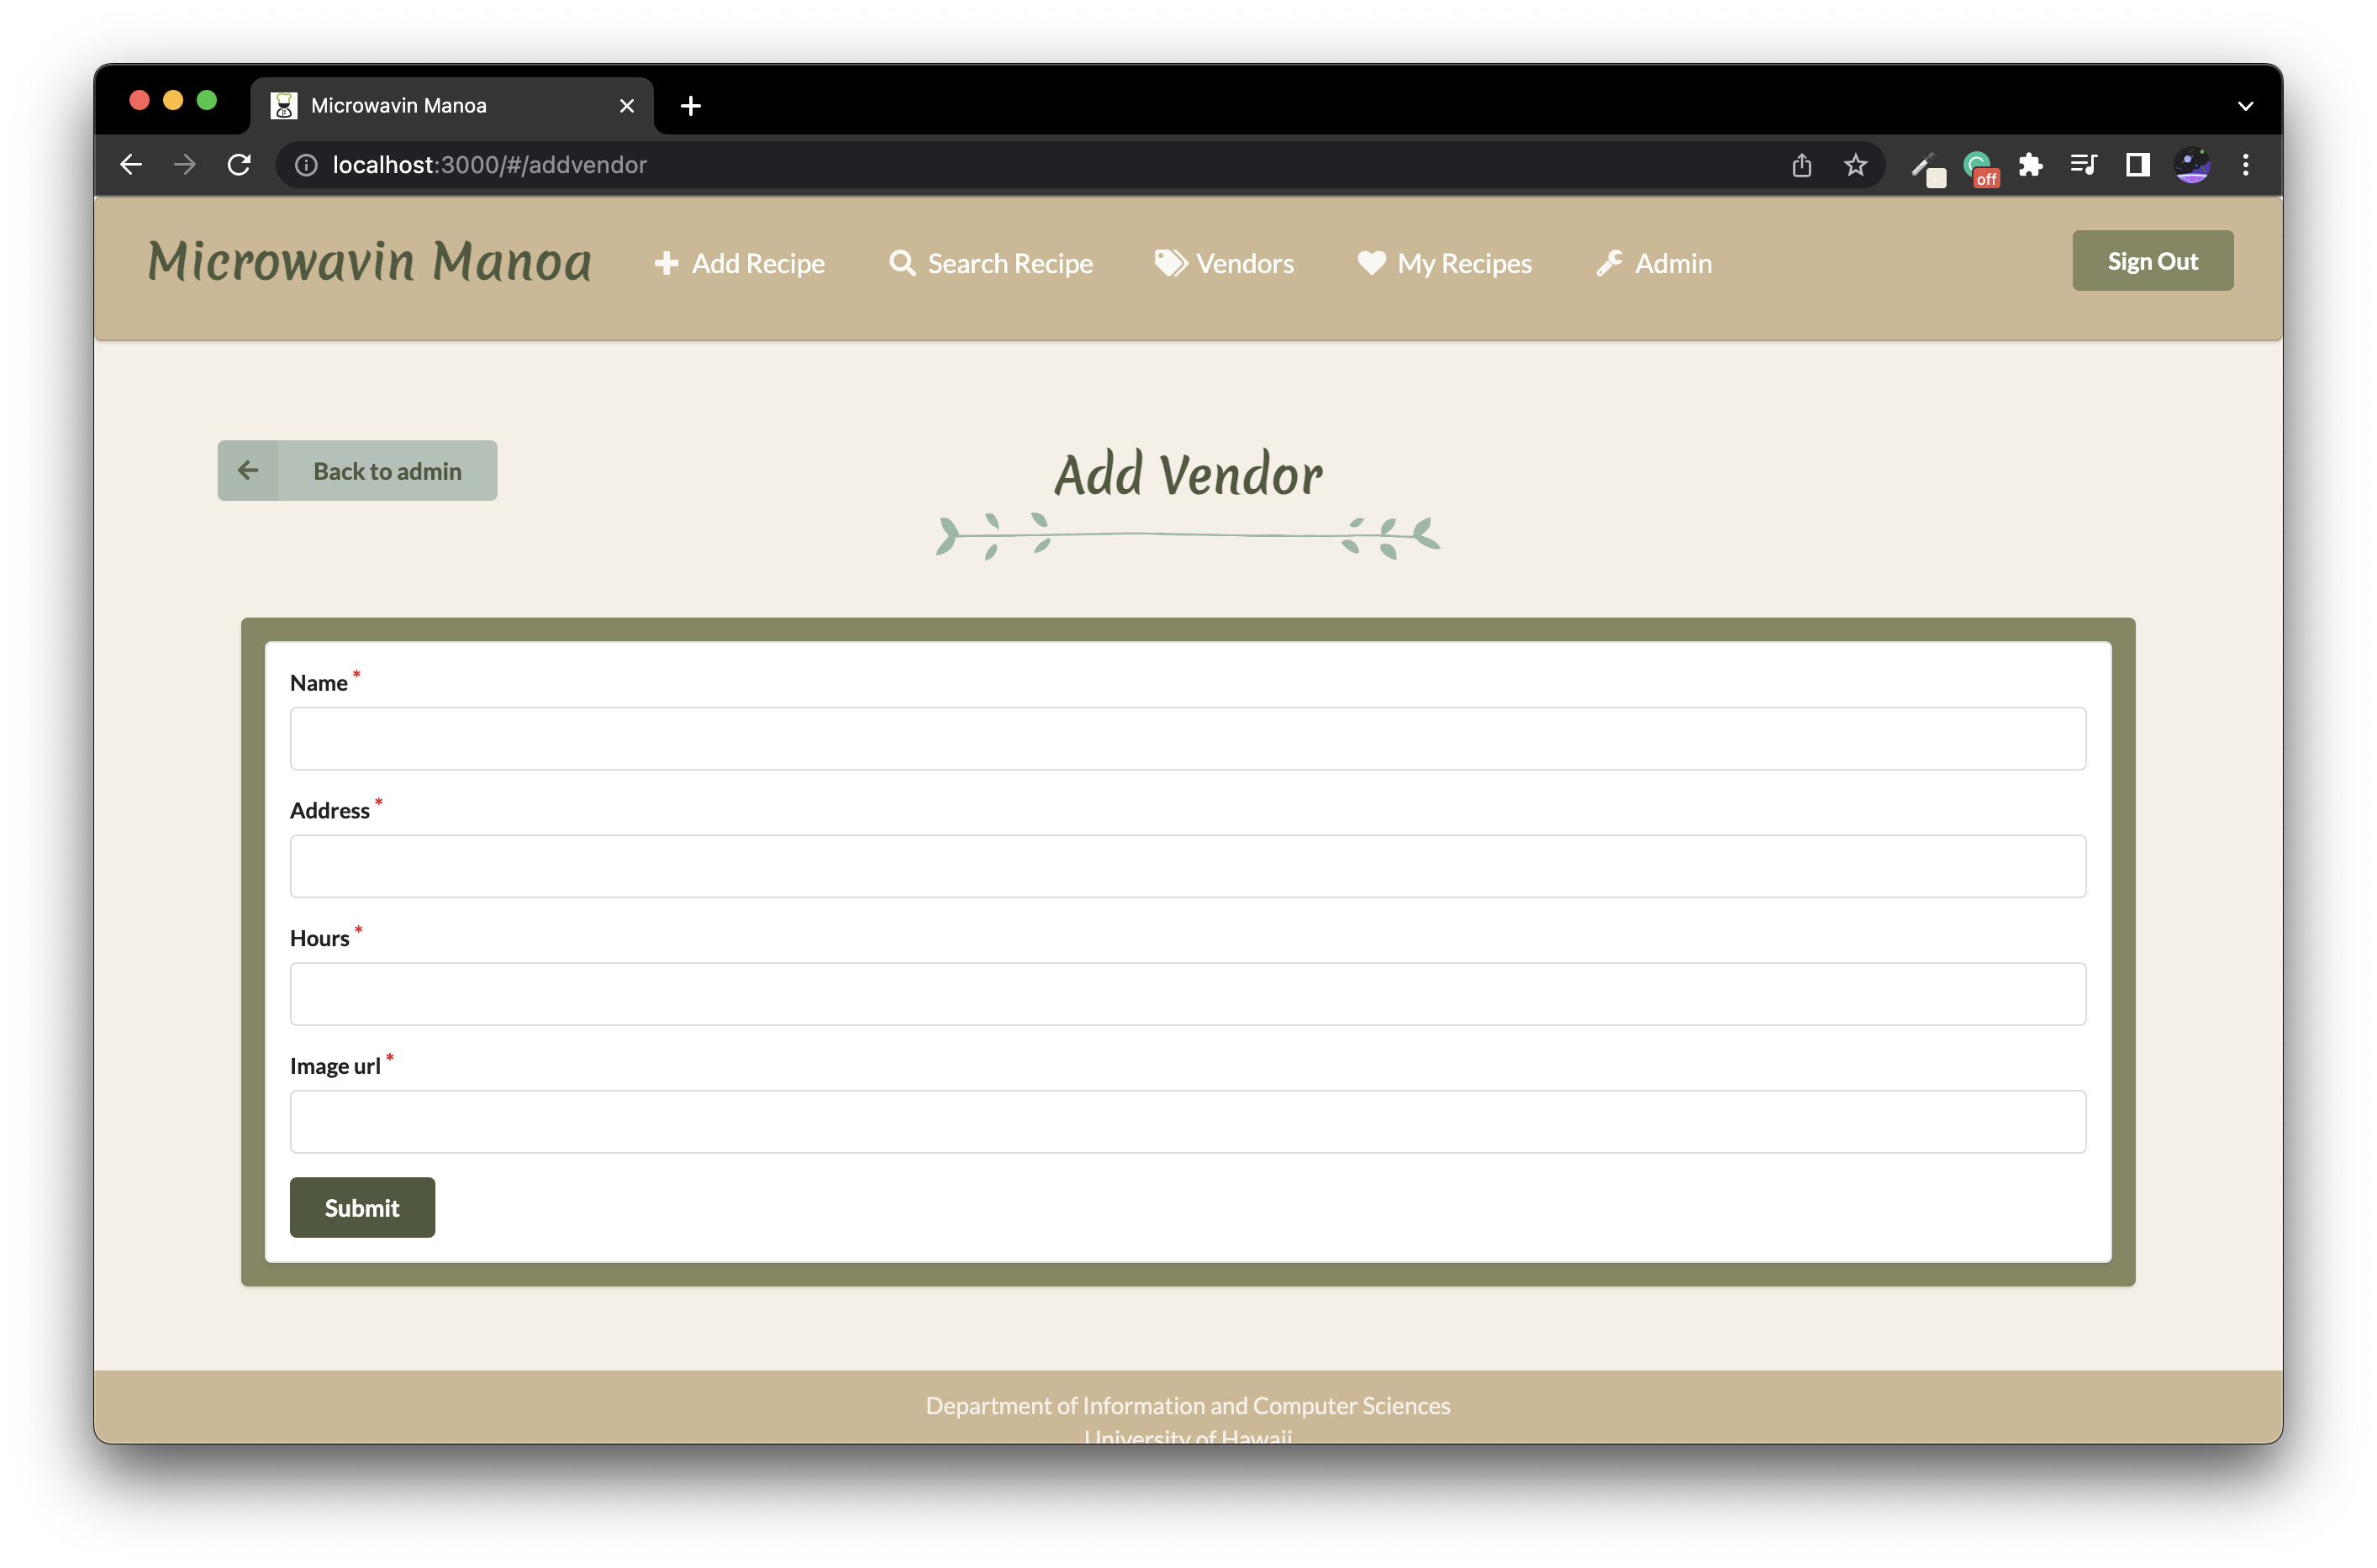
Add Vendor Page
Admins can add new vendors into the system with a name, address, image, and hours.
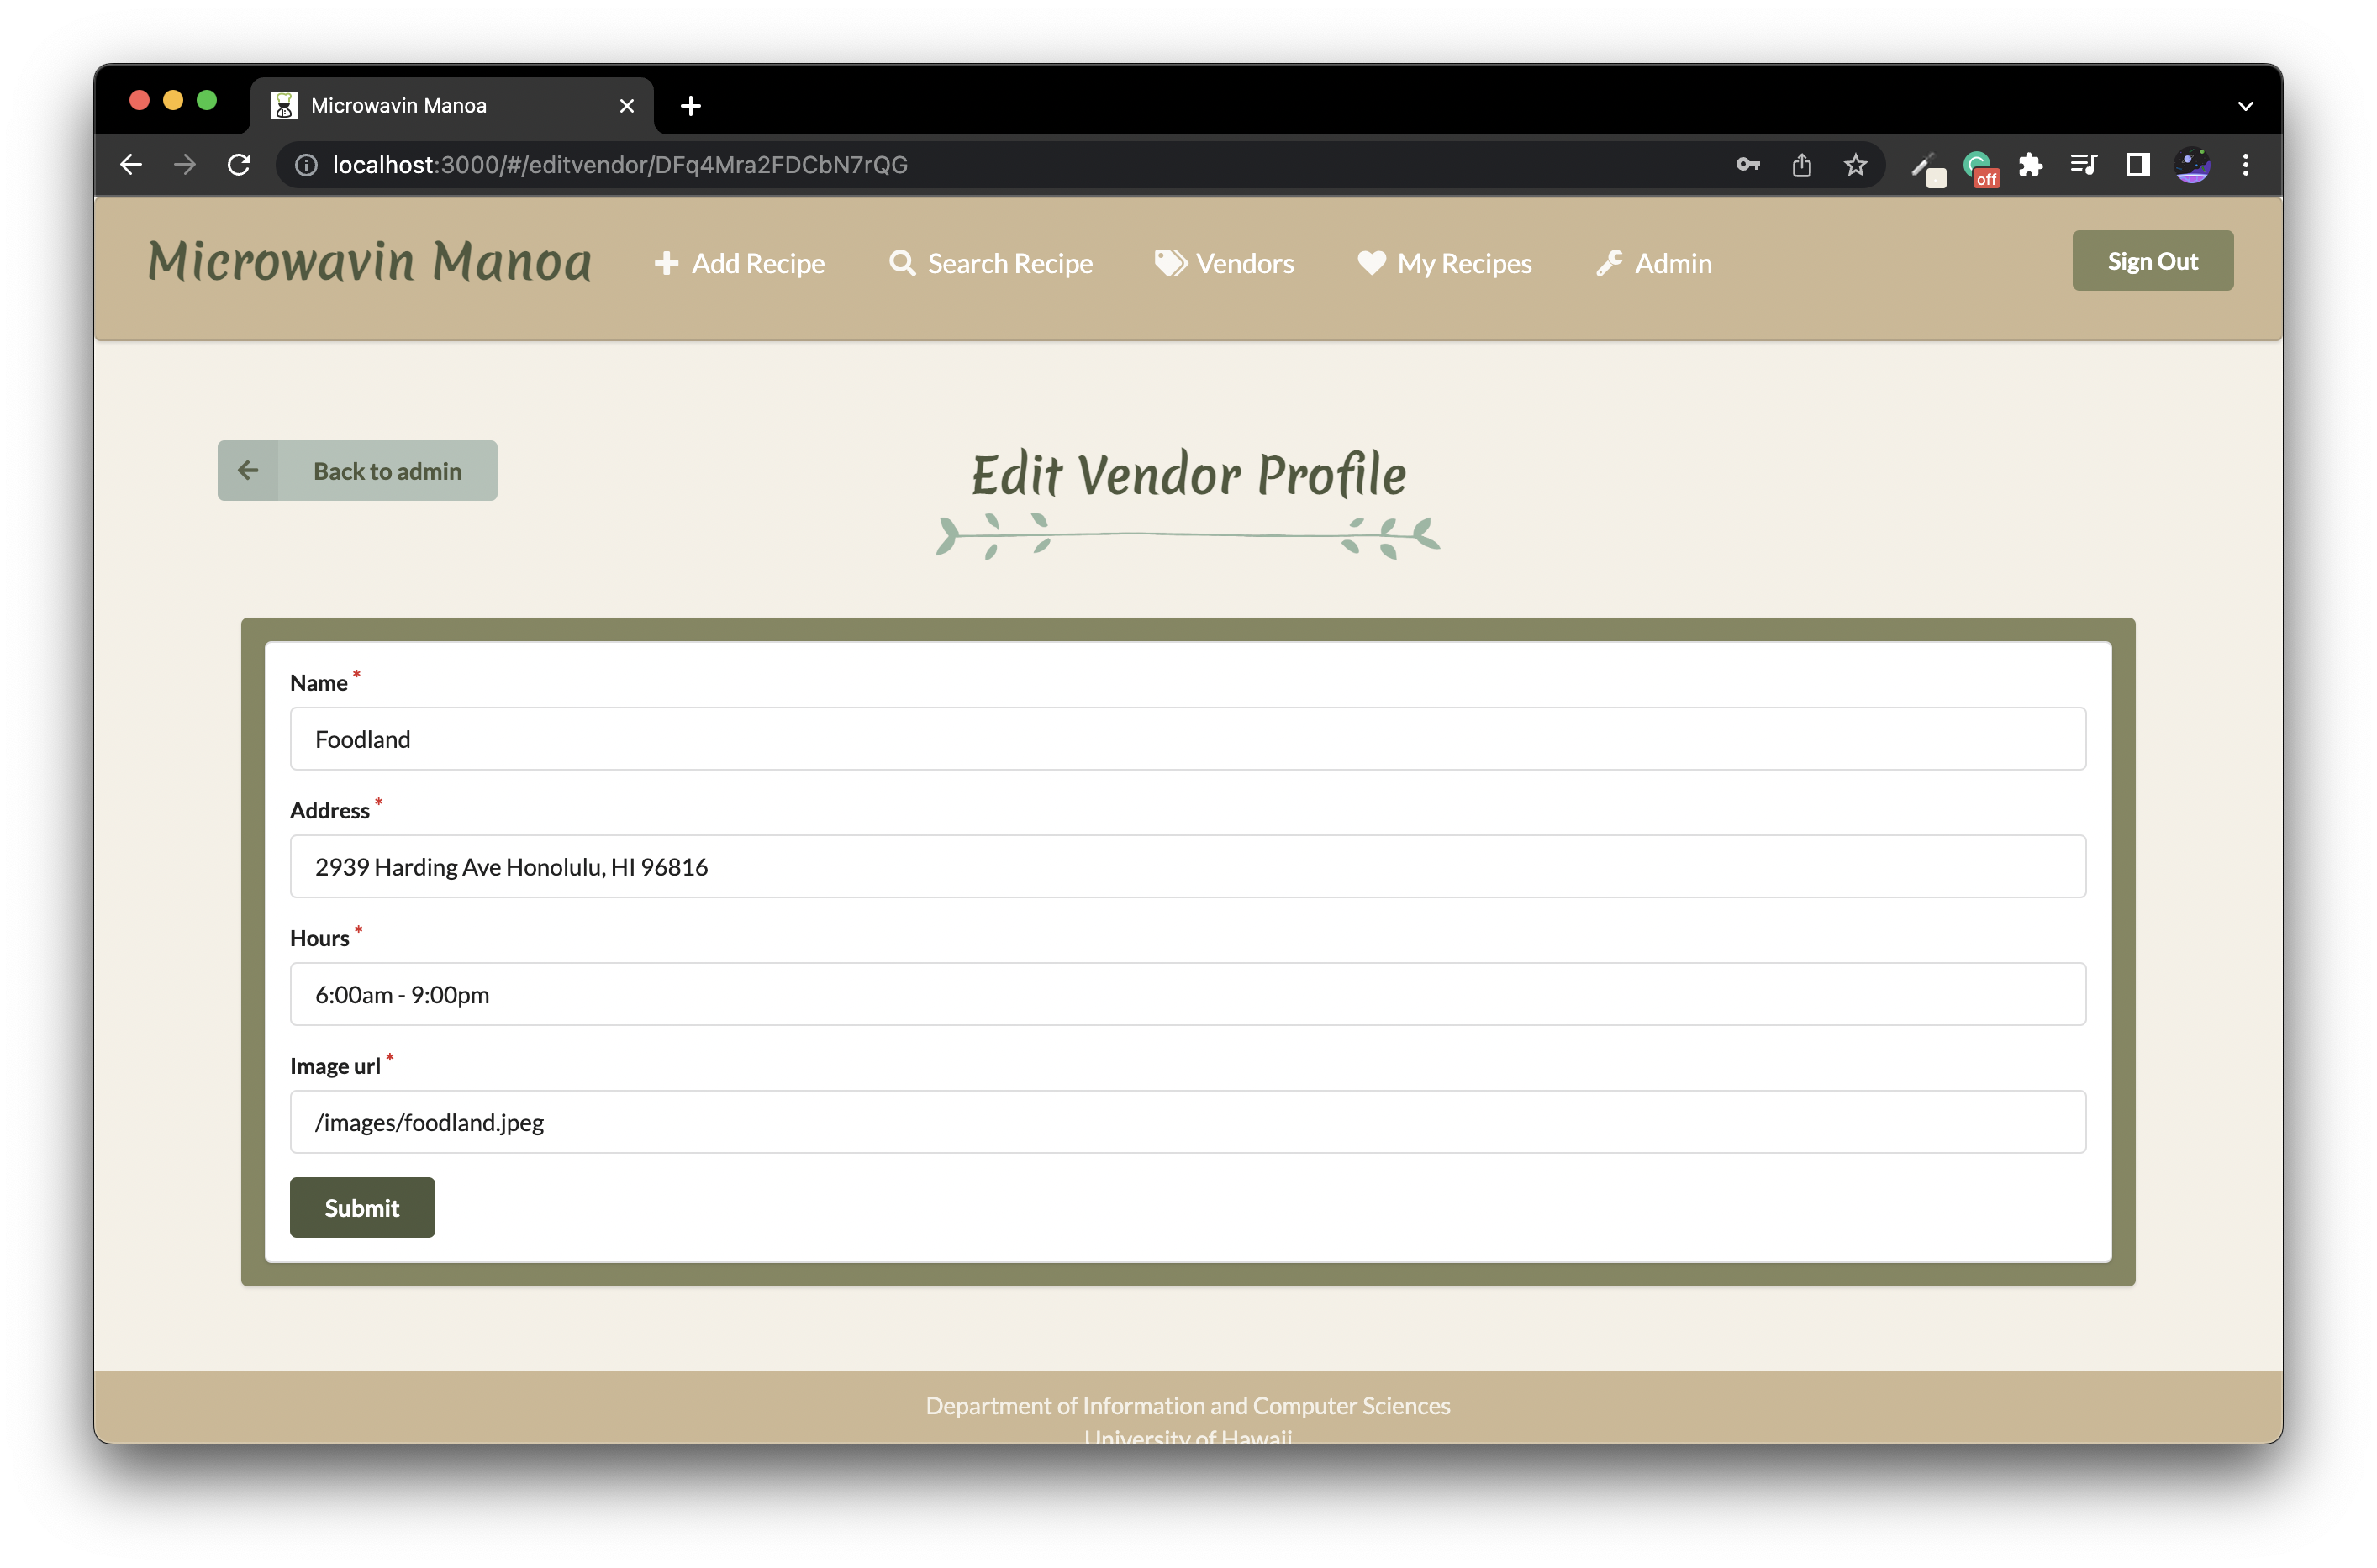
Edit Vendor Page
Admins can edit existing vendors.
Community Feedback
We kindly received feedback on the application from 5 UH community members. Here are the results of our findings!
- Users mixed up sign-in and sign-out buttons which used to be icons, so we changed them to words instead
- Users had confusion with the filter form, so we tried to make it more specific and better change the button layout
- Some confusion with the “Display all” button, which we changed to say “Clear filters”
- User said links on the navbar were hard to see, so we changed the font color to plain white
- One user had a problem with one of the fonts which he felt was too contrasting, which we changed in certain places
-
Users didn’t know they could type in search recipes so we specified that
- “Impressed by the amount of recipes!”
- “The chicken wrap is expensive!”
- “I like the colors and aesthetic of the site. The site looks very clean”
- “I wish you could click on tags or ingredients [in the recipe page] and have it take you to all recipes with that tag or ingredient”
- “If I was dorming it would be a good resource to eat healthier, but since I’m not dorming, I personally wouldn’t use it much but those on-campus will find great use.”
- “Good variety of recipes and good ways to filter them”
Developer Guide
Installation
First, install Meteor.
Second, download a copy of Microwavin Manoa.
Third, cd into the app directory and install the required libraries with:
$ meteor npm install
Additionally, you may need to run this command:
$ meteor npm install --save react-router-hash-link
Running the system
Once the libraries are installed, you can run the application by invoking:
$ meteor npm run start
Note regarding “bcrypt warning”:
You might also get the following message when you run this application:
Note: you are using a pure-JavaScript implementation of bcrypt.
While this implementation will work correctly, it is known to be
approximately three times slower than the native implementation.
In order to use the native implementation instead, run

  meteor npm install --save bcrypt

in the root directory of your application.
On some operating systems (particularly Windows), installing bcrypt is much more difficult than implied by the above message. Bcrypt is only used in Meteor for password checking, so the performance implications are negligible until your site has very high traffic. You can safely ignore this warning without any problems during initial stages of development.
Viewing the running app
If all goes well, the template application will appear at http://localhost:3000. You can login using the credentials in settings.development.json, or else register a new account.
ESLint
Lastly, you can run ESLint over the code in the imports/ directory with:
meteor npm run lint
Development History
GitHub Organization of Microwavin-Manoa containing all its repositories.
The development process for Microwavin Manoa conformed to Issue Driven Project Management practices. In a nutshell:
- Development consists of a sequence of Milestones.
- Each Milestone is specified as a set of tasks.
- Each task is described using a GitHub Issue, and is assigned to a single developer to complete.
- Tasks should typically consist of work that can be completed in 2-4 days.
- The work for each task is accomplished with a git branch named “issue-XX”, where XX is replaced by the issue number.
- When a task is complete, its corresponding issue is closed and its corresponding git branch is merged into master.
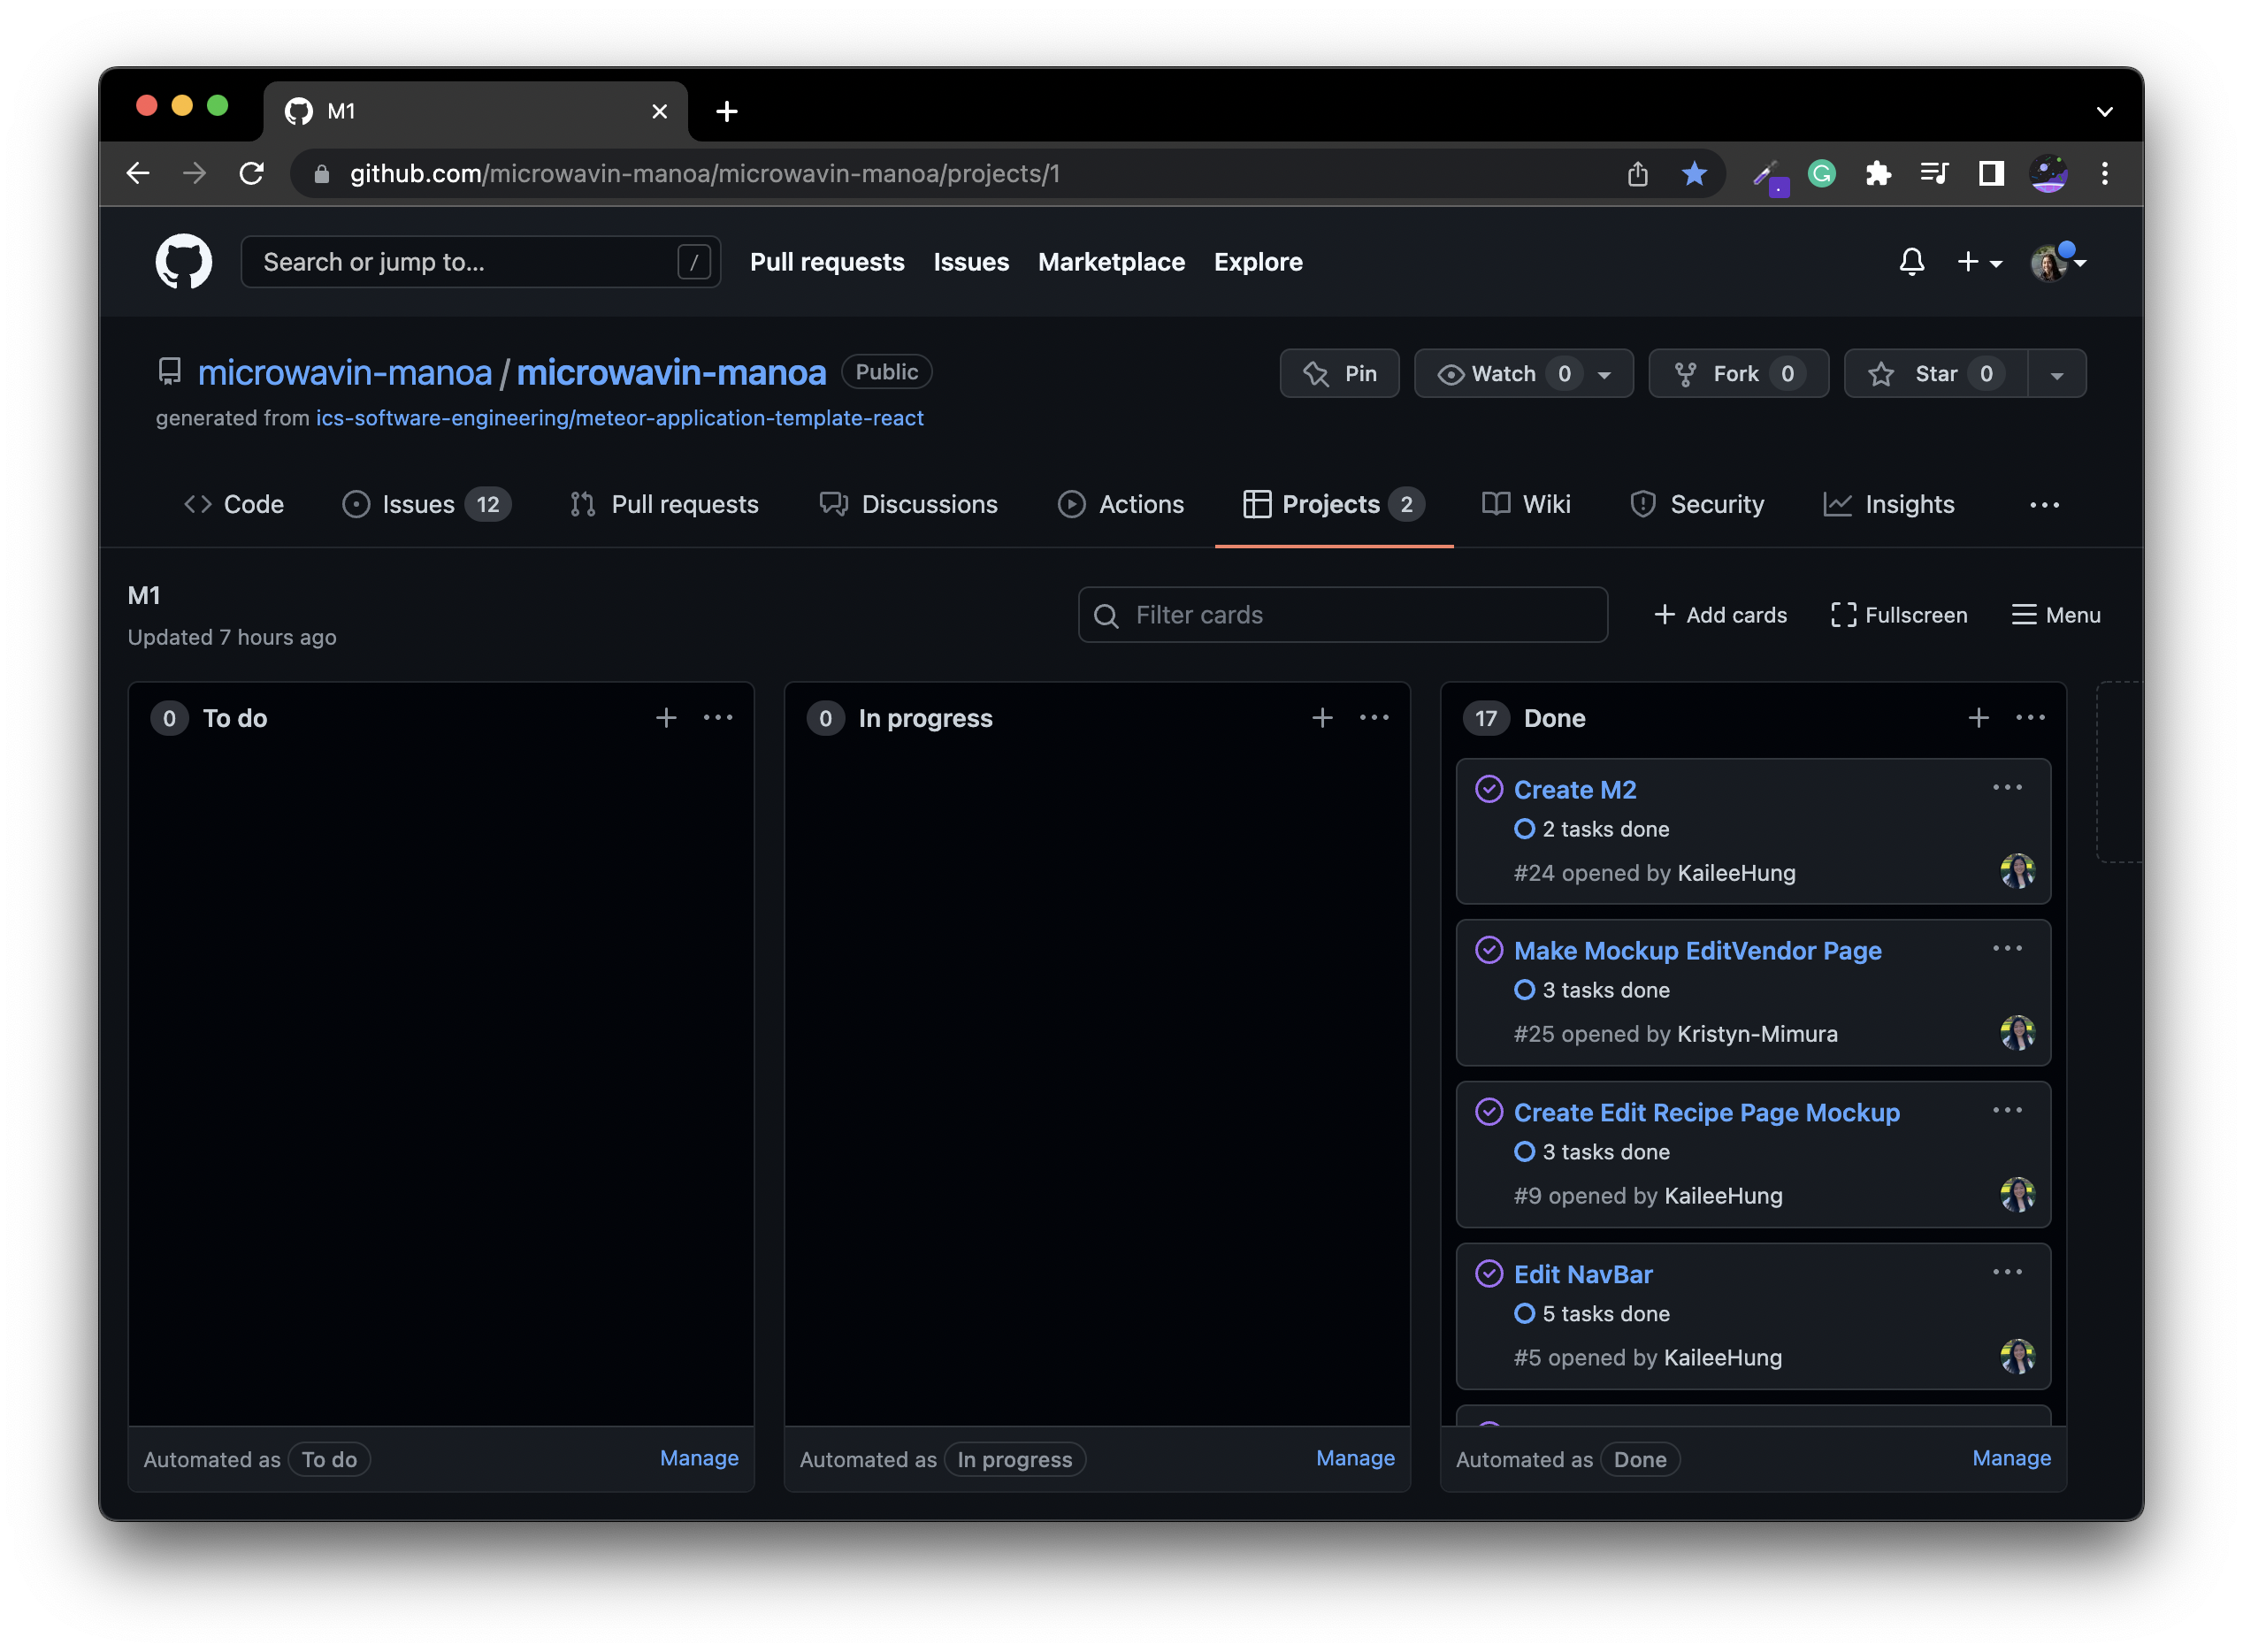
- The state (todo, in progress, complete) of each task for a milestone is managed using a GitHub Project Board.
The following sections document the development history of Microwavin Manoa.
Milestone 1
The goal of Milestone 1 to form an idea how the site would be set up along with developing very basic mockups for the pages and starting work on the different Mongo collections.
Milestone 1 was managed using Microwavin Manoa GitHub Project Board M1:
Milestone 2
The goal of Milestone 2 was adding more functionality to the site by making various calls to the Mongo database. Another goal improve the overall UI design of the site.
Milestone 2 was managed using Microwavin Manoa GitHub Project Board M2:

Milestone 3
The goal of Milestone 3 was to continue improving functionality to the site. A big part of this was adding 50 default recipes and 25 default users into the system. We were also continuously implementing some quality of life and UI changes.
Milestone 3 is currently being using Microwavin Manoa GitHub Project Board M3
